Keeping your dehumidifier stored properly before winter hits matters more than most homeowners realize. A unit that’s been through a long humid summer doesn’t deserve to sit neglected over the cold months. Moisture left inside tanks, filters clogged with dust, and plastic housings exposed to freezing temperatures can turn a reliable appliance into an expensive paperweight by spring.
The good news? You don’t need special tools or professional help to get it right. A few straightforward steps will protect your investment and ensure your dehumidifier kicks back into action when you need it most.
This guide walks you through everything from cleaning the unit to choosing the best storage spot.

Image source: Pexels / Peter Vang (Pexels License)
Why Winter Storage Matters
Dehumidifiers pull moisture out of the air, but they also trap that moisture inside their own tanks and internal components. When you leave water sitting in those compartments over winter, two problems emerge quickly. First, standing water breeds mold and mildew.
Those spores linger inside the machine and blow out across your home next season whenever you flip the switch. Second, cold temperatures can damage the internal plumbing and compressor if any residual water remains. Even a small amount freezes, expands, and cracks pipes or seals.
Think of it this way: your dehumidifier does heavy lifting during summer and early fall. It runs for hours, sometimes days, pulling pounds of moisture from your space. That continuous operation accumulates dust, lint, and debris, not just in the tank but deep inside the coils and filters.
If you skip the proper shutdown routine, you’re essentially sealing all that gunk inside the unit for six months. Then you wonder why it smells musty or why airflow has dropped.
Storing the unit correctly is straightforward maintenance that pays off immediately. You extend the lifespan of the compressor. You prevent odors from developing.
And most importantly, you avoid costly repairs or early replacement. The EPA recommends regular appliance maintenance as a key way to preserve indoor air quality year-round EPA Indoor Air Quality Resources, and that principle applies directly to dehumidifier care.
A well-stored dehumidifier will reward you with clean, dry air the moment you unbox it in spring. Neglect it, and you may be looking at a trip to the manufacturer’s service department or a new purchase altogether.
When to Start Preparing for Storage
Timing your winter storage properly makes the whole process smoother. Don’t wait until the first hard freeze. Start preparing your dehumidifier once you’ve had your last full day of use.
In most climates, that means late September or early October, well before temperatures consistently drop below freezing.
Give yourself at least two weeks between finishing summer use and committing the unit to storage. This window lets you test the cleaning steps, verify the unit powers down cleanly, and address any issues while you still have access to parts or replacement filters. If something breaks during the shutdown process, you want time to fix it before the unit gets boxed away.
Watch your local forecast and keep an eye on nighttime low temperatures. Once lows stay consistently above 40°F (4°C) but humidity levels start dropping naturally, that’s your cue. You’re not trying to catch a cold snap.
You’re trying to beat it. Premature storage works against you too, storing in July means you’ve lost a full month of utility without getting much return.
If you live in a milder climate where you run your dehumidifier through early November, that’s fine. Just make sure you clean and dry the unit thoroughly after your final use, regardless of how many months you plan to store it. The clock starts ticking on mold growth the moment stale water sits undisturbed inside the tank.
Step-by-Step Guide to Storing Your Dehumidifier
Getting the basics right matters far more than any fancy technique. Follow these steps in order, and your dehumidifier will sleep soundly through winter.
Step 1: Unplug the unit. Always disconnect power before handling anything. Wait at least thirty minutes for the compressor to settle and any residual charge to dissipate.
Step 2: Empty the water tank completely. Remove the bucket and dump every drop. Tip it upside down on a towel and let gravity do the work. Check for small puddles hiding near the drain port or in corners of the tank interior.
Step 3: Clean the tank with a mild solution. Mix warm water with a splash of white vinegar or a teaspoon of mild dish soap. Scrub the inside with a soft brush or sponge. Rinse thoroughly and let it air-dry completely.
Even a few leftover drops harbor bacteria.
Step 4: Remove and clean the air filter. Most dehumidifiers have a washable mesh filter at the back or side. Take it out gently. Vacuum loose dust first, then rinse under lukewarm water.
Shake off excess moisture and lay it flat to dry. Never reinstall a damp filter, that moisture becomes a breeding ground for mold inside the housing.
Step 5: Wipe down the exterior and coil area. Use a dry microfiber cloth to remove surface dust from the casing. For the condenser coils visible behind the filter slot, use a soft brush attachment on your vacuum or a can of compressed air. These coils collect the most grime over a season of operation, and clogged coils reduce efficiency and strain the compressor.
Step 6: Dry the interior chamber. Leave the front panel or filter cover open and prop the unit in a well-ventilated area for several hours. A fan pointed nearby speeds things up. The goal is zero internal moisture before anything gets wrapped or covered.
Step 7: Coil the power cord neatly. Don’t wrap it tightly around the body, that kinks the insulation. Loop it loosely and secure with a twist tie or Velcro strap. Store the cord separately if your model allows it.
Step 8: Cover the unit. Use a breathable fabric cover or a large trash bag with ventilation holes. Avoid airtight plastic sheets pressed directly against the casing, since trapped humidity accelerates corrosion on metal components.
Step 9: Label and note the date. Write the storage date on masking tape and stick it to the cover. Next spring, you’ll know exactly how long it sat and what condition you found it in.
Cleaning and Preparing the Unit Before Storage
Cleaning isn’t just about appearances. It’s the single most important factor in whether your dehumidifier starts up cleanly in March or arrives covered in a layer of mildew you can’t scrub away.
Start with the filter. Washable filters need only rinsing and thorough drying. Disposable foam filters should be replaced if they look packed with dust or show signs of wear.
Reusing a degraded filter forces the compressor to work harder and pushes particles deeper into the internal mechanism. Consumer Reports provides useful guidelines on maintaining home appliances to maximize performance and longevity.
The water tank deserves extra attention. Vinegar kills mold spores better than bleach for this application because it doesn’t leave harsh chemical residue that could later mix with collected moisture. A one-part vinegar to three-part water solution works perfectly.
Let it sit for ten minutes, then scrub and rinse.
Check the condensate overflow sensor if your model has one. These safety switches shut off the unit when the tank gets too full. Dust or mineral deposits can jam the sensor mechanism.
Gently wipe the sensing area with a cotton swab dipped in rubbing alcohol.
Inspect the drain hose connection if yours has a permanent drain setup. Disconnect the hose if removable, flush it with clean water, and check for clogs. Mineral buildup inside narrow tubing is common in areas with hard water and can completely block drainage paths.
Examine the housing for cracks or loose panels. Small damage that went unnoticed during the heating season can worsen during storage if the unit shifts or gets bumped. Address minor issues now rather than discovering them when you plug the dehumidifier back in.
Finally, consult your owner’s manual for any model-specific maintenance instructions. Different brands position filters, access panels, and drain ports differently. Some require removing the rear grille for coil access.
Others have a dedicated cleaning cycle built into the control board. Your manual tells you exactly what your model needs.
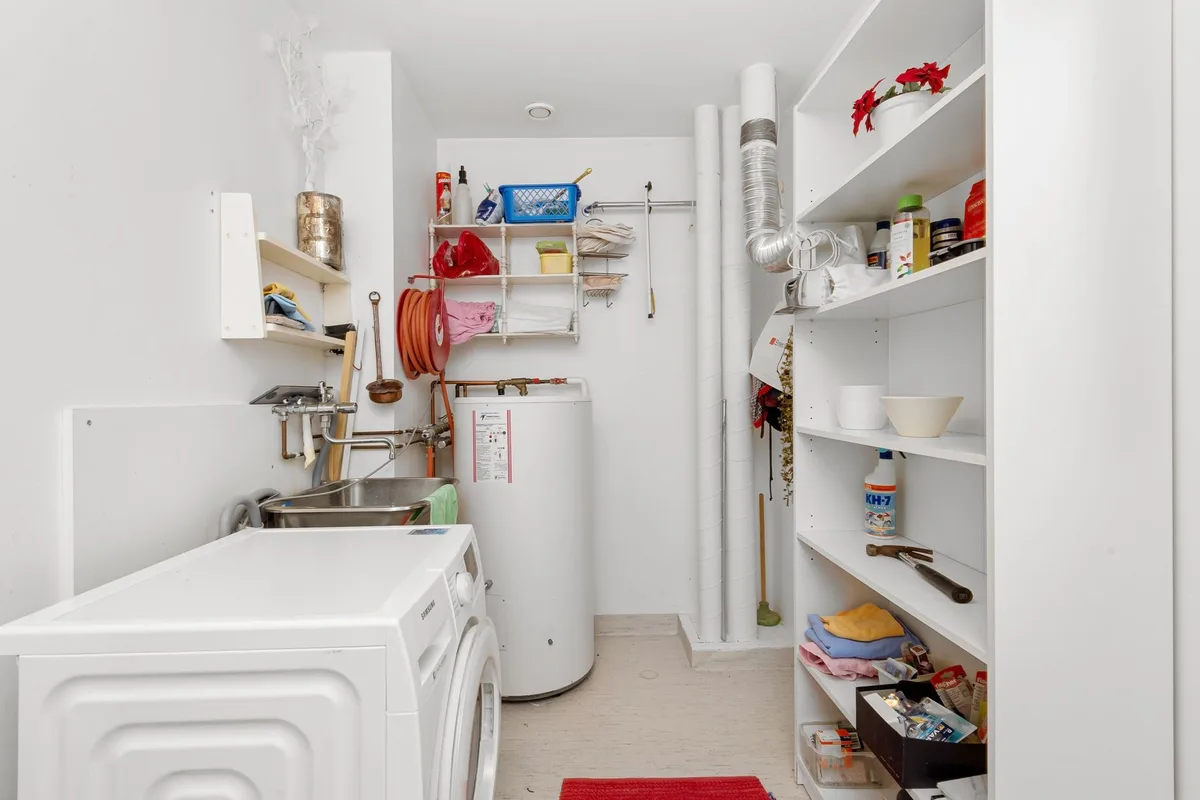
Image source: Pexels / Alex Tyson (Pexels License)
Choosing the Right Storage Location
Where you put your dehumidifier during winter determines whether it comes out in perfect shape or emerges damaged beyond repair. The ideal storage spot shares three qualities: it stays dry, it stays above freezing, and it stays relatively stable in temperature.
An interior closet on an upper floor of your home is usually the best choice. Basements sound logical since that’s where dehumidifiers live in summer, but basements are actually among the worst winter storage areas. They tend to drop below freezing in colder climates, and even in milder regions they fluctuate enough to encourage condensation inside the unit between freeze-thaw cycles.
Avoid garages unless they’re fully heated and insulated. Unheated garages get cold fast, and the temperature swings are brutal on plastic housings and rubber seals. Attics are another trap, they bake in summer heat and freeze in winter cold, plus they’re uncomfortable places to store heavy appliances.
Look for a spot protected from direct sunlight. UV exposure over months fades the plastic casing and makes it brittle. A dark closet or under-stairs cupboard checks every box.
You want consistent conditions, not the rollercoaster of a room with exterior walls and windows.
Make sure the floor surface is level and solid. Don’t place the dehumidifier on unfinished concrete without a wooden board underneath. Concrete wicks moisture and can transfer it into the unit’s base over time.
A piece of plywood or a rubber mat creates a clean barrier.
Keep the unit upright during storage. Tipping it on its side or back can cause oil from the compressor to leak into the refrigerant lines. When you eventually set it upright again, that displaced oil needs time to drain back.
Running the unit immediately after moving it can damage the compressor. If you must move it horizontally for any reason, let it stand upright for at least four hours before plugging it back in.
Protecting Your Dehumidifier During Storage
Once your unit is clean and your location is chosen, a few finishing touches keep it safe through the months ahead.
Use a breathable fabric cover designed for appliances, or a clean cotton bedsheet cut to size. These materials allow minimal air circulation while keeping dust and pests out. If you use a plastic storage bag, poke eight to ten small holes around the edges with a pushpin.
Completely sealed plastic traps whatever tiny amount of moisture remains inside the housing and guarantees condensation on the next warm day.
Place a small desiccant pack or two inside the unit through the filter slot before closing everything up. Silica gel packets work well here, the kind you find in shoeboxes and electronics packaging. They absorb ambient moisture that creeps in during temperature changes and keep the interior drier than the surrounding air.
Write the month and year of storage on a piece of painter’s tape and attach it to the cover. This simple habit saves headaches come spring when you’re digging through multiple stored items.
If you’re storing the unit in a garage or shed alongside other tools, keep it elevated off the floor. Place it on a sturdy shelf or a stack of plywood blocks. Flooding from a burst pipe or melting snow isn’t common, but it happens, and a five-minute cleanup beats replacing a ruined appliance.
Check on the unit once during the winter if you think about it. Pull the cover back, sniff the interior, and confirm nothing smells off. One quick inspection takes thirty seconds and gives you peace of mind.
Image source: Pexels / MART PRODUCTION (Pexels License)
Common Mistakes to Avoid
Even experienced homeowners mess up dehumidifier storage. The mistakes are usually simple oversights, but each one carries real consequences.
Leaving water in the tank is the number one error. It sounds obvious, but people rush through the shutdown process and assume the little bit of water at the bottom doesn’t matter. That small amount concentrates minerals and grows mold fast.
Even half an inch of stagnant water creates problems.
Skipping the filter cleaning is the second most common mistake. Dust-packed filters don’t just cause odors, they restrict airflow through the coils and force the compressor to run hotter than designed. Heat stresses the compressor motor and shortens its life significantly.
Wrapping the unit in non-breathable plastic is a close third. Plastic bags create a greenhouse effect inside. Any residual moisture gets trapped against the metal and plastic surfaces, accelerating corrosion and encouraging microbial growth in ways that open-air drying prevents.
Storing the unit in a damp basement seems practical because that’s where you used it. But basements are exactly the worst place to store any electrical appliance during winter. Temperature instability and ambient humidity combine to undo all the careful cleaning you did beforehand.
Not letting the unit dry completely before covering it is another frequent blunder. Wiping the outside looks sufficient to most people, but internal components need time to reach equilibrium with the room air. Leaving the cover open for a full day after cleaning makes a noticeable difference in the smell and condition of the interior when you open it months later.
Forgetting to remove batteries from remote controls or digital displays also pops up regularly. Batteries leak over time, especially in temperature fluctuations. Corroded contacts on the control board can disable features or prevent the unit from powering on entirely.
Getting Your Dehumidifier Ready for Spring
When April arrives and humidity starts climbing again, pulling your dehumidifier out of storage should feel effortless. Remove the cover, inspect the filter slot for any dust buildup, and check that the tank is completely dry inside. Plug the unit in and run it empty for thirty minutes with the filter out.
This blasts out any stale air from months of sitting and confirms the fan and compressor are working properly.
Install a fresh or freshly cleaned filter. Fill the tank halfway with water as a test, yes, that sounds backward, then let the unit run through a complete cycle. Watch for proper drainage and listen for unusual noises.
If everything runs quietly and the tank empties as expected, you’re ready for normal use.
If the unit smells slightly musty after that first test run, mix a cup of white vinegar into the tank water and let it run for an hour. That typically clears things up. If the odor persists, the filter or internal components may need a more thorough cleaning before the season officially begins.
One final tip before you start using it again: check the settings your unit remembers from last season. Some dehumidifiers retain preset humidity targets and fan speeds. If you preferred a different setting, say 45% relative humidity instead of the factory default of 50%, adjust it now while the unit is running clean.
Storing a dehumidifier for winter doesn’t require expertise or expensive supplies. A little attention to detail during the shutdown process protects a significant household investment and keeps your indoor air quality healthy when you need it most. Follow these steps, avoid the common pitfalls, and your dehumidifier will be ready and waiting when spring humidity returns.

Table of Contents