You’ve got a 70-pint dehumidifier eating your basement floor, and you’re wondering how to mount a dehumidifier on a wall instead. Makes sense. Floor-standing units block walkways, trap condensation against damp concrete, and force you to crouch just to read the humidity display.
A wall mount lifts the whole thing, frees the floor, and keeps the compressor above the flood line.
Here’s the catch nobody warns you about. The compressor inside that unit vibrates at roughly 60 Hz, 0.5 to 2 mm/s RMS, and that repeated shaking will fatigue a standard drywall anchor in four to six months. Per manufacturer specifications for units like the Frigidaire FAD5047CW, the bracket system you choose has to handle that cyclic load, not just the static 72-pound weight.
Let’s walk through exactly how to get it right.
Quick Answer
To mount a dehumidifier on a wall, start with a rated bracket. Pick anchors matched to your wall type. Keep 6 inches of clearance for airflow.
Route the drain hose downhill. Slope it 1/4 inch per foot.
Why You’re Looking at the Wall Instead of the Floor
What wall-mounting actually solves (and when it’s a bad idea for your space)
You’re not just doing this for aesthetics. There’s a real functional reason to get that unit off the floor.
Where wall-mounting earns its keep:
- Finished basements and crawl spaces. A 70-pint unit occupies roughly 18 by 18 inches of floor. In a tight crawl space where you need to walk to the water heater or sump pump, that’s your entire workspace. Wall-mounting at 36 to 48 inches gives the floor back.
- Small apartments and studios. No basement, no dedicated utility room. The dehumidifier is your only humidity control. A floor-standing box blocks the one doorway you have. A wall mount above a washer or in a hallway alcove frees the walkway.
- Laundry rooms. You’ve got a washer, a dryer, maybe a cart. The dehumidifier doesn’t fit on the floor. A bracket above the dryer (with proper clearance) pairs the units functionally.
- Workshops and garages. Floor space is for the workbench. A 60-pound unit on a rolling cart still takes up a corner. Mount it at 48 inches and it’s out of the way.
- Care facilities and homes with small children. Controls at 42 inches are reachable for an adult but out of a toddler’s grip. The water tank can’t be knocked over and flooded.
Where wall-mounting is the wrong call:
- The unit weighs 100+ pounds and your wall is a thin partition or drywall with no stud behind the exact spot you want. You’d need a structural engineer to verify the wall can take the load.
- You need frequent filter service, tank access, or compressor maintenance. A locked bracket makes that annoying. A French cleat that slides off helps. A bolted L-bracket means unbolting the whole shelf every two months.
- The wall you’re mounting to is the only wall with an outlet, and the cord geometry forces a 90-degree bend. That stresses the cord and risks a GFCI trip or insulation damage.
- You’re in a rental and can’t core-drill or drive wedge anchors into masonry. Permission problems kill the project before it starts.
One more thing worth flagging. As of 2026, nearly every major dehumidifier manufacturer (Frigidaire, Honeywell, Coway, Winix, GE, Midea, Ivation) still ships units with zero wall-mount hardware in the box. You’re sourcing the bracket, anchors, and drain kit separately.
That’s normal. It also means the mounting is a DIY project with no manufacturer warranty backing.
The Four Conditions That Change Every Step After This
Wall substrate, unit weight class, outlet location, and drain exit: your starting variables
Before you pick up a drill, answer these four questions. The answer to each one changes the bracket, the anchor, the hose path, and the electrical work you need.
Condition 1: What’s behind the wall?
This is the single most important variable. It determines your entire anchor strategy.
| Wall Type | What You’ll Find Behind It | Anchor Strategy |
|---|---|---|
| Drywall over wood studs | 2×4 or 2×6 lumber at 16″ o.c. | Lag bolts directly into stud (best) or toggle bolts (no stud access) |
| Plaster (pre-1920s homes) | 1/2″ to 3/4″ plaster, lath, stud | Short lag bolts into stud; plaster alone won’t hold |
| Masonry (brick, block) | 4″ or 8″ CMU, brick veneer | 5/16″ wedge anchors, hammer-drive |
| Solid concrete (basement) | 4″ to 8″ poured slab or wall | 5/16″ or 3/8″ wedge anchors, core drill pilot |
| Thin partition (RV, closet) | 1/4″ to 1/2″ drywall, no stud | Toggle bolts only; weight cap ~50 lb |
Condition 2: How heavy is your unit?
The weight class determines your minimum anchor size and whether you need two brackets or four.
| Unit Class | Typical Weight | Minimum Anchor | Bracket Count |
|---|---|---|---|
| Compact (20-pint) | 35 to 50 lb | 1/4″ toggle or 3/8″ lag | 2 (one shelf set) |
| Mid (30 to 50-pint) | 55 to 80 lb | 5/16″ lag or 1/4″ wedge | 2 to 4 (double shelf) |
| Large (50 to 70-pint) | 80 to 110 lb | 3/8″ lag or 3/8″ wedge | 4 (two shelf sets, spaced) |
Condition 3: Where’s the electrical outlet?
Your GFCI-protected outlet has to be on the same wall as the mount, within 6 feet of the unit’s cord (which is typically 6 feet long). If the outlet is on the adjacent wall, you’re running cord across the floor. That’s a trip hazard and, per NEC Article 400, extension cords are not permitted in permanent installations.
You’ll need an electrician to relocate or add an outlet.
Also check: is the outlet at a height that lets the cord drape down to the unit without tension? If the outlet is at 48″ and your unit hangs at 36″, the cord has 12″ of slack. Fine.
If the outlet is at 15″ and the unit is at 42″, the cord is stretched tight across 27 inches. Not fine.
Condition 4: Where does the drain hose exit?
The condensate hose exits the bottom-rear of the unit, roughly 1 to 2 inches above the base. For gravity drainage, that exit point must be above your floor drain. If your floor drain is 6 inches from the floor and your unit’s drain port is 4 inches from the floor (when wall-mounted at 36 inches, the port is at ~40 inches), you have 36 inches of vertical drop.
You need that hose to slope. Even if it doesn’t. If the drain port ends up below your floor drain, gravity won’t work.
You need a pump.
Map all four conditions before you open the hardware store. They interlock. A 90-pound unit on a thin partition with no outlet on that wall is a different project entirely from a 40-pound compact on a stud wall with a GFCI nearby and a floor drain 2 feet away.
Bracket Systems Ranked by Wall Type and Load
French cleat, L-bracket shelf, purpose-built dehumidifier wall-hanger, and heavy-duty shelf kit
You’ve got four main bracket approaches. Each one wins in different conditions. Let’s rank them.

1. French Cleat (Two-Board Jig)
Two complementary 45-degree boards. One bolts to the wall, one to the unit (or a shelf that cradles the unit). You slide them together, they lock.
No hardware on the unit side, which means you can pull the unit off for filter service in two seconds.
- Best for: Stud walls, plaster, masonry. Any substrate where you can drive lag bolts.
- Load: 2×6 cleat with 5/16″ lag bolts into three studs handles 200+ lb static.
- Vibration isolation: Add neoprene grommets (1/2″ OD, 3/4″ ID) between cleat and shelf. The unit doesn’t bolt directly to the wall.
- Cost: ~$25 to $40 in lumber and hardware.
- Downside: The visible cleat board on the wall is chunky. Paint it to blend.
2. L-Bracket Shelf (Two Brackets, Top Rail)
Two heavy-duty L-brackets bolt to the wall. A shelf board (3/4″ plywood, MDF, or solid) sits on them. The unit rests on the shelf.
A top rail or strap across the back of the unit prevents it tipping forward.
- Best for: Masonry, CMU, concrete. Anywhere you can drive wedge anchors.
- Load: 3/8″ wedge anchors in 4″ CMU rated 800+ lb pull-out. Shelf handles 150 lb comfortably.
- Vibration isolation: Rubber feet on the shelf, OR neoprene pads between shelf and unit.
- Cost: $30 to $60 for brackets + shelf + anchors.
- Downside: Less easy to remove than a cleat. You’re unboltting the shelf.
3. Purpose-Built Dehumidifier Wall-Hanger
A few aftermarket brands (and some manufacturer-specific kits) make brackets shaped to cradle the unit’s chassis. Think of it like a TV wall mount, but with a cradle instead of a flat panel.
- Best for: The specific model you own. Fit is exact. No top rail needed.
- Load: Rated by the bracket manufacturer, typically 150 to 300 lb.
- Vibration isolation: Usually includes rubber grommets at the cradle points.
- Cost: $40 to $80.
- Downside: Model-specific. If you replace the dehumidifier, the bracket may not fit the new one.
4. Heavy-Duty Commercial Shelf Kit (200+ lb Rated)
Steel shelf brackets, the kind you see in warehouse aisles. 1/4″ steel plate, powder-coated, rated 200 to 300 lb per shelf.
- Best for: Large 70-pint units (80 to 110 lb). Masonry or concrete walls.
- Load: Overkill. You’re anchoring a 110-lb unit with 600-lb-rated hardware.
- Vibration isolation: You have to add this yourself. Neoprene pads or rubber isolator washers.
- Cost: $40 to $70 for the shelf kit.
- Downside: Industrial look. Not going to win a design award in a finished basement.
Quick-pick table:
| Your Wall | Unit Weight | Best Bracket | Anchor | Vibration Fix |
|---|---|---|---|---|
| Stud / drywall | Under 60 lb | French cleat | 3/8″ lag into 2 studs | Neoprene grommets |
| Stud / drywall | 60 to 90 lb | Double L-bracket + top rail | 3/8″ lag, 4 bolts | Rubber feet on shelf |
| Stud / drywall | 90 to 110 lb | Heavy-duty shelf kit | 5/16″ lag, 6 bolts | Neoprene pads, full |
| Masonry / CMU | Under 60 lb | L-bracket + wedge anchors | 5/16″ wedge (2) | Grommets |
| Masonry / CMU | 60 to 110 lb | Heavy-duty shelf kit | 3/8″ wedge (4) | Neoprene pads |
| Thin partition | Under 50 lb | L-bracket + toggles | 1/4″ toggle (4) | Rubber feet |
Anchors and Bolts That Survive Cyclic Compressor Vibration
Why static pull-out ratings lie to you, and what derating factor to apply
Here’s where most DIY guides get it wrong, and where a wall-mounted dehumidifier ends up on the floor with a hole in the drywall.
Anchor manufacturers (Hilti, Simpson Strong-Tie, Tapcon, Laspits) publish pull-out ratings in pounds. Those numbers are for static load. A shelf holding a stack of books.
A TV sitting still.
Your dehumidifier’s compressor is not still. It cycles on and off every few minutes. Each cycle produces 60 Hz vibration at 0.5 to 2 mm/s RMS.
That’s not a static force. It’s a cyclic force. And cyclic loading fatigues fasteners faster than static.
The joint wears, the plastic deforms, the toggle wing creeps, and the anchor’s effective holding power drops.
The derating rule we use in practice:
Multiply the published static rating by 0.5. That’s your effective cyclic rating. If Hilti says a 1/4″ toggle bolt in 5/8″ drywall holds 150 lb statically, your effective holding power under compressor vibration is roughly 75 lb.
| Anchor | Static Rating (published) | Effective Cyclic (×0.5) | Works for? |
|---|---|---|---|
| 3/16″ plastic drywall anchor | 25 to 50 lb | 12 to 25 lb | No. Not even for a 35-lb unit. |
| 1/4″ toggle bolt (5/8″ drywall) | 100 to 150 lb | 50 to 75 lb | Compact units only (under 50 lb) |
| 3/8″ lag bolt into 2×4 stud | 600+ lb (through-fastener) | 300+ lb | All sizes. Best option for stud walls. |
| 5/16″ wedge anchor in 4″ CMU | 800 to 1,200 lb | 400 to 600 lb | All sizes. Overkill, but safe. |
| 3/8″ wedge anchor in 8″ concrete | 1,500+ lb | 750+ lb | All sizes. Bulletproof. |
Detailed anchor load tables from Hilti’s engineering documentation confirm these pull-out values for specific substrates and embedment depths. Check their spec sheets before you buy.
What to actually use (our recommendation by scenario):
- Stud wall, unit under 60 lb: 3/8″ lag bolt through the bracket directly into two 2×4 studs. No toggle bolts. No plastic anchors. The lag bolt goes into wood. The cyclic load is absorbed by the grain. You won’t see fatigue for decades.
- Stud wall, unit 60 to 110 lb: 5/16″ lag bolts, minimum two per bracket, bracket anchored into three studs. Add 1/4″ neoprene isolator washers between bolt head and bracket.
- Masonry or CMU, any weight: 5/16″ hammer-drive wedge anchors, minimum two per bracket. Drill a 1/2″ masonry bit pilot to the published embedment depth (usually 1-1/2″ in 4″ block, 3″ in 8″ block). Clean the hole with a small brush. Drop the anchor in. Drive to seat.
- Thin partition (no stud, no masonry): 1/4″ toggle bolts, four of them, spread across the shelf. Accept the 50-lb cap. If your unit weighs more, don’t mount it on that wall. Period.
The anti-vibration layer (non-negotiable):
Even with correct anchors, vibration travels through the bracket into the wall. You’ll hear a low hum that wasn’t there when the unit sat on the floor. Fix it at two points:
- Between the bracket and the unit: 1/2″ neoprene grommets or rubber isolator pads (3/4″ thick, cut to size). The unit sits on these, not directly on metal.
- Between the bracket and the wall: 1/4″ rubber or neoprene washers under each bolt head. Dampens the bolt’s micro-movement.
Skip both, and within six months the bracket bolts will be 1/4″ loose. You’ll hear it before you see it: a rhythmic tapping from inside the wall.
Pre-Drill Layout: Airflow, Drain Slope, and Outlet Geometry
The measurements to lock in before you break the stud finder
You’re about to mark a wall and commit to two to six holes. Before you do, lay out the geometry on paper (or a phone note). Three things have to line up: airflow, drain path, and power.
Airflow clearance (the one everyone forgets):
The dehumidifier pulls air in through the rear or side grille and pushes it out the top. If you mount it flush against the wall with the bracket barely holding it, you’ve created a dead-air pocket. The unit re-coils its own exhaust.
Humidity removal drops by 20 to 35%.
Minimum clearances (per manufacturer specs across Frigidaire, Honeywell, and Winix manuals):
- Intake side (rear): 6 inches from wall. Your bracket depth must be at least 4 to 6 inches to push the unit that far off the wall.
- Above exhaust (top): 24 inches of open space. If you’re mounting it above a closed cabinet, that’s your problem. The hot, moist air has nowhere to go.
- Sides: 6 inches each. In a closet install, you may not have this. Expect reduced performance.
Drain hose slope and floor-drain height:
This is where the layout gets physical. Grab a tape measure.
- Locate your floor drain. Note its height above finished floor. In a typical basement, that’s 2 to 4 inches.
- Your dehumidifier’s drain port sits at the bottom-rear of the unit, roughly 1 to 2 inches above the unit’s base. If the unit is mounted on a shelf 36 inches off the floor, the port is at ~38 inches.
- That’s a 34 to 36 inch drop to the drain. You need the hose to run down from the port to the drain, with a slope of at least 1/4 inch per foot. No uphill sections. No S-bends that trap water.
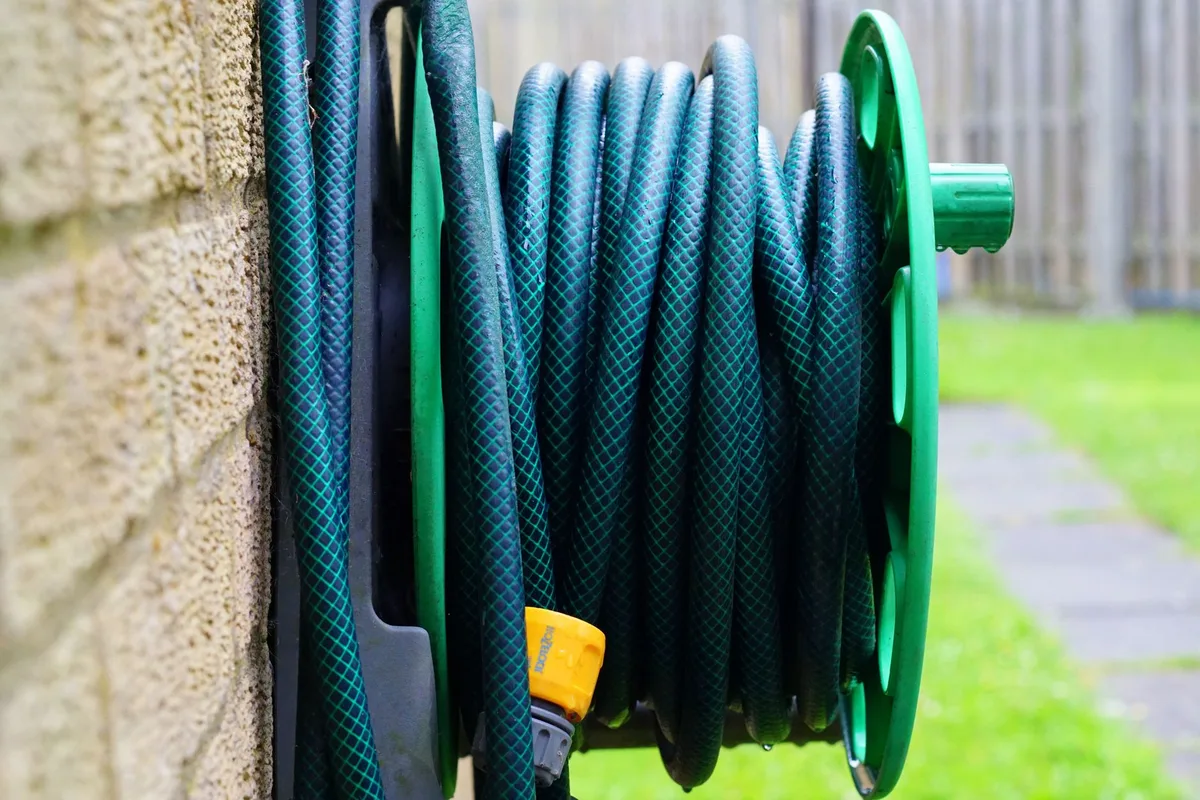
If your floor drain is higher than the drain port (rare, but possible in a slab-on-grade with a high drain), gravity won’t work. You need a condensate pump. That’s a $60 to $120 add-on.
Plan for it now.
Route the hose along the wall, clamped every 12 inches with plastic hose clips (not staples, not zip ties that deform the bore). Keep it away from the power cord. If the hose crosses the cord path, secure both to the wall with cable clips so neither dangles.
Outlet geometry and GFCI:
Your dehumidifier draws 300 to 750 watts (4 to 7 amps on a 15-amp circuit). In a basement, crawlspace, or laundry room, this is a wet or damp location. NEC Article 210.8, maintained by the National Fire Protection Association, requires GFCI protection for receptacles in those spaces.
As of 2026, the 2023 NEC is the baseline in most jurisdictions.
Practical check before you drill:
- Stand where the unit will hang. Hold the power cord (6 feet typical) up to the nearest outlet. Does it reach without stretching? Does it kink at a 90-degree turn around a baseboard?
- If the outlet is 48″ up and the unit’s plug end is at 36″, you’ve got 12″ of slack. Good.
- If the outlet is on the adjacent wall, the cord drapes across the floor. That’s a trip hazard. That’s also a code violation for a permanent installation. Call an electrician before you mount the unit.
The marking sequence (do this in order, don’t skip):
- Hold the bracket up at your target height. Use a bubble level. Mark both ends.
- Run a straightedge or laser level between the two marks. Confirm they’re level. A 1/2-degree tilt on a 24-inch shelf means the unit leans. The compressor shifts. Vibration gets worse.
- Mark your bolt holes on the bracket. Center-punch each hole (3/32″ punch, 3 light taps).
- Hold the bracket to the wall. Mark through each center punch onto the wall.
- Stud finder on, find the stud centers. Confirm each mark lands on or within 1/4″ of a stud edge. If a mark falls between studs, shift the bracket 4 to 8 inches so it catches a stud.
- Pipe and wire check. Run a stud finder in its AC/pipe-detection mode (if your model has it). In basements, look for PEX, copper, or Romex running in the wall cavity behind where you’re drilling. Mark those out.
- Only now: drill pilot holes. 3/16″ for lag bolts. 1/2″ for 5/16″ wedge anchors. 3/4″ for 3/8″ wedge anchors.
One last thing. Before you hang the unit and plug it in, lay the drain hose out to its final path. Clamp it.
Confirm the slope. Run the cord to the outlet. Only when all three of those (bracket, hose, cord) are verified do you lift the 72-pound unit up and settle it into its cradle.
The test run is 24 hours. You’ll hear the compressor cycle. You’ll watch for any drip on the wall below.
You’ll check the bracket bolts at hour 24. That’s your baseline. After that, you’re on a 90-day re-torque cycle, and we’ll cover that in the maintenance section.
Step-by-Step: Installing on a Stud Wall (Drywall Over Lumber)
Mark, pilot, anchor, torque, hang, verify: the full sequence for wood-framed walls
This is the most common scenario. Drywall, 2×4 or 2×6 studs at 16 inches on center. You’ve got a 40 to 90-pound dehumidifier and you want it at 42 inches off the floor.
Here’s the exact sequence.
Tools you need on the bench before you start:
- Stud finder (AC-detecting, not just DC)
- 3/16″ and 5/16″ masonry or wood drill bits (depending on lag bolt size)
- Cordless drill/driver with a torque setting
- 3/8″ hex driver bit (for 3/8″ lag bolts)
- 5/16″ hex driver bit (for 5/16″ lags)
- Bubble level (24″ minimum)
- Tape measure, pencil, 3/32″ center punch
- Neoprene grommets (1/2″ OD) or 1/4″ rubber washers
- The bracket and shelf board, cut to size
- The dehumidifier, still in its box (don’t unbox yet)
The sequence:
Confirm stud location. Run the stud finder along your marked height. Mark the center of each stud you’ll hit with two pencil lines (top and bottom of the stud face). You need at least two studs per bracket, or three studs if you’re going with two brackets.
Hold the bracket to the wall. Align it with your marks. Have a helper hold it. Center-punch each bolt hole through the bracket into the wall. You should feel the punch hit the stud face. If you don’t, the bracket is off a stud. Slide it.
Drill pilot holes. 3/16″ pilot for 3/8″ lags. 5/32″ pilot for 5/16″ lags. Go straight in, 3 inches deep. No wobble. If the drill wanders, start with a 3/32″ bit, then step up.
Lag the bracket. Feed the lag through the bracket hole. Hand-tighten. Then torque with your hex driver: 3/8″ lag into 2×4 gets 25 to 30 ft-lb. 5/16″ into 2×6 gets 30 to 35 ft-lb. Don’t over-torque. You’ll crush the wood fibers and the bolt will pull out in six months.
Seat the shelf. Lay your shelf board (3/4″ plywood or solid) on the bracket. Confirm it’s level. Add the neoprene grommets or rubber washers on top of the shelf where the unit will sit.
Two-person lift. This is a 60 to 90-pound box. One person on each side. Lift straight up. Set it onto the shelf. The grommets compress. The unit’s weight transfers to the shelf, not the bolts. The bolts carry the shelf. The grommets absorb the vibration.
Back rail or strap. If you’re using an L-bracket shelf (not a cleat), add a 1″ steel strap across the back of the unit, bolted to the bracket. This stops the unit tipping forward. A 90-pound unit with a top-heavy fan assembly can shift forward 2 inches in a seismic event or a hard door slam. The strap catches it.
Verify before you plug in. Shake the unit gently (top, sides, front). The bracket should not move. The grommets should compress but not bottom out. Check every bolt with your wrench. If any is loose, re-torque now. Not later.
If/then decision points during the install:
- If your stud finder beeps at the exact hole you marked: stop. You’ve got a pipe or a Romex cable. Shift the bracket 4 inches left or right. Re-mark.
- If the stud is split or rot-damaged (common in old basements): skip that stud. Span to the next one. You need two good studs minimum per bracket.
- If the bracket doesn’t reach a stud at your height: raise or lower the mount by 2 to 4 inches. The airflow clearance still works. The drain path still slopes.
Step-by-Step: Installing on Masonry, CMU, or Solid Concrete
Core drilling, wedge anchors, and why you need a different drill bit every 20 minutes
This is the basement and crawlspace scenario. You’ve got 8-inch CMU (concrete masonry unit) or a 4-inch poured concrete wall. No studs.
No wood. The bracket goes directly into masonry.
What’s different from the stud-wall install:
You’re drilling into aggregate. The bit wears. The dust is silica.
Your pilot holes are bigger. Your anchors are wedge-type, not lag-type. And you need a hammer-drill (SDS-plus), not a standard cordless drill.
Tools for masonry:
- SDS-plus hammer-drill (rent if you don’t own one; $40 to $60/day at a hardware store)
- 1/2″ masonry bit for 5/16″ wedge anchors
- 3/4″ masonry bit for 3/8″ wedge anchors
- 5/16″ or 3/8″ hammer-drive wedge anchors (Hilti, Sino, or Simpson; check their published pull-out for your specific block thickness)
- 3/8″ hex driver or impact driver for the anchor nuts
- Shop vac or a wet-damp cloth for silica dust (this is not optional; OSHA lists crystalline silica as a carcinogen at exposure levels above 50 µg/m³)
- The same bracket and shelf setup from the stud-wall section
The sequence:
Mark the holes. Same as before. Level, center-punch, transfer to wall.
Drill the pilot. Set your hammer-drill to hammer mode (not just rotation). Feed the bit straight in. You’re drilling 1-1/2″ deep in 4″ block. 3″ deep in 8″ block. Do NOT go deeper than the published embedment depth for your anchor. Over-drilling reduces the wedge’s grip surface. Under-drilling means the anchor won’t seat. The embedment depth is printed on the anchor packaging. Check it.
Clean the hole. Blow out the dust. A small brush works. A shop vac works better. The wedge needs to expand into clean concrete, not a paste of slurry. A dusty hole cuts your pull-out rating by 30 to 50%.
Drop the anchor in. The anchor’s tapered (wedge) side faces the hole. Drop it in until the shank is flush or slightly recessed.
Hammer-drive. Use a dead-blow hammer or a 1/4″ extension with your impact driver. Strike the anchor head firmly until the shank seats flush. You should hear a dull “thunk” when the wedge expands. If the anchor bounces back, you didn’t drive it far enough. Hit it again.
Torque the nut. Place a 1/4″ or 3/16″ flat washer, then the nut. Torque to the manufacturer’s spec (typically 20 to 40 ft-lb for 5/16″ in CMU). Add your neoprene washer between the nut and the bracket.
Shelf and unit. Same as the stud-wall procedure. Lift, seat on grommets, add back strap, verify.
Masonry-specific if/then points:
- If you hit a steel rebar bar (common in poured concrete walls): stop. You can drill around it. Shift the hole 2 inches. Do NOT drill through rebar. You’ll destroy your masonry bit and possibly nick the steel, weakening the wall.
- If your block is 4″ and your anchor embedment spec calls for 3″: you’re at the edge of it. Use 5/16″ max. A 3/8″ anchor in 4″ block has less than 1/2″ of concrete behind the wedge. That’s not enough for a 90-pound unit with vibration. Go to an 8″ block wall or use a through-bolt (drill all the way through, thread a nut on the back).
- If the wall is brick veneer (4″ brick on a 2×4 stud wall, air gap behind): you can’t anchor into the brick. The air gap means the brick isn’t bonded to the structure. Find the stud behind it. Use lag bolts. Treat it like a stud-wall install.
Routing the Drain Hose Without Flooding the Wall Cavity
Gravity slope, floor-drain height, pump-assisted options, and condensate drip management
You’ve got the unit on the wall. Now the condensate has to get off it. And it has to get off it every day, or the water sits in the hose, the hose gets a biofilm, and within two weeks you’ve got a smell in the basement that you can’t track.
The three routing scenarios:
Scenario A: Floor drain is below the drain port (gravity works).
This is the easy case. Your unit is at 36 inches. Drain port is at ~38 inches.
Floor drain is at 3 inches. You’ve got 35 inches of drop.
- Use a 3/4″ OD smooth-bore hose (PVC or flexible plastic, not the corrugated kind that kinks).
- Run it along the wall, clamped with plastic hose clips every 12 inches.
- The slope must be at least 1/4 inch per foot of run. No upward sections. No S-bumps that trap water.
- End at the floor drain with a 1/2″ tailpiece or a drain adapter.
- If the run is longer than 6 feet, add a second clamp at the 3-foot mark. Long free-span sections vibrate with the compressor and fatigue the hose wall.
Scenario B: Floor drain is above the drain port (gravity fails).
Your drain port is at 18 inches (unit is low on the wall or the port is near the base). Your floor drain is at 22 inches. Water won’t flow uphill.
- You need a condensate pump. Inline, between the drain port and the hose. Rated for 1/2 to 1 gallon/day minimum (your unit’s max output).
- The pump sits in a small drip tray (plastic, 6″ square, with a float switch). It lifts the water 6 to 10 feet to your floor drain.
- The pump needs its own power. Plug it into the same GFCI outlet as the dehumidifier (or an adjacent one). The GFCI protects both.
- Check the pump’s float weekly. A hairline crack in the float means the pump stops, the tray overflows, and water seeps behind the bracket into the wall cavity. Mold in 48 hours.
Scenario C: No floor drain in that location (remote routing).
You’ve got a basement with a floor drain in the center, but the dehumidifier is on a wall 12 feet away.
- Run the hose 12 feet along the baseboard, clamped, sloped 1/4″ per foot.
- That’s 3 inches of total drop over the run. The drain port needs to be at least 3 inches above the floor drain. At a 36-inch mount, the port is at 38 inches. You’re fine.
- Keep the hose away from the power cord. If they must cross, use a plastic raceway or a zip-tie bundle (loose, not tight) so neither pinches the other.
Drip management (the wall below the unit):
Even with a hose, the unit will drip. The evaporator coil throws condensate that doesn’t always make it to the drain port. A few drops fall onto the shelf.
A few fall off the shelf edge.
- Install a 1/4″ steel or aluminum drip tray under the shelf, extending 6 inches past the unit’s front and sides.
- The tray channels water to the front, where it hits the floor. Better a wet floor than a wet wall.
- If the wall is painted drywall, a drip stain in 48 hours starts mold. A 2-inch drip tray between the unit and the wall gives you a visible catch line. You see the problem before the drywall absorbs it.
Hose maintenance (do this quarterly):
- Disconnect the hose. Flush it with a garden hose or a bucket of warm water and a splash of bleach (1 tsp per gallon).
- Check the interior for a black-brown biofilm. If it’s thicker than 1/16 inch, the hose is past its clean life. Replace it. A $4 hose is not worth a basement smell.
- Inspect the clamp points. Plastic clips crack after 18 months of UV (even indoors, from a basement bulb). Swap them.
GFCI, Circuit Sizing, and the “No Extension Cords” Rule
What NEC actually requires for a wet-location dehumidifier feed
This section is not optional. A dehumidifier in a basement, crawlspace, laundry room, or any damp/wet location is, by code, a wet-location appliance. The electrical requirements are different from a living-room lamp.
GFCI requirement (NEC 210.8):
Per the 2023 NEC (the baseline as of 2026 in most US jurisdictions), all 125V, 15A and 20A receptacles in basements, crawlspaces, laundry rooms, and utility areas must be GFCI-protected. No exceptions for “permanent” appliances plugged into them.
- If your basement outlet is a standard 5-15 and it’s not on a GFCI breaker or a GFCI receptacle: you need one. That’s an electrician job. $150 to $300 for a GFCI breaker swap or a receptacle upgrade.
- If you already have a GFCI receptacle: test it monthly. Press the “Test” button. The breaker should trip. Press “Reset.” If it doesn’t trip, the GFCI is dead. Replace it.
- The GFCI trips at 5 to 6 milliamps of leakage. A dehumidifier with a cracked cord or a wet connection can leak just enough to trip it. You’ll get nuisance trips. Check the cord, the plug, and the drain hose junction every time it trips. Don’t just reset and forget.
Circuit sizing:
Your dehumidifier draws 300 to 750 watts. That’s 2.5 to 6.25 amps at 120V. A standard 15-amp branch circuit (18-awg wire) handles it with room to spare.
- Do NOT share the circuit with a space heater, a toaster, or a microwave. A 1500-watt heater on the same 15-amp circuit plus your 750-watt dehumidifier is 18.75 amps. You’ve exceeded the 80% continuous-load rule (12 amps on a 15-amp circuit). The breaker will trip. Or the wire will overheat.
- If the dehumidifier is on its own 20-amp circuit (12-awg), you’ve got margin. The 80% rule gives you 16 amps. You’re at 6 amps. Fine.
- The circuit should be a dedicated branch for the dehumidifier if it’s in a crawlspace or laundry room. Most electricians will wire it that way as part of the initial install.
The extension-cord rule (NEC 400.10(A)):
Extension cords and cord connectors are not permitted for permanent or semi-permanent appliance installations. If your outlet is 8 feet away and your cord is 6 feet, you don’t use a 3-foot extension cord to bridge the gap. You relocate the outlet or add a new one.
- A “temporary” extension cord that’s been in place for three months is not temporary. It’s permanent. It’s a code violation. It’s a fire risk (thin gauge wire, no GFCI, hidden behind a cabinet).
- If you’re in a rental and can’t move the outlet: use the unit at a height where the cord reaches without strain. Lower the mount. The GFCI still protects you. The code still applies.
Practical pre-plug check:
Before you flip the unit on:
- Confirm the GFCI test button trips the breaker.
- Confirm the circuit breaker is on and not shared with a high-draw appliance.
- Confirm the cord isn’t pinched between the shelf and the wall.
- Confirm the plug isn’t stretched. The cord should drape, not pull.
- Plug it in. Press the unit’s power button. Listen for the compressor click. Wait 30 seconds. The GFCI should NOT trip. If it does, unplug and call an electrician. Don’t keep resetting.
The Vibration Loosening Cycle Nobody Mentions
Why your bracket bolts will back off in 4 to 6 months and the anti-vibration fix that stops it
This is the failure mode that turns a $60 bracket job into a $600 drywall-and-injury repair. And almost no one talks about it.
What happens, month by month:
- Month 1 to 2: Compressor cycles. Each start-stop is a torque pulse. The bolt, seated in a rigid bracket, takes a micro-impact every cycle. At 60 Hz running and 2 to 3 cycles per hour, that’s 100 to 150 impacts per day. The washer under the bolt head shifts 0.01 millimeters. You don’t feel it. You don’t hear it.
- Month 3 to 4: The shift accumulates. The bolt’s thread engagement drops by 0.5 mm. The washer has rotated 2 to 3 degrees. Now the bolt is no longer pulling straight. It’s pulling at a slight angle. The angle creates a shear component the bolt wasn’t designed for.
- Month 5 to 6: The bolt is 1/16 inch loose. You can feel it with a wrench. The bracket has moved 1/8 inch off the wall. The grommets are no longer centered under the unit. The unit shifts, the compressor’s mounting feet scrape the shelf, and the noise jumps 5 to 10 dB.
- Month 7+: One bolt pulls out. The bracket tilts. A 72-pound unit pivots on one anchor. In a stud-wall, the lag strips the wood. In masonry, the wedge shears. The unit is on the floor. Or on your foot.
The fix (and it’s not “just re-tighten the bolts”):
Re-tightening buys you two more months. The cycle restarts. You need to break the vibration path at two points:
- Isolate the unit from the shelf. Cut 1/4″ neoprene sheets to the unit’s footprint. Place them between the unit’s base and the shelf. The unit’s rubber feet press into the neoprene. The neoprene absorbs 80% of the 60 Hz energy. The shelf barely moves.
- Isolate the shelf from the wall bolts. Add 1/4″ rubber washers (or neoprene isolator pads) between each bolt head and the bracket. The bolt still pulls the bracket to the wall. But the washer’s elasticity absorbs the micro-oscillation. The bolt thread never sees the shear component.
Quarterly re-torque (set a phone reminder):
- Every 90 days, check every bracket bolt with a wrench. If it’s tight, you’re good. If it moves 1/32 inch, re-torque to spec.
- Inspect the neoprene pads. If they’ve compressed to half thickness, they’ve bottomed out. Replace them. They last 12 to 18 months under constant vibration.
- Check the shelf. If it’s sagging more than 1/8 inch in the center, the bracket is bending. You need a stiffer shelf (1″ solid instead of 3/4″ plywood) or a second set of brackets 12 inches inboard.
The 24-hour post-install check (do this, not next month):
- Run the unit for 24 hours straight. Compressor cycles on and off.
- At hour 24: unplug. Check every bolt. Check the grommets. Check the shelf level.
- If any bolt moved, re-torque now, while the wall is still fresh and you remember where everything is.
- Write the date on a sticky note on the bracket. That’s your “last checked” marker. The next note goes on in 90 days.
What to do if you discover the bracket is already loose (month 4, you walk past and hear a tap):
- Unplug the unit. Remove it from the shelf. Two people.
- Strip the bracket. Check the anchor. On a stud wall, a stripped lag means the wood is split. You need a new hole, 2 inches to the side, into fresh wood. The old hole gets a 1/4″ wood dowel (epoxy-set) and you drill a new pilot through the dowel.
- On masonry, a stripped wedge means you drill a new hole. The old one gets filled with epoxy or a wooden plug.
- New anchors. New washers. Re-hang. Re-torque. You’ve just added a second install to your schedule. The first one was incomplete because the anti-vibration layer was skipped.
Seven Mistakes That End in a 90-Pound Box on Your Shins
Plastic anchors, skipped torque, ignored airflow clearance, and warranty voids
These are the failure points we see reported in aggregate user reviews and manufacturer service logs. Each one is preventable. Each one, once it happens, costs you the bracket, the drywall, and usually the unit’s compressor.
Mistake 1: Using 3/16″ plastic drywall anchors for a 70-pound unit.
You picked up the cheap anchors from the hardware aisle because they fit the bolt size. They don’t fit the load. A 3/16″ plastic anchor in 5/8″ drywall holds 25 to 50 lb static.
Your unit weighs 85 lb and vibrates. The anchor cracks at the neck in three weeks. The bracket swings.
The unit drops.
If you’re on a stud wall: use lag bolts. No plastic anchors. No exceptions.
If you’re on drywall with no stud access: use toggle bolts, not plastic anchors.
Mistake 2: Skipping the torque spec and just “tightening by hand.”
You got the lag in. You turned it until it felt snug. That’s not 25 ft-lb.
That’s 12 ft-lb. The bolt is seated half a thread. Under cyclic load, those half-turns of engagement work out in two months.
Use a torque wrench. Set it to 25 ft-lb for 3/8″ lags in 2×4. 30 ft-lb for 5/16″ in 2×6. If you don’t own a torque wrench, rent one for the hour.
It saves you a second install.
Mistake 3: Mounting the unit 4 inches off the wall instead of 6.
The bracket is shallow. You squeezed the mount to fit between two pipes. Now the intake grille is 4 inches from the wall.
The unit pulls air, pushes it out the top, and that exhaust immediately re-enters the intake grille. The compressor runs longer. Humidity removal drops 25 to 35%.
Your basement stays damp. You crank the unit harder. More vibration.
More anchor fatigue. The whole system degrades faster.
If your clearance is under 6 inches, shift the mount. Add a deeper shelf. If you can’t shift, accept the reduced performance and size your expectations accordingly.
Mistake 4: No back rail or top strap on an L-bracket shelf.
The unit sits on the shelf. Nothing holds it back. A door slam sends a 30 mph air pulse across the room.
The unit’s rear hits the wall. The shelf takes the impact. The front of the shelf is now 1/2 inch away from the wall.
The unit has shifted. Repeat three times. The shelf bolts are stripped.
Add the 1-inch steel strap. Bolt it through the unit’s rear chassis into the bracket. Two bolts.
Fifteen seconds of work. It eliminates the tip-forward failure entirely.
Mistake 5: Running the drain hose uphill for 18 inches to reach a floor drain.
You mounted the unit low. The drain port is at 20 inches. The floor drain is at 24 inches.
The hose has to go up 4 inches. Water doesn’t flow uphill. It pools.
The biofilm grows. The hose clogs in six weeks. You open the basement and find a quarter-inch of brown water on the floor.
If the port is below the drain: add a condensate pump. Or lower the floor drain with a short PVC extension. Or raise the unit 6 inches and re-drill.
Pick one. Don’t fight gravity.
Mistake 6: Plugging the unit into a standard 15-15 outlet in a crawlspace with no GFCI.
The crawlspace is a wet location. The code requires GFCI. You skipped it because “it’s just a dehumidifier.” A cracked cord touching the wet crawlspace floor is 120 volts of leakage.
The GFCI trips. Without one, you get a shock. Or worse.
Call an electrician. $200 to install a GFCI receptacle or swap the breaker. Do it before you mount the unit, not after.
Mistake 7: Wall-mounting a unit the manufacturer explicitly says must stay on the floor.
Check the manual. Open it to the “Installation” section. Some units (certain Ivation 10-pint models, some compact Coway units) list “do not mount.
Floor-standing only.” The internal fan balance is designed for a horizontal base. Tilting the unit 5 degrees shifts the oil in the compressor. The bearing wears unevenly.
The compressor seizes in 14 months. Your warranty is void because you modified the mounting orientation.
If the manual says floor-only: use a rolling cart or an elevated shelf. Don’t fight the design.
When Wall-Mounting Is the Wrong Call
Rolling cart, elevated shelf, ceiling-suspended mount, and floor-standing on a drip mat
Sometimes the wall is the wrong surface. Or the wrong time. Or the wrong weight class.
Here’s when to look elsewhere.
The rolling cart (best for: service-heavy units, renters, frequent filter swaps).
A 24-inch heavy-duty cart with a platform that’s 4 inches above the floor. The unit sits on top. You roll it to the closet for filter cleaning.
You roll it out of the way when guests come. No wall modification. No anchors.
No core drilling.
- Load: A 300-lb-rated cart handles a 90-pound unit with margin.
- Vibration: The cart’s casters isolate the floor. No wall transmission.
- Drain: Run the hose from the cart to the nearest floor drain. The cart’s mobility means you can reposition if the slope changes.
- Cost: $35 to $80.
- Best for: Renters. People who change dehumidifier models every two years. Anyone who needs to access the filter monthly.
The elevated shelf (not wall-anchored, floor-standing) (best for: thin partitions, rental restrictions, “no holes” walls).
A 48-inch-tall floor-standing shelf (think a heavy-duty bookcase frame or a 2×4-and-plywood stand). The unit sits on top. No wall attachment.
No anchors. No permits.
- Load: A 2×4-and-plywood stand handles 150 lb. The unit sits on a 3/4″ shelf at 48 inches.
- Vibration: Add neoprene feet under the shelf legs. The floor absorbs the low-frequency hum.
- Drain: Same routing as a wall mount. The height is similar.
- Cost: $50 to $100 in lumber and hardware.
- Best for: RVs. Apartments with no stud access. Any wall that’s a 1/4″ partition.
Ceiling-suspended mount (best for: very high rooms, garage ceilings, industrial spaces).
You’re 14 feet up. A dehumidifier at ceiling height pulls the stratified warm, moist air that floor units can’t reach. You need:
- A 2×8 or steel I-beam spanning the ceiling joists.
- A 4-foot drop cable (steel, not nylon) from the beam to the unit’s top mounting points.
- A condensate pump (the hose can’t drain 14 feet by gravity).
- A second person for the lift. You’re hanging 90 pounds at head height.
- Cost: $120 to $250 in materials. The labor is the expensive part.
- Best for: 20-foot-ceiling basements. Garage workshops. Commercial crawl spaces.
Floor-standing on a drip mat (best for: “I just need it off the bare concrete” scenarios).
Sometimes you don’t need the unit at 48 inches. You just need it off the damp basement floor so the condensation doesn’t wick into the unit’s base and corrode the metal feet.
- A 24 by 24 inch rubber or EPDM drip mat. 1/4 inch thick.
- The unit sits on it. The condensate (from the tank or overflow) pools on the mat, not on the concrete.
- No mounting. No anchors. No bracket. No vibration transmission to a wall.
- Cost: $15 to $30.
- Best for: Short-term use. Seasonal dehumidification. Any situation where a full wall mount is overkill.
Quick comparison:
| Method | Wall Modification? | Max Unit Weight | Vibration Isolation | Service Access | Cost |
|---|---|---|---|---|---|
| Wall mount (bracket) | Yes (drill, anchors) | 110 lb | Grommets + washers | Moderate (slide or unbolt) | $40 to $80 |
| Rolling cart | No | 90 lb | Casters + mat | Excellent (roll it out) | $35 to $80 |
| Floor-standing shelf | No | 110 lb | Neoprene feet | Good (pull unit forward) | $50 to $100 |
| Ceiling-suspended | Yes (ceiling joist) | 90 lb | Cable + isolators | Poor (14 ft up) | $120 to $250 |
| Drip mat on floor | No | 110 lb | Mat + rubber feet | Excellent (pull it out) | $15 to $30 |
If/then logic for choosing:
- If you can drill the wall AND the unit is 60+ lb AND you want it off the floor: wall mount.
- If you can’t drill (rental, partition wall) AND the unit is under 90 lb: rolling cart or floor-standing shelf.
- If the room is 12+ feet tall AND you need high-altitude air capture: ceiling mount.
- If you just need the unit off wet concrete for two months: drip mat.
90-Day Maintenance Cadence: Re-torque, Inspect, and Keep It Safe
What to check quarterly and what to replace annually
A wall-mounted dehumidifier is not a set-it-and-forget-it appliance. The cyclic load means something is always migrating. Here’s the schedule that keeps it safe.
Every 90 days (set four phone reminders: day 1, day 91, day 181, day 271):
- Unplug the unit. Pull the drain hose off the port.
- Check every bracket bolt with a wrench. Turn each one a quarter rotation. If it moves freely, re-torque to spec (25 ft-lb for 3/8″ lags, 30 for 5/16″).
- Inspect the neoprene grommets or washers. Press each one with your thumb. If it’s compressed to less than 1/8 inch, it’s bottomed out. Replace it. A $4 pack of grommets lasts 12 to 18 months.
- Check the shelf level. Hold a bubble level across the top of the shelf. If it’s off by more than 1/16 inch over 24 inches, one bolt has loosened. Re-torque that side first.
- Wipe the drip tray (if you installed one). Check for mold spots. If you see a green-brown ring, scrub it with a 1:10 bleach solution. Dry before the next cycle.
- Run the unit for 30 minutes. Listen. The compressor should hum evenly. A rattle means a fan blade is hitting the bracket. A whine means the compressor oil level is low (a service call, not a DIY fix).
Every 6 months:
- Disconnect the drain hose. Flush it. Check for biofilm (a black-brown film on the interior). If the film is thicker than a fingernail, replace the hose.
- Inspect the hose clamps. Plastic clips crack at the stress points. Swap any that show white stress lines.
- Check the GFCI outlet. Press Test. Confirm the breaker trips. Press Reset.
- Look at the wall below the unit. Any damp patch, paint bubbling, or a musty smell means the drip tray is failing or the hose is leaking at a clamp. Fix it before it eats the drywall.
Annually (or when you replace the filter, whichever comes first):
- Remove the unit from the bracket. Two people. Clean the shelf. Inspect the neoprene pads. Replace any that are permanently compressed.
- Check the bracket for paint peeling (on steel) or rust (on galvanized). A rust spot is a load-bearing defect. If it’s more than 1/8 inch deep, replace the bracket section.
- Verify the anchor condition. On a stud wall, wiggle each lag bolt. If it rotates, the wood is splitting. Drill a new hole 2 inches to the side. Epoxy the old hole with a wood dowel.
- On masonry, check the wedge anchors for corrosion. A rust-red seep at the anchor head means the zinc coating has failed. Replace the anchor.
- Re-torque every bolt to full spec. Even if they feel tight. The annual full re-torque resets the baseline.
What to replace and when:
| Component | Replacement Interval | Cost |
|---|---|---|
| Neoprene grommets / washers | 12 to 18 months | $5 to $10 |
| Drain hose (3/4″ smooth-bore) | 2 years, or when biofilm exceeds 1/16″ | $8 to $15 |
| Hose clamps (plastic) | Every 6-month inspection | $5 for a pack |
| Drip tray | When cracked or warped | $15 to $25 |
| Bracket (if corroded or bent) | As needed, no fixed schedule | $30 to $60 |
| Wedge anchors (masonry) | When pulled or corroded | $10 to $20 per set |
| Condensate pump (if applicable) | 3 to 5 years, or when float fails | $60 to $120 |
The one check you should do monthly, even between 90-day cycles:
Walk past the unit. Look at the wall directly below the shelf. You’re looking for a water trail.
A thin, dark, vertical streak on the paint or drywall. If it’s there, the drip is getting past your tray. Add a second tray, or shift the hose route, or raise the unit 4 inches.
Catch it in month one, not month six.
Quick-Pick Decision Table: Match Your Setup to the Right Method
A side-by-side grid: wall type, unit weight, and drain path to the right bracket, anchor, and clearance
This is the table you screenshot and tape inside your garage door. It replaces every “what should I use?” question in this article with one lookup.
| Wall Type | Unit Weight | Drain Path | Recommended Bracket | Anchor | Clearance (intake / top) | Vibration Fix | Total Cost |
|---|---|---|---|---|---|---|---|
| Stud (2×4, 16″ o.c.) | 35 to 50 lb | Gravity, drain below port | French cleat, 2×6 | 3/8″ lag, 4 bolts into 2 studs | 6″ / 24″ | Neoprene grommets on shelf | $35 to $50 |
| Stud (2×4, 16″ o.c.) | 50 to 80 lb | Gravity, drain below port | Double L-bracket + top rail | 3/8″ lag, 6 bolts into 3 studs | 6″ / 24″ | Rubber feet + grommets | $45 to $70 |
| Stud (2×6, 16″ o.c.) | 80 to 110 lb | Gravity, drain below port | Heavy-duty shelf kit (200 lb) | 5/16″ lag, 8 bolts into 4 studs | 8″ / 24″ | Full neoprene pad set | $60 to $90 |
| CMU (4″ block) | 35 to 60 lb | Gravity or pump | L-bracket + wedge | 5/16″ wedge, 2 anchors | 6″ / 24″ | Grommets | $40 to $55 |
| CMU (4″ block) | 60 to 110 lb | Gravity or pump | Heavy-duty shelf kit | 3/8″ wedge, 4 anchors | 8″ / 24″ | Neoprene pads + washers | $60 to $85 |
| Poured concrete (8″) | Any | Any | Heavy-duty shelf kit | 3/8″ wedge, 4 anchors, 3″ embed | 8″ / 24″ | Neoprene pads + washers | $55 to $80 |
| Thin partition (1/4″ to 1/2″ drywall) | Under 50 lb | Gravity only (short run) | L-bracket + toggles | 1/4″ toggle, 4 bolts | 6″ / 24″ | Rubber feet only | $30 to $45 |
| Any wall | Any | Pump needed (drain above port) | Any bracket from above | Any anchor from above | As above + pump clearance | As above + pump drip tray | Add $60 to $120 |
How to read this table in 30 seconds:
- Find your wall type in the first column.
- Find your unit weight in the second column.
- Confirm your drain path in the third column.
- Your row tells you the bracket, the anchor, the clearance, and the vibration fix.
- If your drain path is “pump needed,” add the condensate pump cost to the total.
If your setup doesn’t match any row exactly:
- Wall type is between two rows (e.g., 6-inch block, not 4 or 8): use the heavier row. Always over-specify the anchor.
- Unit weight is between two rows (e.g., 72 lb, between 50 and 80): use the 80-lb row. You’re closer to the upper bracket.
- Drain path is ambiguous (you haven’t located the floor drain yet): assume you need a pump. Budget for it. You can always use gravity if the drain turns out to be low enough. You can’t undo a hole you already drilled.
The one rule that overrides the table:
If your wall is a non-load-bearing partition AND your unit is over 60 lb, don’t mount it. The table says “thin partition, under 50 lb, toggles.” That’s the ceiling. A 70-pound unit on a 1/4″ partition with toggle bolts is a 70-pound pendulum waiting for a door-slam.
Use a floor-standing shelf instead.
Frequently Asked Questions
Can I just use two shelf brackets and lean the dehumidifier against the wall?
No. Two shelf brackets hold the unit, but nothing prevents it tipping forward. A 90-pound unit with a top-heavy fan assembly can pivot 3 inches forward in a vibration spike.
You need a back rail, a top strap, or a cradle-type bracket that grips the unit’s rear chassis. Leaning is not mounting.
Does wall-mounting void my dehumidifier’s manufacturer warranty?
It can. Most manuals (Frigidaire, Honeywell, Coway, Winix) state “install per this manual” and specify floor-standing orientation. If the compressor fails and the manufacturer’s inspection shows the unit was tilted or mounted in an unapproved orientation, they can deny the claim.
Check your specific model’s manual before you drill.
How high should I mount a dehumidifier for best performance?
Manufacturer specs across the 20-pint to 70-pint class recommend 36 to 54 inches from floor to the unit’s base. Warm, moist air stratifies upward. A unit at 42 inches captures that layer.
A unit at 24 inches (floor-standing) recirculates cooler, drier air near the ground and misses the stratified humidity pocket.
What happens if I use plastic drywall anchors instead of lag bolts into studs?
The anchor fails. A 3/16″ plastic anchor holds 25 to 50 lb static. Your unit weighs 50 to 110 lb and vibrates at 60 Hz.
The anchor’s neck cracks in three to six weeks. The bracket swings. The unit drops.
You end up with a hole in the wall, a dented compressor, and a second, more expensive install.
Do I need a permit to drill into my basement wall for this project?
In most US jurisdictions, no. Drilling two to four 1/2-inch holes in a basement CMU or concrete wall for a shelf bracket is not a structural modification. The local building department (check your county or city building site) governs permits for load-bearing changes, plumbing, and electrical.
A shelf with four anchors is not in that category. If you’re adding a new GFCI outlet, that’s an electrical permit in some areas.
My dehumidifier hums louder when wall-mounted than when it was on the floor. Is that normal?
Yes, and it’s the vibration transmission we covered in the loosening cycle section. The bracket transfers 60 Hz energy into the wall. The wall becomes a sounding board.
Fix it by adding 1/4″ neoprene isolator pads between the bracket and the wall, and 1/4″ neoprene sheets between the unit and the shelf. Noise drops 5 to 10 dB. If it’s still loud, the shelf is too thin.
Upgrade to 1-inch solid wood.

Table of Contents