That trusty vegetable peeler is a kitchen workhorse, isn’t it? It’s the tool we grab for everything from potatoes and carrots to apples and squash. But over time, even the best peelers can start to drag and tear instead of glide.
A dull peeler makes quick work of prep feel like a chore. Plus, it can lead to uneven peels and wasted produce.
The good news? You don’t need to toss that old peeler. Sharpening a vegetable peeler is surprisingly simple.
It’s a skill that saves you money and keeps your kitchen tasks efficient. We’ll walk you through exactly how to bring that blade back to life.
Why Bother Sharpening Your Vegetable Peeler?
You might be thinking, “Can you even sharpen a peeler?” Absolutely. Many peelers, especially those with swiveling blades, have blades that can be honed. A sharp peeler offers a few key advantages:
- Efficiency: A sharp blade cuts faster and with less effort. You’ll fly through your peeling tasks.
- Precision: It allows for thin, even peels. This means less waste of your precious vegetables and fruits.
- Safety: Ironically, a dull peeler can be more dangerous. You tend to apply more pressure, increasing the risk of your hand slipping. A sharp peeler requires less force, giving you better control.
- Longevity: Why buy new when you can fix what you have? Sharpening extends the life of your tool, saving you money in the long run.
Understanding Your Vegetable Peeler’s Blade
Most modern peelers, whether they’re Y-shaped or straight, feature a blade made of stainless steel. The peeling action works by shaving off thin layers of the fruit or vegetable’s skin. The blade itself is usually a small, angled piece of metal.
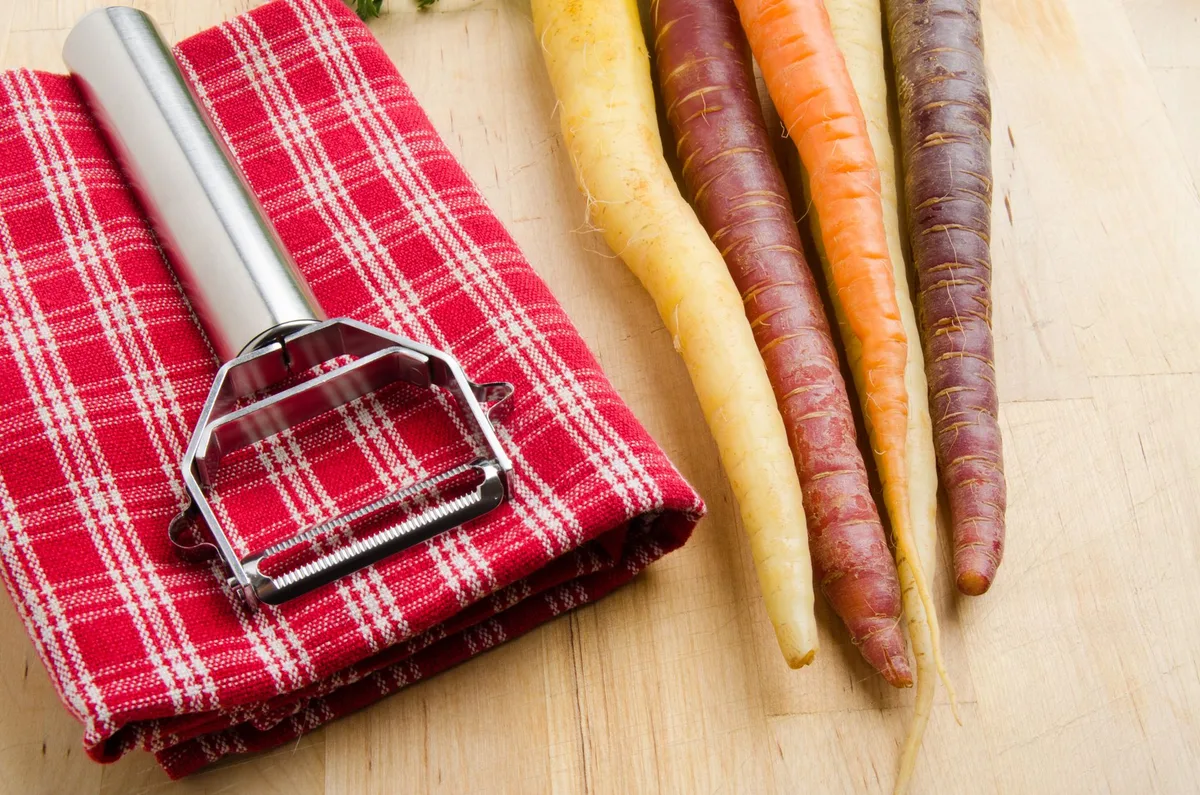
Image source: Pexels / Jason Deines (Pexels License)
The critical part is the edge. Over time, this edge either dulls from regular use or gets slightly misaligned. Our goal in sharpening is to realign and refine this edge.
For most swivel-head peelers, the blade is a discrete component that can often be accessed for sharpening. Straight peelers might have a more integrated blade, but the principle of honing the edge remains the same.
What You’ll Need to Sharpen Your Peeler
Before you dive in, gather your supplies. You don’t need a professional setup. Most of these items are probably already in your kitchen or can be found at a local hardware store.
- Sharpening Tool: This is the most crucial item. We’ll cover options below.
- Honing Steel/Sharpening Rod: Many people have one for their kitchen knives. A fine-grit honing steel works well for realigning the peeler’s blade edge. Look for ceramic or diamond-coated rods for added effectiveness.
- Fine-Grit Whetstone: A fine-grit whetstone (around 1000 grit or higher) is another excellent option. This provides a more controlled sharpening experience. You’ll need to use it with water or oil.
- Small Sharpening Stone: Some compact sharpening stones, designed for small blades or tools, can also be used.
- Emery Board/Nail File: In a pinch, a fine-grit emery board can work for very minor touch-ups. It’s not ideal for a deep sharpening but can certainly help.
- Cleaning Supplies:
- Dish Soap: For cleaning the peeler before and after sharpening.
- Clean Cloths/Paper Towels: For drying and wiping.
- Optional:
- Gloves: To protect your hands, especially if you’re new to sharpening.
- Vice or Clamp: To hold the peeler steady, if it’s a model where you can disassemble the blade.
Choosing the Right Sharpening Method
The best sharpening method depends on your peeler’s design and the tools you have available.
Method 1: Using a Honing Steel or Sharpening Rod
This is often the easiest and quickest method, especially for peelers with a distinct blade that can be angled against the rod.
- Clean the Peeler: Wash your vegetable peeler thoroughly with soap and water. Rinse and dry it completely. Any debris can interfere with the sharpening process and contaminate your food later.
- Secure Your Rod: Hold the honing steel or sharpening rod firmly in one hand. If you’re using a rod with a guard, ensure it’s secure. You can also place the butt of the rod on a damp cloth to prevent it from slipping.
- Find the Angle: This is the key. Most peeler blades have a bevel, which is the angled edge. You need to match that angle. For most standard peelers, this is somewhere between 15 and 20 degrees. Look at the existing bevel on your peeler blade. It’s the sloped surface leading to the very edge.
- The Stroke: Place the edge of the peeler blade against the rod at your chosen angle. Gently draw the peeler down the rod. Imagine you’re trying to shave a thin layer off the rod. The motion should be smooth and consistent.
- Back and Forth: Most experts recommend alternating strokes on each side of the blade rather than doing all strokes on one side before moving to the other. This helps maintain an even edge.
- Pressure: Use light, consistent pressure. You’re not trying to grind away metal; you’re refining the existing edge. Too much pressure can damage the blade.
- Work Your Way Around: If your peeler has a swivel head, you’ll need to work on both sides of the blade. Some models have a blade that inserts into a slot, making it tricky to access both sides simultaneously. In this case, you’ll focus on sharpening the exposed edge.
- For a Y-peeler, hold the peeler so the blade is at an angle to the rod. You want to hone the cutting edge. Imagine you’re trying to slice a sliver off the rod.
- Many swivel peelers have two cutting edges. You’ll need to touch up both.
- Test the Sharpness: After a few strokes on each side (start with 5-10 per side and adjust), carefully test the peeler. Try peeling a soft vegetable like a zucchini or a tomato. If it still catches or tears, give it a few more strokes. You can also carefully run your fingertip away from the edge to feel for any burrs or roughness, but do this extremely cautiously.
- Clean Again: Once you’re satisfied with the sharpness, wash the peeler again to remove any metal particles.
Method 2: Using a Fine-Grit Whetstone or Sharpening Stone
A whetstone offers more control but requires a bit more practice. This method is excellent if you regularly maintain your kitchen knives.
- Prepare the Stone: If you’re using a water stone, soak it according to the manufacturer’s instructions. Usually, this means submerging it in water until it stops releasing air bubbles. For oil stones, apply a thin layer of honing oil.
- Clean the Peeler: Just like with the rod method, start by cleaning and drying your peeler thoroughly.
- Mount the Stone: Place the whetstone on a stable surface. Many stones come with a non-slip base. If yours doesn’t, use a damp cloth underneath to keep it from sliding.
- Consistent Angle: This is paramount. You need to maintain the same bevel angle we discussed before (around 15-20 degrees) as you move the peeler blade across the stone.
- The Stroke:
- For Swivel Peelers: You might need to disassemble the blade if possible, or work carefully around the swivel mechanism. Hold the peeler so the blade edge is in contact with the stone at the correct angle. Gently slide the blade across the stone. The motion should be like you’re trying to slice a very thin layer off the stone’s surface.
- For Straight Peelers: If the blade is integrated, you’ll need to find a way to position the peeler so the edge can be worked. This can be challenging and might require a very small sharpening stone or an emery board.
- Back and Forth Motion: Alternate strokes on each side of the blade, or sharpen one side until you feel a slight burr (a small ridge of metal) on the opposite side, then switch.
- Light Pressure: Apply just enough pressure to feel the blade engaging with the stone. You’re honing, not grinding.
- Check for Burr: After several passes, carefully feel for a burr on the opposite side of the edge you’ve been sharpening. This indicates you’ve ground that side sufficiently. Then, flip the peeler and work on the other side until you feel a burr on the first side.
- Stropping (Optional): To remove the burr and refine the edge further, you can do a few very light “stropping” passes. Gently drag the peeler blade across the stone with the bevel flat against the surface, no angle, to polish the edge.
- Test and Clean: Test the peeler on a vegetable. If it’s not sharp enough, repeat a few more strokes. Once satisfied, wash the peeler thoroughly to remove any stone residue or oil.
What About Electric Peelers or Specialty Peelers?
- Electric Peelers: Most electric peelers have blades that are not designed to be sharpened. They are typically replaceable, or the unit is designed to be retired when the blades dull. Check the manufacturer’s instructions for your specific model. Attempting to sharpen an electric peeler’s internal blades could damage the unit.
- Specialty Peelers: Some peelers, like those for citrus or specific fruits, might have blades that are too small or integrated in a way that makes them difficult to sharpen with standard methods. For these, replacement is usually the most practical option.
Maintaining Your Peeler’s Sharpness
Once you’ve got your peeler slicing like new, a little maintenance goes a long way to keep it that way.
Regular Cleaning and Drying
After each use, wash your peeler with warm, soapy water. Don’t just let it sit in the sink. Rinse it well.
Crucially, dry it thoroughly before putting it away. Moisture is the enemy of metal. Letting it air dry can lead to rust spots, which dull the blade and can affect its performance.
This is good practice for all your kitchen utensils, much like ensuring you keep your best cutting boards for kitchen clean and dry.
Proper Storage
Store your peeler properly. Avoid tossing it into a drawer with other metal utensils where it can bang against knives and other sharp objects. This can nick and damage the blade.
Consider:
- Gadget Drawer Organizers: These keep tools separated.
- Blade Covers: Many peelers come with a protective cover. If yours doesn’t, you might be able to find a universal one.
- Dedicated Slot: If you have a utensil crock, give your peeler its own space.
Occasional Honing
Even with good care, the edge will naturally dull over time. Don’t wait until it’s completely useless. A quick once-over with a honing steel every month or two (depending on usage) can keep it performing at its peak.
This is similar to maintaining a best knife sharpener for shun, regular upkeep prevents major issues.
When to Replace Your Peeler
While sharpening can revive most vegetable peelers, there comes a time when replacement is the better option.
- Irreparable Damage: If the blade is chipped, bent, or significantly damaged, sharpening won’t fix it.
- Worn-Out Blade: Some peelers, especially very inexpensive ones, have blades that are simply worn down to the point where they can no longer hold an edge, no matter how much you try to sharpen them.
- Corrosion: Deep rust that you can’t clean off might mean it’s time for a new one.
- Design Limitations: If you’ve tried sharpening and it still doesn’t perform well, the peeler’s design might be inherently flawed or simply not suited to your needs anymore.
When that time comes, consider investing in a high-quality peeler. A good peeler, like one with a comfort grip and a sharp, replaceable blade, can be a fantastic addition to your kitchen, similar to how choosing the best blender for vegetable smoothies makes meal prep significantly easier.
Common Peeler Sharpening Mistakes to Avoid
We’ve all been there, trying to fix something and making it worse. Here are a few common blunders to steer clear of:
- Using the Wrong Grit: Trying to sharpen with a coarse stone won’t give you a fine edge. It can actually create more damage. Stick to fine grits for honing and light sharpening. For knife sharpening enthusiasts, this is like using the wrong grit on your best sharpening stone for kitchen knives.
- Incorrect Angle: If your angle is too steep or too shallow, you won’t be sharpening the edge effectively. You’ll either be working the side of the blade or just skimming the surface. Take a moment to observe the existing angle.
- Too Much Pressure: This is a big one. You’re not trying to grind down metal. Over-applying pressure can overheat the blade, permanently damage it, or create an uneven edge that’s hard to correct. Gentle, consistent strokes are key.
- Not Cleaning Properly: Metal particles left on the blade can end up in your food. Always wash your peeler thoroughly after sharpening.
- Sharpening After Every Use: Unless your peeler is particularly poor quality or you peel extremely tough skins, you don’t need to sharpen it every single time. Regular honing is usually sufficient.
Conclusion: Your Peeler’s Second Life
Giving your vegetable peeler a sharpening is a simple, rewarding task. It resurrects a dull instrument into a kitchen ally that makes food preparation a breeze. By understanding the blade and using the right tools with a steady hand, you can enjoy the benefits of a sharp peeler for years to come.
Don’t underestimate the power of a keen edge to transform your cooking experience. So, grab that peeler, find a honing steel or a fine stone, and get ready to shave those skins off with ease!

Table of Contents