Loading a dishwasher looks like the simplest chore in the house, right up until you pull out a glass with grit in the bottom. If you want to know how to load a dishwasher correctly, the short version is this: it’s a plumbing puzzle, not a stacking contest. Water has to reach every surface, and your job is to get out of its way.
In our research, the two failures behind most dirty dishes are blocked spray arms and plates that touch each other. Manufacturer specifications for standard 24-inch machines describe a wash zone the spray arm can only reach when the racks are loaded with clearance in mind. Get that clearance right, and everything downstream gets easier.
Here’s how to build a load that actually works.
How to Load a Dishwasher Correctly
Scrape food off, don’t rinse. Load plates facing the center, tilted back. Put glasses upside down on the top rack.
Keep the spray arm and detergent door clear. Run a full load on the right cycle, then clean the filter monthly.
Why the Rack Is a Water-Path Problem, Not a Storage Shelf
Every dishwasher cleans the same way. Hot water sprays up from the bottom, bounces off surfaces, and drains away. Your spray arms need to spin freely.
Anything tall, wide, or tilted wrong becomes a wall between the water and your dishes.
The two things every load must protect: spray arm clearance and water sheeting
Spray arm clearance is the gap between the arm and the nearest dish. If a sheet pan hangs below the lower rack, the arm stops mid-rotation. Half the load never sees water, and you blame the detergent.
Water sheeting is the other half. Water needs to run down a surface, not pool on top of it. That’s why a bowl loaded face up comes out with a puddle of dirty water sitting inside it.
Why pre-rinsing works against you (and what to scrape instead)
Modern detergents need food to work on. Enzymes in the tablet or powder bind to soil and break it down. Rinse everything off first and your detergent has nothing to attack.
Scrape instead. Push solids into the bin, then load. If a plate sat with greasy sauce overnight, a 10-second rinse is fine.
Just don’t run every single dish under the tap.
There’s a water angle too. Per ENERGY STAR guidance, unnecessary pre-rinsing can waste thousands of gallons a year, and a standard 24-inch machine uses only about 3 to 6 gallons per cycle. Scraping beats rinsing on every metric.
What “clean” actually depends on
Temperature, contact time, and chemical action. Water needs to hit around 120 to 150°F (49 to 66°C) in the main wash. Final rinse climbs higher, up to 160°F (71°C) on sanitize cycles.
Your only job in all this is contact time. Every dish needs an unobstructed path to water. Load with that single rule in mind and the rest follows.
Lower Rack: Angling Plates, Bowls, and Pans Into the Spray
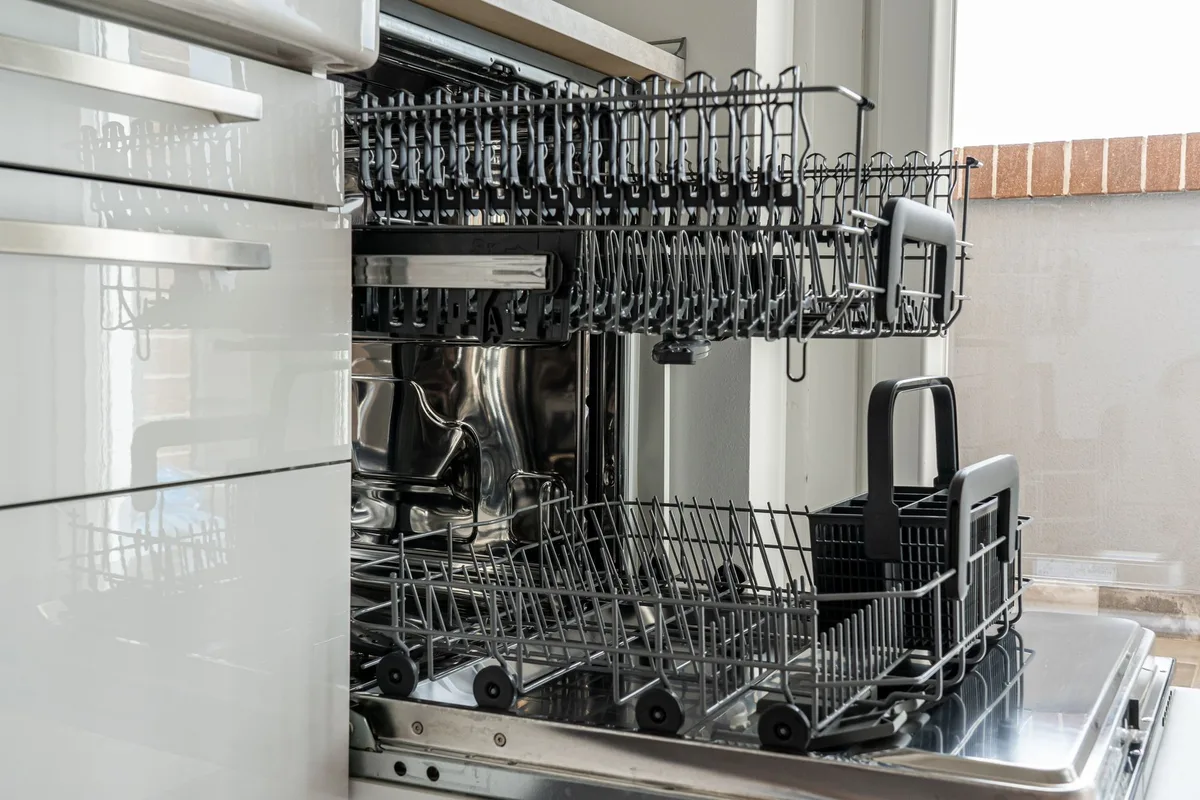
The lower rack does the heavy lifting. Plates, bowls, pots, and sheet pans all live here because the strongest water pressure comes from the bottom arm. Load it carelessly and everything above it suffers too.
Plate placement: face the center, tilt back, leave a finger-width gap
Load plates with the dirty side facing the middle of the tub. Tilt them slightly back so water runs off instead of sitting in the curve. Leave roughly a finger’s width between plates.
In our research, touching plates are the number one cause of clean-on-one-side, crusty-on-the-other. If your rack has folding tines, drop one section flat for a wide pot or a cutting board. If it doesn’t, accept the smaller load.
Bowls and containers: why flat-face-up is the single biggest loading error
A bowl loaded face up collects water and holds it. Nothing drains, nothing sprays through, and you get a cloudy puddle at the bottom of the tub.
Load bowls on their side or tilted forward at about 45 degrees. Small containers go over a tine, never on top of one. Plastic lids get their own space in the upper rack or a cutlery tray, where they won’t flip.
Pots, pans, and sheet pans: where they go so they don’t shadow everything behind them
Pans are the biggest shadowing risk in the machine. A sheet pan set flat across the back blocks two or three plates behind it.
Stand sheet pans on edge along the side of the rack. Put pots mouth-down and slightly angled. If a pan is too big to angle, it’s a hand-wash job or a solo quick cycle.
Never stack pans inside each other. The inside of the bottom pan simply never gets water.
What goes in the front versus the back
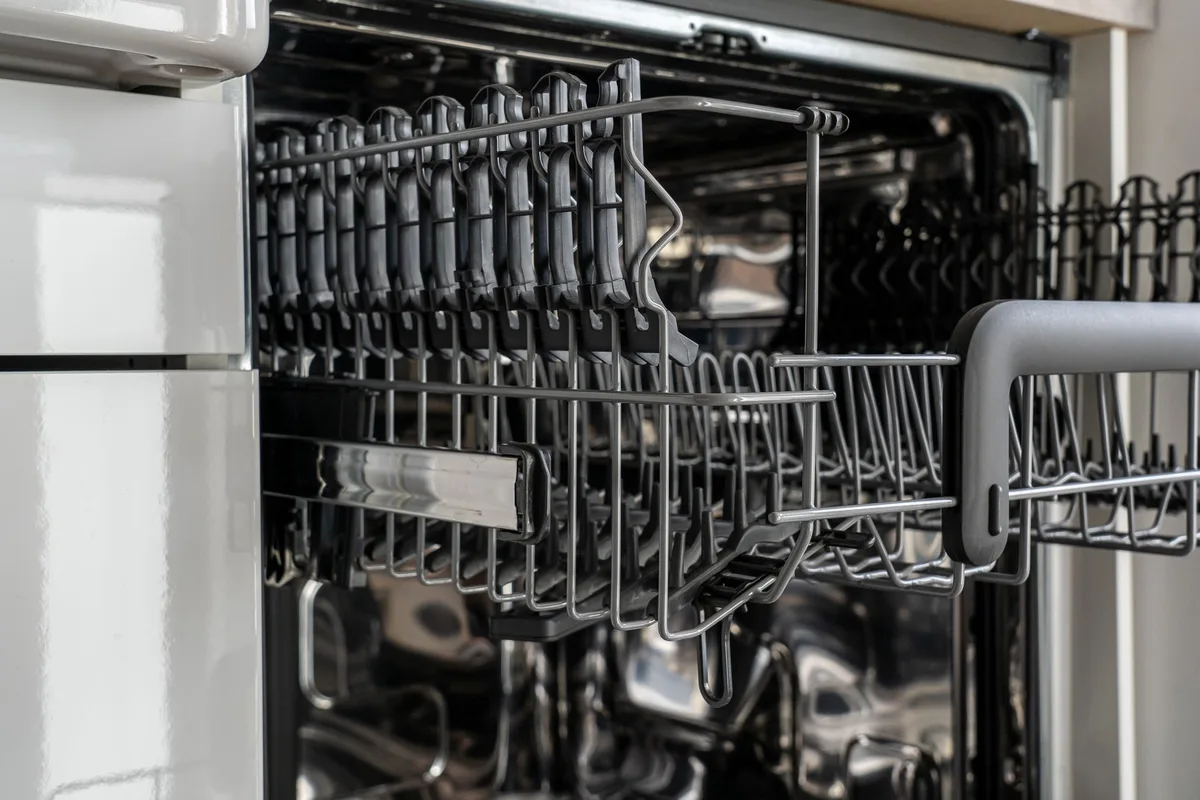
Front edge stays low. That’s the detergent door zone, and tall items there jam the dispenser. Save the front for plates and shallow bowls.
Back and sides take the tall stuff: pitchers, tall pots, cutting boards. Aim the dirtiest surface toward the center column where the spray concentrates.
Upper Rack: Glasses, Mugs, and Plastics the Right Way Up
The upper rack sits closest to the detergent dispenser and catches the final rinse. That makes it the right home for anything delicate, tall, or prone to spotting.
Why glasses go upside down and never over the tines
Glasses load mouth-down. Always. Any other way and water pools in the base, which is exactly where that ring of grit comes from.
Don’t drop the rim over a tine either. A tine inside the glass can chip the rim, and glass chips are sharp and hard to spot. Set glasses between tines, not on them.
Stemware, wine glasses, and the clips that actually protect them
Wine glasses need a stemware clip or a dedicated slot. Resting them at an angle against another glass flexes the bowl and cracks it over time.
If your machine has a stemware holder, use it. If not, hand-wash crystal. Owner’s manuals from most major brands recommend hand-washing crystal and hand-painted glass regardless of cycle.
Adjustable upper-rack height and when to drop it
Most upper racks adjust up or down by an inch or two. Drop the rack when you’re loading tall glasses. Raise it when a pot on the bottom needs headroom.
Check clearance after adjusting. Push the rack in and out with the door half open to feel for contact before you add dishes.
What actually belongs up top
Mugs, small bowls, plastic containers, silicone spatulas, and light glassware. Skip anything heavy. Heavy items up top can shift mid-cycle and crack the rack or the item itself.
Plastic needs a caveat. Lightweight containers can flip and land on the heating element. Weight them down with a mug or place them in a corner where they can’t move.
Cutlery, Third Racks, and Knife Safety
Cutlery is where most loads quietly fail. Spoons nest, water can’t reach the surfaces, and you end up with a film of coffee residue on every teaspoon.
Basket loading: mixed handles, no nesting, blades down
Don’t sort your cutlery. Mixing forks, knives, and spoons keeps them apart and lets water through. Load handles up and down at random so no two pieces sit flush.
Sharp knives go blade down. A blade-up knife is a hand injury waiting to happen, especially if kids empty the machine. Point forks and spoons down too, so nobody grabs a prong.
Third-rack trays and where small lids and long utensils belong
A third rack is a shallow tray above the upper rack. It’s built for long utensils, small lids, and serving spoons that would otherwise nest in the basket.
Load it flat, not stacked. Long items lay parallel to the door so they don’t block the upper spray arm. Keep the tray light and don’t overload the front edge.
Cutlery basket versus third rack
| Feature | Cutlery basket | Third rack |
|---|---|---|
| Best for | Families loading 12+ pieces | Long utensils and small lids |
| Water reach | Good with mixed loading | Better separation, less nesting |
| Space cost | Eats lower rack room | Costs about 1 inch of height |
| Accessibility | Easy to grab and empty | Requires reaching over |
What shouldn’t go in the basket at all
Good knives, wooden spoons, and anything with a hollow handle that traps water. Cast iron and carbon steel never go in. Neither does anything with a glued joint, because heat and moisture break the bond.
Silver flatware is a special case. It tarnishes faster in a dishwasher than by hand, particularly alongside stainless steel. If you care about it, wash it separately.
The Three Blockers: Detergent Door, Spray Arm, and Filter
Three small parts decide whether a load works or fails. Check all three every time before you close the door. It takes 15 seconds.
Detergent door clearance and why your pod never dissolved
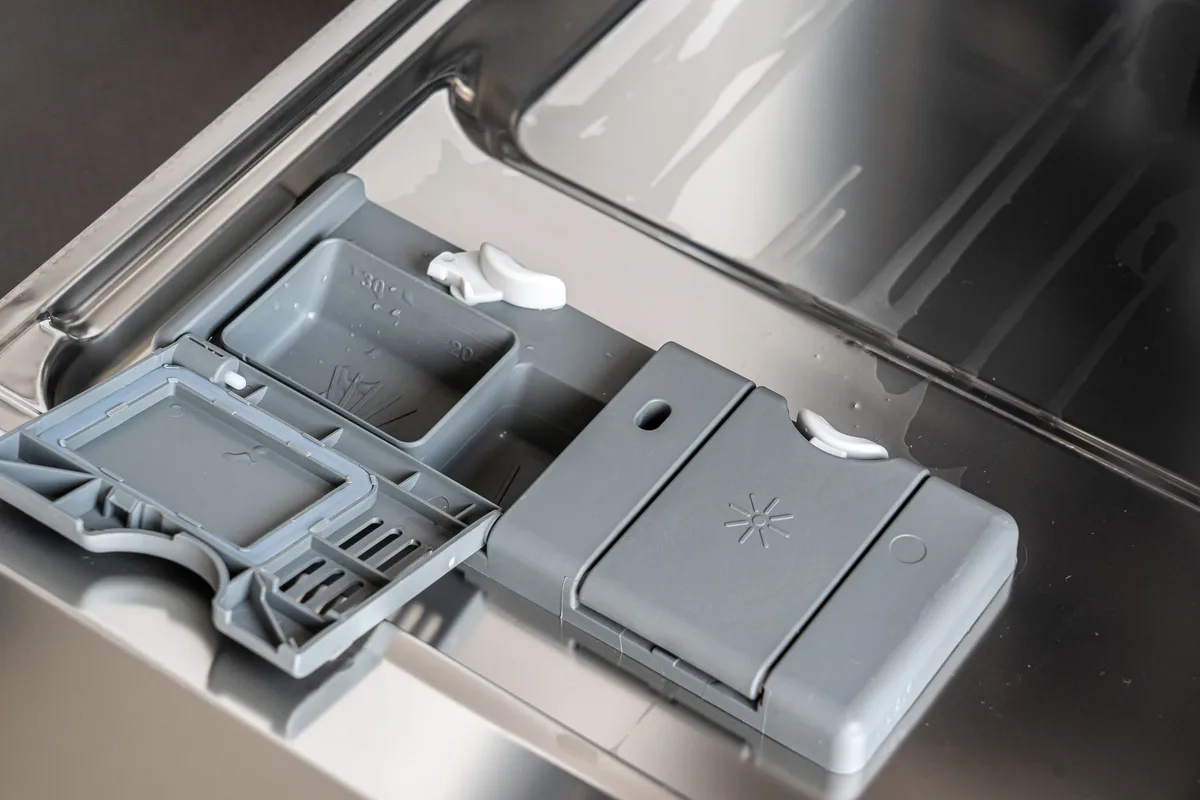
The detergent door flips open mid-cycle. If a sheet pan or a dinner plate sits in front of it, the door jams and the pod stays inside. You get a full cycle with no detergent and a rack of dirty dishes.
Load tall items to the sides. Keep the front edge of the lower rack low. That single habit saves more re-washes than any detergent upgrade.
Testing spray arm rotation before you close the door
Spin the lower arm with your hand. It should complete a full rotation without hitting anything. Spin the upper arm the same way.
If it catches, find the item and reposition it. Don’t close the door and hope. A stalled arm means zero water pressure reaching half the load.
Filter access and the monthly clean that keeps everything working
The filter sits at the bottom of the tub. Food debris collects there, and once it does, the machine starts to smell and performance drops.
Pull the filter every one to two months. Rinse it under warm water with a drop of dish soap. Reassemble it fully before running a cycle.
Per NSF International, a certified sanitize cycle (NSF/ANSI 184) only delivers the temperature and contact time it claims when water circulates properly. A clogged filter undermines that. Standing water in the base is your warning sign, and it usually means the filter or drain is blocked.
The 15-second pre-close checklist
- Spray arms spin freely, top and bottom
- Detergent door has clear space in front of it
- Nothing pokes through the bottom of either rack
- Detergent is in the right compartment
- Rinse aid reservoir isn’t empty
- Every item is angled to drain
What Never Belongs in There and How to Read Dishwasher Safe
Some items are never worth gambling on, no matter how well you load the rack. The honest answer is that a short list of materials should stay out of the machine entirely.
Here’s the never-load list, grouped by why:
- Cast iron and carbon steel. Hot water strips the seasoning, and the rinse leaves rust in the crevices.
- Good knives. The edge dulls against other cutlery, and the heat can loosen glued handles.
- Wood and bamboo. Cutting boards, spoons, and salad bowls warp, split, and lose their finish.
- Copper and unlined aluminum. They discolour, and aluminum pans can pit.
- Nonstick. The coating degrades faster under hot water and harsh detergent.
- Crystal and hand-painted glass. Etching is permanent, not a rinse-off film.
- Gold-rimmed china. The metallic trim wears away in a few cycles.
- Insulated mugs and travel cups. Water gets trapped between the walls and never drains.
- Printed plastics. The print lifts, and cheap lids can warp onto the heating element.
- Silver flatware. It tarnishes faster in the machine, especially next to stainless.
Why the label beats every general rule
The manufacturer’s instruction always wins. “Dishwasher safe” means the item survived a test cycle, not that it will survive a thousand. A pan labelled dishwasher safe can still dull its finish over two years of daily loads.
If a label says “top rack only,” believe it. That wording exists because the heating element or the lower spray pressure damages the item. Loading it in the bottom rack anyway is how lids warp and plastic handles go soft.
If you’re not sure, hand-wash it
Uncertainty is your signal to stop. One hand-washed pan takes three minutes. A warped cutting board, a pitted aluminum pot, or a clouded wine glass lasts forever.
There’s a middle ground worth knowing. Anything you’d be annoyed to replace gets hand-washed. Everything else takes its chances.
Visual Mistakes You Can Spot in Five Seconds
Open the door and look before you press start. Four problems account for most disappointing loads, and every one of them is visible without running anything.
Nesting, overcrowding, and the “just one more plate” problem
Plates that touch each other block the water film. Squeeze in a twelfth plate and two of them come out with a dry, crusty stripe. If the tines won’t hold it apart, the plate doesn’t belong in this load.
Overcrowding looks similar but hits harder. A full rack cleans well. A wedged rack cleans badly, because water can’t reach the gaps.
Plastic containers that flip onto the heating element
Lightweight containers lift under spray pressure and land face-down on the exposed element. You’ll smell it before you see it.
Weight them down or trap them in a corner. A plastic tub that can move is a plastic tub that will.
Items poking through the bottom of the rack
Look under the lower rack. A knife tip, a fork tine, or a skewer hanging through will stop the spray arm dead. So will a spatula handle.
Push everything up so the arm sweeps clean. This one check prevents more re-washes than any detergent change.
Glasses sitting over the tines
A tine inside the glass chips the rim and blocks water from the base. You get a chipped glass and a gritty bottom at the same time. Shift it between tines and move on.
Load Patterns by Dish Type: A Quick Visual Reference
A diagram of a well-loaded machine would show one thing above all else: everything angled to shed water toward the center. Here’s the pattern, item by item.
| Item | Rack | Orientation | Watch out for |
|---|---|---|---|
| Dinner plates | Lower | Facing center, tilted back | Touching neighbours |
| Bowls | Lower | On their side, about 45 degrees | Face-up puddles |
| Glasses | Upper | Mouth down, between tines | Tines inside the rim |
| Mugs | Upper | Upside down, angled | Pooling in the base |
| Cutlery | Basket or third rack | Mixed handles, blades down | Nesting spoons |
| Pots and pans | Lower | Mouth down, angled | Shadowing plates behind |
| Sheet pans | Lower | On edge, along the side | Blocking the spray arm |
| Plastic tubs | Upper | Weighted, in a corner | Flipping onto the element |
| Long utensils | Third rack | Parallel to the door | Blocking the upper arm |
What the pattern actually teaches
Every row follows the same logic. The dirty surface faces the water. The item drains rather than pools.
Nothing sits between the spray and another dish.
Once you see it that way, you stop memorising rules. You look at an item, ask which way the water needs to hit it, and load accordingly.
Adapting when the rack doesn’t cooperate
Folding tines change the pattern, not the principle. Drop a section flat for a wide pot and accept the smaller load. Adjustable upper racks buy you headroom for tall glasses.
If a load won’t fit the pattern, split it. Two sensible loads beat one crammed one every time.
Matching the Cycle, Detergent, and Rinse Aid to the Load
Loading gets you most of the way there. The rest comes down to three settings, and most households get all three slightly wrong.
Normal, Eco, Heavy, or Quick: picking honestly
| Cycle | Best for | Typical time |
|---|---|---|
| Normal | Everyday mixed loads | 90 to 130 minutes |
| Eco | Full loads, energy saving | 150 to 180+ minutes |
| Heavy | Baked-on and greasy cookware | 120 to 160 minutes |
| Quick or 1-Hour | Lightly soiled, no dried food | 45 to 60 minutes |
Eco cycles run longer but use less water and energy, because they rely on soak time instead of heat. Skip Eco for a load of dried-on casserole dishes. Skip Quick for anything that sat overnight.
Detergent dose and pod placement
Powder gives you control, and most loads need about one tablespoon (15 g) in the main compartment. Heavy soil gets a little in the pre-wash too. Pods go in the main compartment, never loose in the tub.
Pods need a long enough cycle to dissolve. On a 45-minute quick wash, the casing can still be intact at the end.
Rinse aid, hard water, and soft water etching
Rinse aid makes water sheet off instead of beading into spots. Start the dial at 4 and adjust. Spotting means go higher, streaking means go lower.
Hard water above 7 gpg (grains per gallon) needs more help. A machine with a built-in softener, or a combo detergent plus rinse aid, handles it better than detergent alone.
Soft water brings the opposite risk. Too much detergent on soft water etches glass permanently, leaving a cloudy film that looks like dirt and won’t wash off. Use less detergent, not more.
Frequently Asked Questions
Which rack do glasses go on?
The upper rack. Glasses load mouth-down between the tines, never over them. The upper rack sits closer to the final rinse and holds items that drain easily.
Keep heavy glassware low if it can’t sit stably up top.
Is it bad to pre-rinse dishes before loading?
Yes, mostly. Modern enzymes need food soil to work on, and ENERGY STAR guidance notes that unnecessary rinsing wastes water. Scrape solids into the bin and load.
A quick rinse is fine for greasy sauce left overnight.
Where do knives go in the dishwasher?
In the cutlery basket, blade down, or in a third-rack tray laid flat. Mix them with other cutlery so they don’t nest. Good kitchen knives should be hand-washed, since heat and detergent dull the edge and can loosen handles.
Why are my dishes still dirty after a full cycle?
Check three things in order: a blocked spray arm, an item in front of the detergent door, and a clogged filter. Any one of them produces a full cycle with no cleaning. Spin both arms by hand before closing the door.
Can I put pots and pans in the dishwasher?
Only if the manufacturer says so. Stainless steel and some nonstick pans are fine. Cast iron, carbon steel, copper, and unlined aluminum should stay out.
Load pans mouth-down and angled so they don’t shadow the plates behind them.
How often should I clean the filter?
Every one to two months for most households. Rinse it under warm water with a drop of dish soap and reassemble it fully. Standing water in the base or a lingering smell means it’s overdue.

Table of Contents