Loading a dishwasher looks simple until a saucepan comes out discolored or a nonstick skillet comes back with a chalky film. Most of that damage traces back to one decision made in the two seconds before the door closes. Learn how to load pots and pans in a dishwasher properly, and you’ll stop losing cookware to cycles it was never built for.
Manufacturer care guides set the temperature bar here: water supplied to a machine at 120°F (49°C) cleans well, and NSF/ANSI 184 sanitizing cycles push to 150°F (65°C) and above. That’s hot enough to strip seasoning off cast iron and to etch soft aluminum over time. Material and placement decide the rest, so start with the short answer below.
How to Load Pots and Pans in a Dishwasher
Scrape off food, then check the material. Load pots and pans face-down on the lower rack. Angle them toward the spray arm.
Leave gaps so water can reach every surface. Keep nonstick, cast iron, and copper out of the machine.
Why One Bad Load Costs You Cookware (and a Second Wash)
The cost of a bad load shows up twice. First you lose a pan you liked. Then you run the whole cycle again because the first one didn’t clean anything.
Blocked spray is the usual culprit. A stockpot sitting flat over the lower arm stops rotation, and everything behind it gets splashed with dirty water instead of rinsed. You end up with grit on the plates and a greasy film on the pan.
Nesting is the quiet version of the same mistake. Two pans stacked bowl-to-bowl create a sealed pocket. Water can’t get in, detergent can’t reach the soil, and heat can’t escape.
That trapped heat is what warps thin aluminum and bubbles nonstick coating.
Warping isn’t cosmetic, either. A pan with a dished base rocks on a flat cooktop, which means uneven contact and hot spots the next time you fry. Once the bottom is out of true, no amount of reseasoning fixes it.
Water waste is the other hidden bill. A full machine load uses roughly 3 to 4 gallons on a standard cycle, according to ENERGY STAR figures. Re-washing doubles that number for zero benefit.
Loading it right the first time is the cheapest efficiency upgrade in your kitchen.
There’s an appliance-side cost too. Food debris and grease that never reach the filter settle in the sump and on the door gasket. Over a year, that’s the sour smell people blame on the machine.
It’s almost always a loading pattern, not a broken dishwasher.
The Material Test: Which Pots and Pans Are Actually Dishwasher-Safe
One question decides everything else: what is the pan made of? Check that before you check whether it fits. “Dishwasher safe” is a manufacturer claim, not a universal property of cookware, and it varies by brand and by model.
| Material | Dishwasher safe? | What happens if you load it |
|---|---|---|
| Stainless steel (18/10, clad) | Yes, usually | Safe on the lower rack; hard water leaves spots |
| Hard-anodized aluminum | No | Chalky white film that won’t scrub off |
| Nonstick (PTFE or ceramic) | Rarely | Coating degrades and release fails |
| Cast iron, carbon steel | No | Rust and stripped seasoning |
| Copper | No | Tarnish and dulling |
| Enameled cast iron | Sometimes | Enamel can chip; read the care guide |
Stainless steel, clad, and disc-base pans
Stainless steel is the safe bet in most machines. Clad pans with a bonded aluminum or copper core are fine too, because the reactive layer is sealed inside. Load them on the lower rack and expect some spotting in hard water.
One caveat: detergents with high alkalinity can leave a blue or rainbow sheen on polished stainless. It wipes off with vinegar. It isn’t damage.
Nonstick (PTFE and ceramic) coatings
Most nonstick makers still recommend hand washing, and there’s a reason. Detergent, heat, and spray pressure slowly break down the coating’s release surface. The pan doesn’t fail all at once.
It just stops letting go of eggs.
Check the care guide for “top rack only” or “hand wash.” If it says hand wash, believe it.
Hard-anodized aluminum
Hard anodizing is a surface treatment, not a coating you can sacrifice. Hot water and alkaline detergent break it down. The result is a dull, chalky, mottled finish that no cleaner reverses.
Cast iron, carbon steel, and copper
None of these belong in a dishwasher. Cast iron and carbon steel lose their seasoning and rust within a cycle or two. Copper discolors and needs repolishing.
Skip the machine entirely and wash by hand.
Enameled cast iron, glass lids, and plastic knobs
Enameled cast iron is brand-specific, so read the manual. Glass lids and plastic handles are the parts that fail first. A hollow handle can trap water and dribble it out days later.
Remove knobs and lids and wash them separately.
How to read a dishwasher-safe label and care guide
Look for a symbol of a plate under falling water, or the words “dishwasher safe” in the care sheet. Then look for qualifiers: top rack only, no heated dry, hand wash recommended. The qualifier matters more than the symbol.
Per NSF, residential sanitizing performance is tested to NSF/ANSI 184, but that standard covers cleaning efficacy, not whether your specific pan survives.
Rack-by-Rack Placement: Where Every Pan, Lid, and Knob Belongs
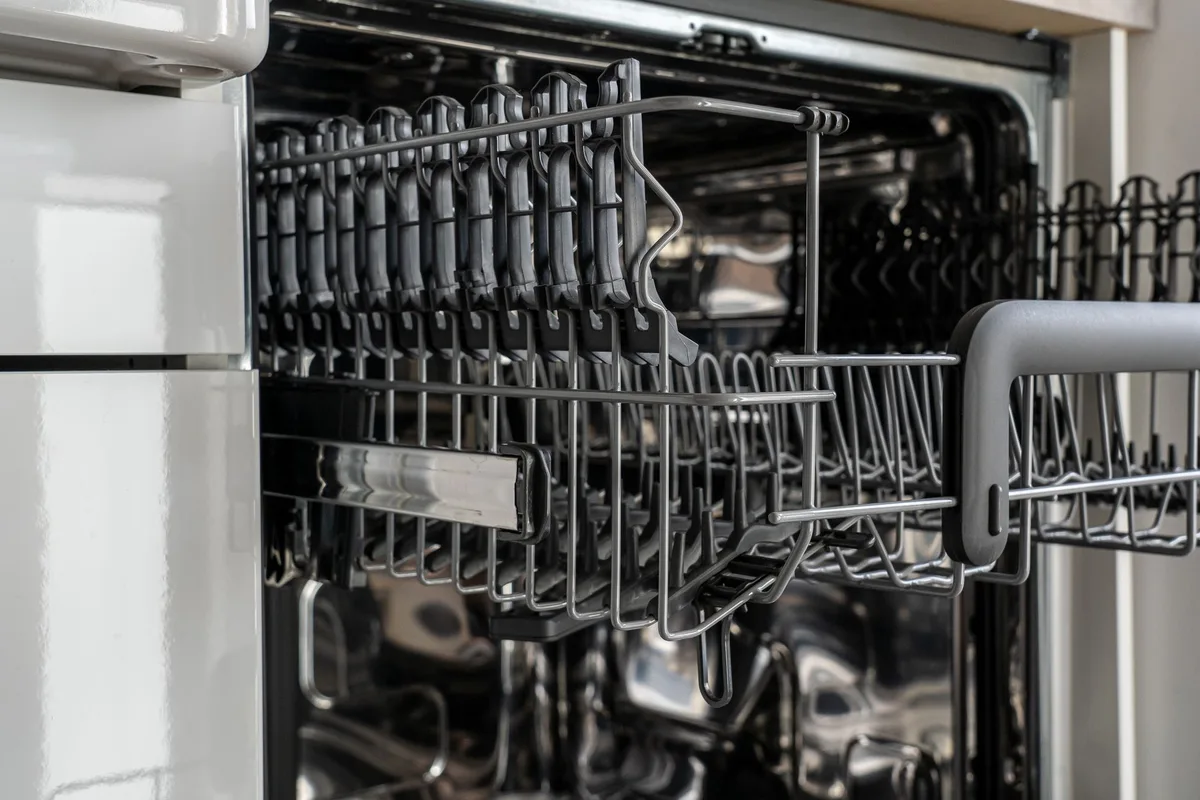
Placement is a geometry problem. Water sprays up from the bottom and down from the top, and everything in the rack is either in the path or in the way.
Lower rack: the only real home for pots and pans
Load pots and pans face-down or at a steep angle on the lower rack. The soiled surface should face the spray, not the ceiling. Keep them at the front and sides, and never directly over the spray arm housing.
If a stockpot is too tall for the top rack, it goes on the bottom. If it’s too tall for the bottom, it goes in the sink.
Upper rack: what’s safe up there (and what isn’t)
Only top-rack-safe items belong up top, and that usually means small nonstick pans and plastic utensils. The upper rack gets less spray pressure and less heat. Large pans up top block the middle spray arm and starve the whole load.
Third rack and silverware basket: lids, knobs, and small parts
Lids, knobs, and pan handles go in the basket or third rack. The basket is also where you clip light items so they don’t flip onto the heating element. Set lids on edge, not flat.
A flat lid cups water and never dries.
The spray-arm spin test before you close the door
Give both spray arms a full spin by hand before you close the door. If either one hits a pan, reposition it. This ten-second check prevents the single most common load failure, and it costs you nothing.
The Step-by-Step Loading Workflow, From Scrape to Start
Follow this order every time and the guesswork goes away. It runs top to bottom, which is how the machine fills anyway.
- Scrape, don’t rinse. Knock solids into the bin and skip the sink rinse. Modern detergents are built to grab food, and a quick scrape saves 20 gallons a load.
- Sort by material. Pull out cast iron, carbon steel, copper, and anything labeled hand wash. Set them aside before the safe items go in.
- Pre-treat burnt-on residue. A paste of baking soda and water for ten minutes does more than a heavy cycle will.
- Start with the largest pans. Load the big pots at the sides and back of the lower rack, angled downward.
- Fill the gaps with plates and bowls. Plates go in the front, facing forward. Bowls go in at a tilt so they drain.
- Place lids and small parts. Lids and knobs go in the basket or third rack, set on edge.
- Spin the spray arms. Check both. Reposition anything that blocks a full rotation.
- Load detergent and rinse aid. Fill the dispenser, close it, and top off the rinse aid reservoir.
- Pick the cycle. Choose Heavy or Pots & Pans, add Hi-Temp or Sanitize for greasy loads, and enable Extra Dry if your machine has it.
- Unload top down. Pull the top rack first so drips don’t land on clean dishes below.
The whole routine takes about four minutes on a normal load. Scraping and the spray-arm check carry most of the value. Everything else is just spacing.
Loading Mistakes That Block Water Flow and Ruin Finishes
Most bad loads come from six repeatable errors. Fix these and the machine does the rest.
Overcrowding. Every pan you add takes up spray space. Pack the rack and water hits the front row only. Leave at least an inch between items and never let a handle cross a spray path.
Nesting pans. Two pans stacked bowl to bowl seal water out and heat in. That trapped heat is what warps thin aluminum and bubbles coatings. Load one pan per slot, face down.
Covering the spray arm. A wide skillet laid flat over the lower arm stops the whole cycle. Test the rotation by hand every time. If it hangs, the pan is in the wrong spot.
Loading light items on the top rack without clipping them. A plastic lid or small pan can flip onto the heating element and melt. Clip it down or move it to the basket.
Skipping the filter check. Grease and food that never reach the filter collect in the sump. That’s the source of the sour smell people blame on the machine. Clean the filter monthly.
Using the wrong cycle for the load. A quick wash won’t dissolve a pod or cut heavy grease. Match the cycle to the soil, not to your patience.
Cycle, Detergent, and Rinse Aid: Setting Up the Load to Actually Clean
Loading gets the water where it needs to go. The setup decides whether that water works.
Choosing Heavy, Hi-Temp, or Sanitize
Heavy or Pots & Pans is your default for greasy cookware. It runs longer and uses hotter water than Normal. Hi-Temp adds a boost for baked-on residue, and Sanitize pushes past 150°F (65°C) to NSF/ANSI 184 standards.
Use Sanitize when someone in the house has been sick, not on every load.
Powder, gel, or pods, and why short cycles fail
Pods need time and water volume to dissolve fully. On a 30-minute quick wash, the pod casing can still be intact when the cycle ends, so the detergent never activates. Powder and gel start working immediately, which makes them the more forgiving choice for fast cycles.
Rinse aid, hard water, and spot-free results
Rinse aid breaks surface tension so water sheets off instead of beading. Skip it and hard water leaves mineral spots that look like damage. Above 7 gpg on a water hardness scale, you’ll notice the difference within a week.
| Water hardness | What to add | What to expect |
|---|---|---|
| Soft (under 3.5 gpg) | Rinse aid optional | Minimal spotting |
| Hard (7 to 10.5 gpg) | Rinse aid every load | Some filming without it |
| Very hard (over 10.5 gpg) | Rinse aid plus dishwasher salt | Scale without both |
Drying, Unloading, and Long-Term Care for Dishwasher-Used Pans
Drying is where good loads go wrong at the finish line. Plastics and nonstick come out beaded with water on an air-dry setting. Heated dry fixes that but adds energy use and heat stress on coatings.
Open the door a few inches when the cycle ends. Let steam escape for ten minutes, then pull the top rack first. Drips from above land on the bottom rack, so unloading top-down keeps clean dishes clean.
Towel-dry stainless pans immediately if your machine has no heated dry. Standing water plus minerals equals spots, and spots on polished steel look worse than they are.
Long-term, three habits extend cookware life. Clean the filter monthly. Run a dishwasher-cleaner or vinegar cycle every few months.
Wipe the door gasket with a damp cloth weekly, since that’s where grease collects and odors start.
Check spray-arm nozzles every so often. Mineral buildup clogs the holes and cuts pressure across the whole rack.
FAQs: Dishwasher Loading Questions People Actually Ask
Can you put pots and pans in the dishwasher?
Only if the manufacturer says they’re dishwasher safe. Stainless steel and clad cookware usually are. Cast iron, carbon steel, copper, and most nonstick are not.
Check the care guide before the first load.
Where do pots and pans go in a dishwasher?
The lower rack, always, unless the care guide says top rack only. Angle them face down toward the spray. Keep them at the front and sides so the spray arm spins freely.
Can you wash nonstick pans in the dishwasher?
Rarely, and only if labeled dishwasher safe. Detergent and heat degrade the coating over time. The pan won’t fail at once.
It just stops releasing food cleanly.
Should you rinse pots and pans before loading them?
Scrape, don’t rinse. Modern detergent is formulated to grab food soil, and a full rinse wastes water. Scraping solids into the bin is enough for most loads.
How do you stop dishes coming out wet?
Use rinse aid and select heated dry if your machine has it. Open the door a few inches after the cycle ends. Plastics hold water longer than ceramic or steel.
How often should you clean the dishwasher filter?
Monthly for most households, more often if you cook with a lot of fat. A clogged filter recirculates dirty water and undoes a good load.
Final Decision Guide: A One-Page Loading Rulebook
Here’s the whole process compressed into rules you can run from memory.
If the material is stainless or clad, load it. Lower rack, face down, angled at the spray. Skip cast iron, carbon steel, copper, and hand-wash nonstick entirely.
If the pan is wider than the gap between tines, put it at the side. Never over the spray arm housing. Spin the arms before you close the door.
If the load is greasy, run Heavy or Pots & Pans. Add Hi-Temp for baked-on residue. Save Sanitize for when someone’s been ill.
If your water is hard, use rinse aid every load. Above 10.5 gpg, add dishwasher salt too.
If you want spot-free results, unload top down. Open the door early and towel-dry stainless.
If you want the machine to last, clean the filter monthly. Wipe the gasket weekly and run a cleaning cycle every few months.
The short version: material first, placement second, cycle third. Get those three right and your cookware outlives the appliance.

Table of Contents