Turn off water, remove old faucet, install new one, seal, and test.
If you’ve wondered how to replace bathroom sink faucet without stress, you’re in the right place. I’ve swapped dozens of faucets in tight vanities and old homes, and I’ll walk you through the process with clear steps, common pitfalls, and pro tips. By the end, you’ll know how to replace bathroom sink faucet safely, cleanly, and with a leak-free finish.
Tools and materials you’ll need
Having the right gear makes this project smooth. Most of it is basic, and you can reuse it later.
- Basin wrench for hard-to-reach mounting nuts under the sink.
- Adjustable wrench and tongue-and-groove pliers for supply lines and drain parts.
- Screwdrivers, flashlight or headlamp, utility knife, and a putty knife.
- Bucket, towels, and rags to catch drips and protect the cabinet.
- Plumber’s putty for the drain flange, unless your sink or manufacturer requires silicone.
- 100% silicone sealant for some sinks and escutcheon plates if the manual calls for it.
- Teflon tape for threaded NPT connections only. Do not use on compression fittings.
- New faucet matched to your sink holes: single-hole, 4-inch centerset, or 8-inch widespread.
- Braided stainless supply lines if your faucet does not include them.
- New drain assembly and pop-up, often included with the faucet.
- Safety glasses and gloves.
Tip from the field: If you want the fastest path for how to replace bathroom sink faucet, buy a faucet that includes supply lines and a pre-assembled drain. It saves time and cuts down on leaks.
Understand your faucet setup
Before you start, confirm what you have. This avoids mid-project surprises.
- Count the holes in your sink or countertop. Single-hole, 3-hole 4-inch, or 3-hole 8-inch are common.
- Match the faucet style to the hole layout. Use an escutcheon plate to cover unused holes if needed.
- Check your shutoff valves. Most modern valves accept 3/8-inch compression supply lines. Older homes may have 1/2-inch IPS threads.
- Look at your drain linkage. If your new faucet uses a pull-rod or a clicker drain, plan for that change.
- Measure clearances under the sink. Pedestal sinks and deep bowls can be tight to work in.
If you’re learning how to replace bathroom sink faucet for the first time, take photos of the existing setup. You’ll thank yourself during reassembly.
Prep your workspace and stay safe
Good prep makes the job cleaner and faster.
- Turn off the hot and cold shutoff valves under the sink. Open the faucet to relieve pressure.
- Place a bucket and towels under the P-trap and valves.
- Unplug nearby outlets or cover them to avoid splashes.
- Spray a little penetrating oil on old mounting nuts and supply connections. Give it a few minutes.
- Plug the sink drain with a rag so small parts don’t fall in.
When learning how to replace bathroom sink faucet, patience at this stage prevents broken valves and stripped threads later.

Step-by-step: how to replace bathroom sink faucet
Follow these steps for a clean, leak-free install. I use this exact flow on service calls.
- Stage the parts
Unbox the new faucet. Verify the hole spacing, escutcheon plate fit, gasket, and drain parts. Read the manual for any special sealant rules. - Shut off and depressurize
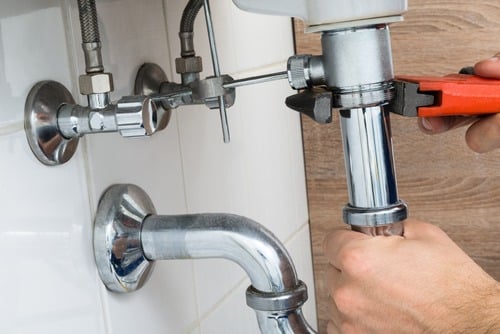
Close both shutoff valves. Open the old faucet to drain water. Keep the bucket ready. - Disconnect supply lines
Loosen the lines at the shutoff valves and the faucet shanks. Use two wrenches to avoid twisting valves. If lines look old or kinked, replace them. - Remove the lift rod and drain linkage
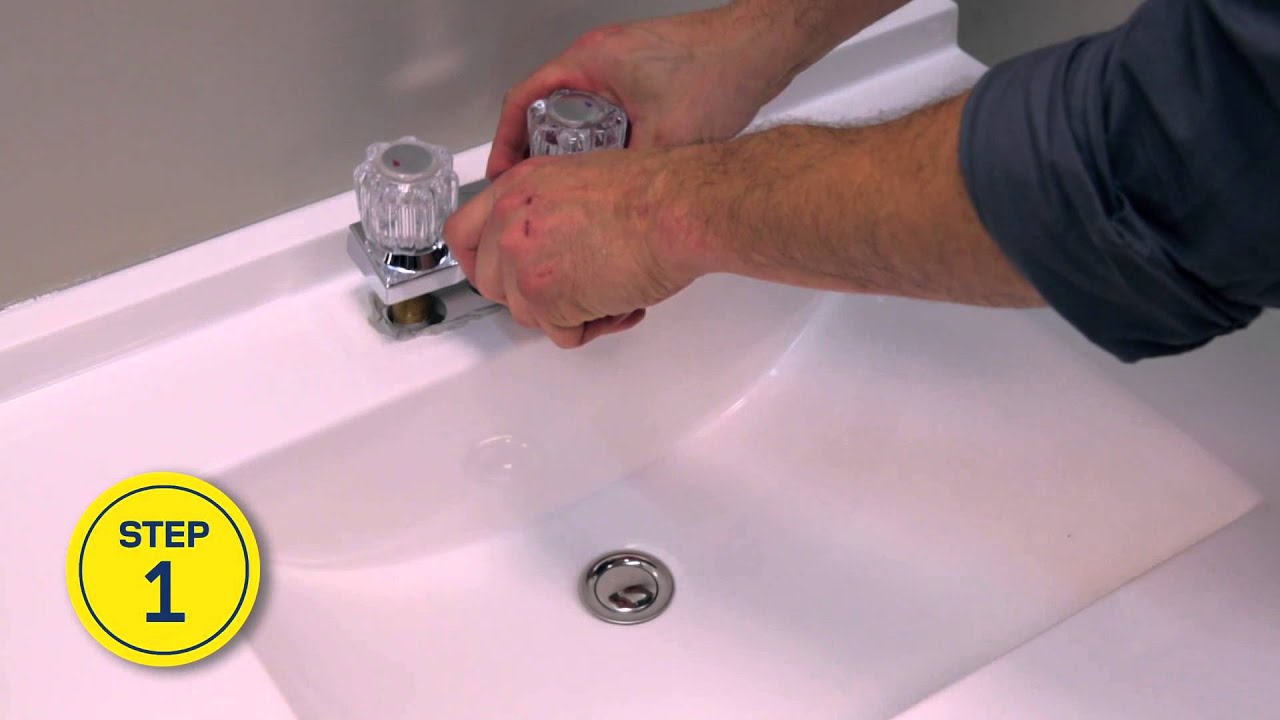
Unscrew the clevis and pivot rod from the drain assembly. Keep parts in a small tray. - Loosen the faucet mounting nuts
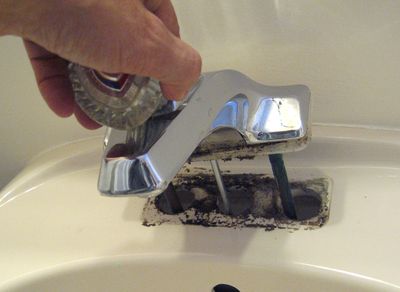
Use a basin wrench to remove nuts and any metal or plastic washers. If corrosion is heavy, add more penetrating oil and wait. - Lift out the old faucet
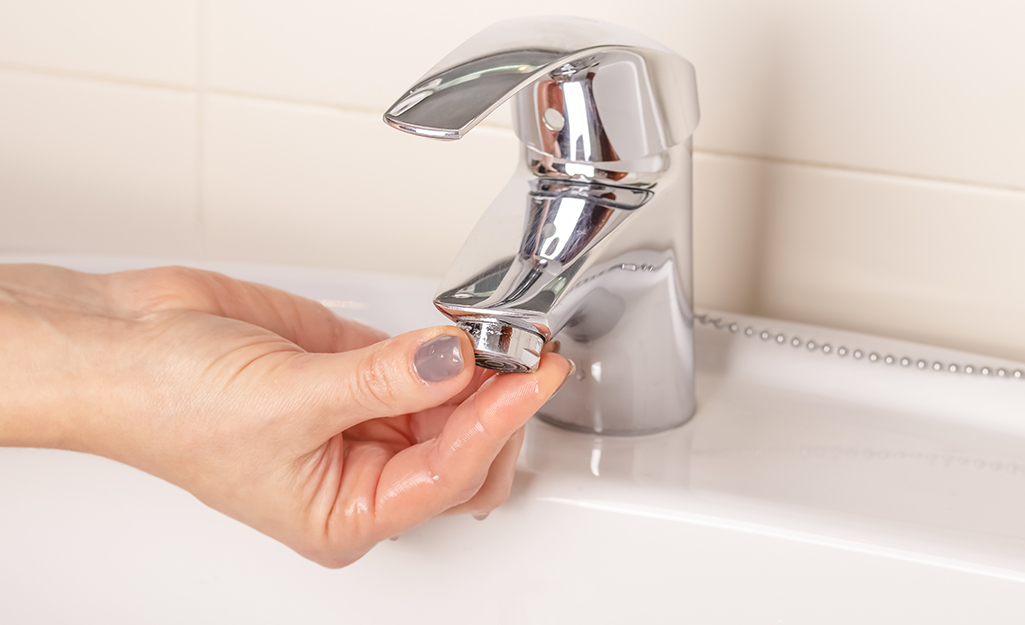
Scrape off old putty or silicone with a putty knife. Clean the surface with mild cleaner and dry it well. - Set the new faucet and gasket
Place the gasket or escutcheon per the manual. If the faucet calls for a thin bead of silicone, apply it now. Do not use plumber’s putty under most faucet bases unless specified. - Tighten the mounting hardware
Hand-tighten first, then use the basin wrench. Snug the nuts evenly so the faucet stays centered. Do not overtighten. - Install the new drain assembly
Roll a thin ring of plumber’s putty under the drain flange unless the manual or sink says silicone. Insert the drain body from above. From below, tighten the locknut while keeping the logo on the flange straight. - Reattach the lift rod
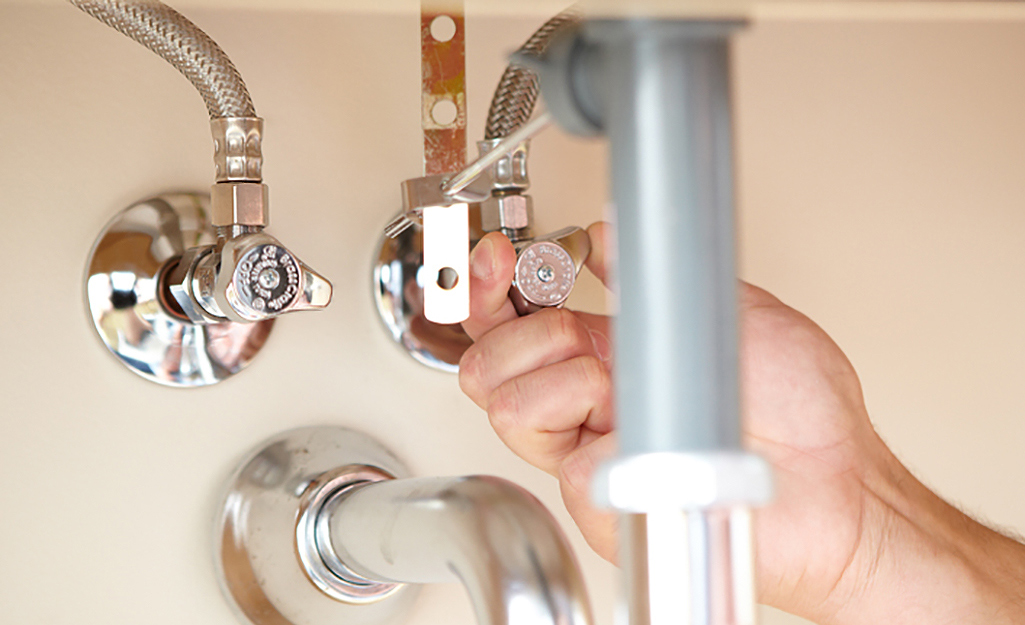
Connect the pivot rod, clevis strap, and spring clip. Test the pop-up for smooth open and close. - Connect supply lines
Thread lines to the faucet and the shutoff valves. Use Teflon tape only on threaded NPT connections. Do not tape compression fittings. Tighten finger-tight, then add a quarter-turn with a wrench. - Flush and test
Remove the aerator. Turn on the shutoff valves slowly. Let water run for 30 to 60 seconds to flush debris. Reinstall the aerator.
Quick PAA-style answers
- Do I need plumber’s putty or silicone for the drain?
Use plumber’s putty for most metal drains unless your sink is stone or the manual says silicone. - Can I install a single-hole faucet in a 3-hole sink?
Yes, use the included escutcheon plate to cover the extra holes. - What size supply lines do I need?
Most faucets use 3/8-inch compression to the shutoff and 1/2-inch female to the faucet.
This workflow is the reliable core of how to replace bathroom sink faucet and get pro results the first time.
Troubleshooting typical snags
Old hardware can fight back. Here’s how to handle common issues.
- Stuck mounting nuts
Use more penetrating oil and a basin wrench. As a last resort, cut the nut with a compact hacksaw or oscillating tool, protecting the sink with a putty knife as a shield. - Frozen shutoff valves
Do not force them. If they leak or won’t turn, shut off the main water and replace the valves. This adds time but prevents floods. - Leaks at supply connections
Check for cross-threading. For compression fittings, loosen and re-seat the ferrule. For threaded NPT, rewrap with fresh Teflon tape and retighten. - Wobbly faucet
Loosen and re-center the faucet. Retighten both nuts evenly. Add the manufacturer’s stabilizer plate if provided. - Pop-up won’t seal
Adjust the clevis strap hole and pivot rod angle. Add plumber’s grease to the stopper’s O-ring for a better seal.
If you hit a wall while learning how to replace bathroom sink faucet, step back, take photos, and reassess. Rushing causes most leaks and cracks.

Seal, reconnect, and leak-test like a pro
Great installs end with patient testing.
- Dry tissue test
Wipe every joint with a dry tissue while water runs. If the tissue dampens, you found a leak. - Cold, hot, then both
Test cold, hot, then mixed flow for two minutes each. Check under the sink again after 10 and 30 minutes. - Next-day check
Open the cabinet the next morning. Look for moisture rings or a chemical odor from slow drips. - Extra pro tip
Before attaching supply lines to the faucet, briefly flush each valve into a bucket. This clears debris that can clog cartridges and aerators.
This calm, methodical approach is key in how to replace bathroom sink faucet with zero call-backs.

Cleanup, disposal, and finishing touches
A clean finish makes it feel brand-new.
- Remove excess putty or silicone with a plastic scraper and a damp cloth.
- Align handles so off positions look straight and consistent.
- If you applied silicone at the base, let it cure per the tube time before heavy use.
- Recycle the old metal faucet if possible. Bag old putty and rags.
- Wipe the cabinet and floor, then restock under-sink items.
These details wrap up how to replace bathroom sink faucet with a professional look you’ll notice every day.

Cost, time, and when to call a pro
Plan your project with clear expectations.
- Typical DIY time
About 45 to 90 minutes for a straightforward swap. Add time for stuck parts or valve changes. - Typical cost
Faucet: 60 to 300 dollars for most homes. Supplies: 10 to 30 dollars. Pro labor, if needed: 150 to 350 dollars and up based on access. - Call a pro if
Shutoff valves won’t close or leak. Pipes are galvanized or fragile. You have a pedestal sink with no access. The vanity or top must come off. There are signs of leaks inside the wall.
Choose certified, lead-free faucets and lines that meet current standards. Manufacturer instructions and local codes always come first for how to replace bathroom sink faucet.
Care and maintenance after installation
A little care keeps things smooth for years.
- Clean the aerator every few months to keep flow strong.
- Operate shutoff valves a few times a year so they don’t seize.
- Check under the sink for dampness after heavy use weeks later.
- Avoid harsh cleaners on finishes. Use mild soap and a soft cloth.
- If handles get stiff, replace the cartridge per the manual.
These simple habits support everything you learned about how to replace bathroom sink faucet and protect your work.
Frequently Asked Questions of how to replace bathroom sink faucet
Can I replace the faucet without changing the drain?
Yes, but I recommend changing it if a new one is included. Old drains often leak after you disturb them, and matching finishes look better.
Do I put plumber’s putty or silicone under the faucet base?
Use the faucet’s gasket alone unless the manual calls for silicone. Many brands warn against putty under the base, but do use putty or silicone at the drain flange per instructions.
What if my new faucet doesn’t cover the old holes?
Use an escutcheon plate sized for your sink. If holes remain visible, consider a matching soap dispenser or hole cover, or switch to a faucet that matches the hole layout.
Should I replace the shutoff valves during this job?
If they are older, seized, or leaking, replace them now. It’s easier to handle both tasks together and reduces the risk of future leaks.
Why is the water brown after installation?
It’s usually harmless sediment from disturbed lines. Run the water with the aerator removed for a few minutes until clear.
What size are typical bathroom sink supply lines?
Most use 3/8-inch compression at the valve and 1/2-inch female at the faucet. Always check your faucet manual and valve size before buying.
Conclusion
You now know how to replace bathroom sink faucet from start to finish. With the right tools, patient prep, and careful testing, you can get pro-level results in an afternoon. Take your time, follow the steps, and enjoy the upgrade every time you turn the handles.
Ready to try it? Save this guide, share your progress, and drop your questions or wins in the comments. If you found this helpful, subscribe for more simple, expert DIY walkthroughs.

Table of Contents