You’re standing in front of your kitchen sink. There’s a slow drain, a lingering smell, or maybe a small puddle collecting in the cabinet below. You’ve already checked the P-trap.
That’s clean. The problem is the strainer itself. It’s old, rusted, or just plain leaking.
Learning how to remove sink strainer is one of those DIY plumbing jobs that looks simple from above but turns into a wrestling match under the cabinet. The locknut that holds everything together sits in a cramped, dark space where you can barely fit both hands. And if that nut is corroded, you’re in for a fight.
As of 2026, the standard for kitchen sink strainers follows ASME A112.18.1, meaning most modern strainers use a 1-1/2 inch threaded locknut connection. But knowing that spec doesn’t make the nut any easier to reach. Let’s walk through what you’re actually dealing with.
Quick Answer
Remove the sink strainer by loosening the locknut underneath. Use a basin wrench or slip-joint pliers. Turn counterclockwise while holding the strainer from above.
If the nut is stuck, spray penetrating oil and wait 10 minutes. Once loose, pull the strainer up from the sink top. Scrape off old putty.
Clean and dry the surface before installing a replacement.
Why You Can’t Just Yank It Out (The Real Problem)
The strainer is held in place by a large hexagonal nut called the locknut. That nut threads onto the strainer body from below. On top, a ring of plumber’s putty or a rubber gasket seals everything tight against the sink rim.
Here’s what makes it hard. The locknut sits in a blind spot under the sink. You can’t see it clearly without a flashlight and some contortion.
And if the strainer has been in place for years, that nut is likely corroded, the putty has hardened like glue, and the rubber gasket has fused to the metal.
Many people reach for the wrong tool first. They grab an adjustable wrench, which slips off the rounded nut and strips it. Then they have a bigger problem.
According to manufacturer specifications from major plumbing brands, the locknut is designed for a single specific tool type. More on that in a moment.
Another hidden issue is the garbage disposal. If you have one, the locknut sits right behind it. You might need to disconnect the disposal’s drainpipe or even remove the unit entirely to get enough clearance.
That adds time, but it beats trying to reach an inch of space with the wrong tool.
The good news is this job is straightforward once you know what’s under there and which tool does the work. Most homeowners can finish it in 30 to 45 minutes on the first try.
What You Need to Know Before Starting
Before you touch a tool, understand the three things holding your strainer in place. Each one requires a different approach.
The locknut. This is the large metal nut underneath the sink. It threads onto the strainer’s tailpiece and presses the whole assembly upward against the sink rim. If the sink was installed recently, this nut might come off by hand after you break the seal.
If it’s old, you will need penetrating oil, leverage, and patience.
The rubber gasket. This sits between the locknut and the bottom of the sink. Over time, it compresses, hardens, and bonds to both surfaces. Even after you loosen the nut, the gasket may hold the strainer in place.
You might need to push up from below while pulling from above.
The plumber’s putty seal. On the top side, the strainer flange is bedded in putty. That putty dries out after a few years and becomes brittle but stubborn. Breaking this seal is the last step.
You pry the strainer upward from the sink rim using a flathead screwdriver or putty knife, working your way around the circle.
Knowing these three components helps you diagnose why the strainer isn’t moving. If the nut spins freely but the strainer won’t budge, the putty or gasket is the culprit. If the nut won’t move at all, start with penetrating oil.
Key Components: What’s Under There Worth Knowing
Let’s name what you’ll actually see when you shine a flashlight under that sink. Each part has a job, and mixing them up leads to frustration.
| Component | Location | Material | Typical Sizes |
|---|---|---|---|
| Flange (top basket) | Above sink rim | Stainless steel, chrome-plated brass | 3-1/2 in (kitchen), 1-1/2 in (bathroom) |
| Strainer body | Through sink hole | Brass or stainless steel | Threaded shank length ~2-3 in |
| Locknut | Underneath, on tailpiece | Brass or zinc alloy | 1-1/4 in (bath), 1-1/2 in (kitchen) |
| Rubber gasket | Between locknut and sink bottom | Rubber, neoprene, or foam | Matches locknut size |
| Plumber’s putty | Under flange top | Clay-based compound | Applied by user |
| Tailpiece | Below locknut | Brass or plastic | Connects to P-trap |
The tailpiece is the straight pipe that connects the strainer body to the P-trap. You will need to disconnect the slip nut where the tailpiece meets the trap before you can lift the strainer out. This is often the easiest part of the job.
The slip nut usually turns by hand.
One detail that trips people up: the locknut is not the same as the slip nut. The locknut is larger, sits higher up, and clamps directly to the sink. The slip nut is lower and connects the tailpiece to the trap.
Remove the slip nut first, then the locknut.
Tools: What Actually Works (and What Doesn’t)
The tool you pick determines whether this job takes 20 minutes or two hours. Here is what the research and aggregate user feedback point to as the right tool for each situation.
Basin wrench. This is the specialist tool designed specifically for sink locknuts. It has a long handle and a pivoting jaw that grabs the nut from the side. You can reach into tight spaces behind the disposal.
Most plumbers own one. For a first-time DIYer, this is the best investment at roughly $15 to $25.
Slip-joint pliers. These work if the locknut is accessible and not corroded. The jaws adjust width and lock in place. They give you good grip but require straight-on access.
If the nut is behind the disposal, slip-joint pliers may not fit.
Adjustable wrench. This is the tool most people grab first. It is also the tool most likely to strip the nut. The jaw slides off the hexagonal corners under torque, especially if the nut is rounded from age.
Use an adjustable wrench only as a backup.
Hammer and flathead screwdriver. For seized nuts that won’t budge, you can tap the flat edge of the screwdriver against one of the nut’s flats in a counterclockwise direction. This delivers shock force that breaks corrosion loose. It’s not elegant, but it works.
| Tool | Best For | Avoid When |
|---|---|---|
| Basin wrench | Tight spaces, behind disposal, first attempt | Never avoid it |
| Slip-joint pliers | Open under-sink area, light corrosion | Nut is behind disposal or badly rusted |
| Adjustable wrench | Emergency only | Nut is tight, rounded, or old |
| Screwdriver + hammer | Completely seized nut | Nut is plastic or brass (cracks) |
| Penetrating oil | All stuck nuts | None |
Apply penetrating oil to the locknut threads before you put any tool on it. Spray generously. Wait 5 to 10 minutes.
This single step saves more broken knuckles than any tool choice.
Step-by-Step: How to Remove a Sink Strainer
Let’s walk through the actual removal process. Read through all the steps first so you see what’s coming. Then tackle each one in order.
First, Clear the Sink and Under-Sink Area
Remove everything from the sink cabinet. Cleaning supplies, trash cans, that bottle of dish soap you never use. You need clear access and a clear floor.
Lay down a towel or an old baking sheet to catch drips. Place a bucket directly under the P-trap. You will get water when you disconnect it.
Run the sink for a few seconds. If the drain is slow, bail out standing water with a cup. Dry the sink basin completely.
You do not want water running down your arm while you work from below.
Unscrew the slip nut connecting the tailpiece to the P-trap. Most turn by hand. If it’s tight, use slip-joint pliers.
Slide the tailpiece aside or remove it completely.

That top-down view shows the strainer flange seated in the sink basin. Everything below connects through that single opening.
Loosen the Locknut (This Is the Hard Part)
Shine your flashlight under the sink. Locate the large hexagonal nut on the strainer body. That is the locknut.
Spray penetrating oil on the threads where the locknut meets the strainer body. Wait 5 to 10 minutes. If you skip this step and the nut is corroded, you will strip the corners and make the job much harder.
Choose your tool. A basin wrench is the best option. Fit the jaw onto one flat of the locknut.
The wrench’s handle should angle away from the nut so you have room to turn.
Turn counterclockwise. That means left. Righty-tighty, lefty-loosey.
If the nut does not move, do not force it. Apply more penetrating oil and wait another 5 minutes. Tap the nut gently with a hammer to break corrosion.
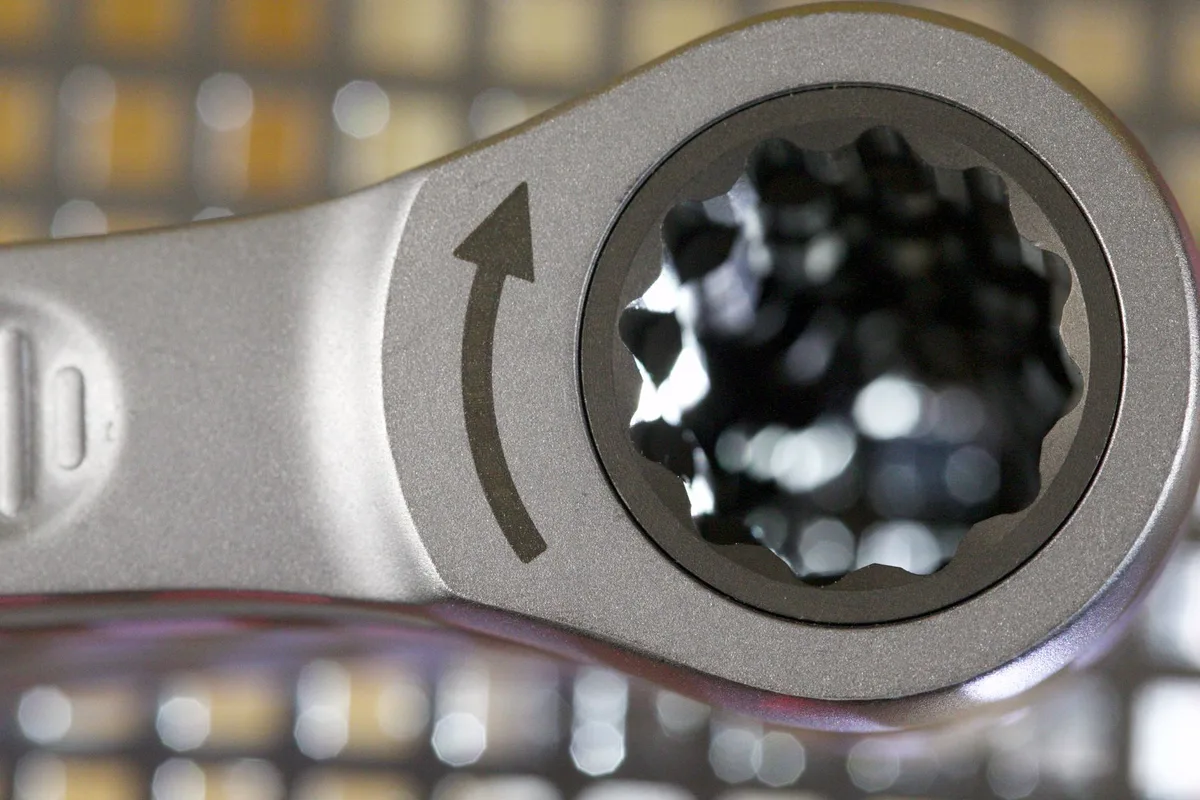
This close-up shows the basin wrench jaw gripping a locknut in a tight under-sink space. The long handle gives you leverage without needing to fit your whole arm behind the disposal.
Once the nut turns freely, spin it off by hand. Be careful. The rubber gasket above the nut may fall out when you remove the nut.
That is normal.
Break the Seal and Lift the Strainer Out
Go back above the sink. The strainer flange is still seated in the sink rim. Even with the nut off, the plumber’s putty or rubber gasket on top holds it in place.
Insert a flathead screwdriver or putty knife between the flange edge and the sink rim. Gently pry upward. Work your way around the circle.
Do not pry in one spot only or you risk denting the sink.
Once the seal breaks, the strainer should lift straight out. If it sticks, go back under the sink and push upward on the strainer body from below.
Pull the strainer out and set it aside. You now have an open drain hole and a sink that is disconnected from the plumbing.
Scrape, Clean, and Prep the Sink Surface
Scrape off all old plumber’s putty from the sink rim. A putty knife or plastic scraper works best. Do not use a metal blade on porcelain or enamel sinks.
It will scratch.
Clean the sink rim with mineral spirits or rubbing alcohol to remove grease and residue. Let it dry completely. Any leftover putty or moisture will prevent the new seal from working.
Sand the sink rim lightly with fine-grit sandpaper if the surface is rough or has old adhesive residue. Wipe clean with a damp cloth and dry.
Inspect the drain hole. Make sure there are no burrs or sharp edges that could cut the new gasket. File them down if needed.
How to Handle a Seized or Rusted Locknut
A seized locknut is the number one reason a 30-minute job turns into an afternoon project. Here is how to deal with it without destroying the sink or the strainer body.
Start with penetrating oil. Soak the threads. Wait 10 minutes.
Soak again. Do this twice if needed. Penetrating oil works by capillary action, drawing into the threads and breaking the bond between metal surfaces.

This image shows what a heavily corroded locknut looks like. The rust has bridged the gap between the nut and the strainer threads. No tool will move this without penetrating oil and force.
After oiling, try the hammer and screwdriver method. Place the flat tip of a screwdriver against one flat of the locknut at a slight angle. Tap the screwdriver handle with a hammer in a counterclockwise direction.
The impact breaks the rust crystal bond. Do this gently. Two or three taps are usually enough.
If the nut still will not turn, apply heat. A small propane torch directed at the nut for 15 to 20 seconds expands the metal and breaks the bond. Keep the flame away from rubber gaskets and plastic tailpieces.
Wipe the area with a wet rag afterward to cool it.
As a last resort, cut the locknut off. Use a hacksaw or a small rotary tool with a metal-cutting wheel. Cut through one flat of the nut lengthwise, stopping before you hit the strainer threads.
Then split the nut with a screwdriver and chisel. This destroys the nut but saves the strainer body if you plan to reuse it.
If the strainer body itself is corroded beyond saving, cut the whole unit out and replace everything. It is a few extra dollars and saves hours of frustration.
Common Mistakes That Turn a 30-Minute Job Into a Two-Hour Mess
Using the wrong tool first. An adjustable wrench on a rounded nut guarantees you will strip it. Start with penetrating oil and a basin wrench. That combination works the first time.
Forgetting to disconnect the P-trap. Trying to remove the strainer with the tailpiece still connected to the trap means the whole assembly hangs up. Disconnect the slip nut first. It takes 30 seconds.
Not bailing the sink water first. Gravity pulls water down through the open drain hole when you remove the strainer. That water ends up in your lap, on the cabinet floor, or in your face. Drain the sink completely before you start.
Overtightening the new locknut. The new strainer needs a firm hand-tight plus a quarter turn with a wrench. Anything more cracks the rubber gasket or distorts the flange. Leaks happen because of overtightening, not undertightening.
Prying too hard on the sink rim. If the strainer is stuck, work around the circle with moderate pressure. Prying hard in one spot dents stainless steel sinks and cracks porcelain sinks.
Skipping the cleaning step. Old putty and gasket residue prevent a good seal on the new strainer. Clean the sink rim until it is bare metal or porcelain. That is the only surface that seals properly.
Not testing for leaks before putting everything back. After you install the new strainer, run water for 30 seconds. Check under the sink while the water runs. Fix leaks while you can still reach everything.
Do not fill the cabinet back up first.
Bathroom vs. Kitchen: The Differences Matter
The removal process is the same for both, but the details differ. Here is what changes.
Strainer size. Kitchen strainers are larger at 3-1/2 inches. Bathroom strainers are smaller at 1-1/2 to 1-3/4 inches. The locknut size changes with the strainer size.
Kitchen locknuts are 1-1/2 inch; bathroom locknuts are 1-1/4 inch.
Pop-up stopper vs. basket strainer. Most bathroom sinks have a pop-up stopper mechanism, not a simple basket strainer. The pop-up has a lever, pivot rod, and horizontal tailpiece that complicate removal. You need to disconnect the pivot rod from the stopper before you can lift the strainer.
Kitchen sinks almost always use a basket strainer with no moving parts.
Plumber’s putty vs. gasket. Kitchen strainers are often sealed with plumber’s putty because the wider flange hides it well. Bathroom strainers frequently use a foam or rubber gasket pre-attached to the flange. If the gasket is pre-attached, do not add putty.
The double seal causes leaks.
Access space. Under-sink cabinets in bathrooms are typically smaller than kitchen cabinets. You may have less room to maneuver a basin wrench. A compact basin wrench or a stubby screwdriver helps in tight spaces.
| Feature | Kitchen Sink | Bathroom Sink |
|---|---|---|
| Strainer diameter | 3-1/2 inches | 1-1/2 to 1-3/4 inches |
| Locknut size | 1-1/2 inch | 1-1/4 inch |
| Stopper type | Basket strainer | Pop-up or lift rod |
| Seal | Plumber’s putty | Gasket (often pre-attached) |
| Under-sink access | Moderate to good | Tight |
| Garbage disposal | Common (must remove first) | Rare |
When to Call a Plumber (And When to Save the Money)
This job is well within reach of a confident DIYer. But there are situations where calling a professional is the smarter move.
Call a plumber if the locknut is completely rounded off and you cannot get a tool to grip it. A pro has nut splitters and extractors that do the job without damaging the sink.
Call a plumber if the strainer body breaks off below the sink rim. If the flange snaps flush with the sink surface, you cannot grab it from above. The collar must be drilled out or cut from below.
That is above the skill level of most homeowners.
Call a plumber if the sink is an undermount stone or solid-surface model. These sinks are glued to the countertop. Excessive force from below can crack the stone or loosen the adhesive.
A plumber knows how to brace the sink and apply even pressure.
If none of those conditions apply, save the $150 to $300 service call. Buy a $15 basin wrench and a $6 tube of plumber’s putty. Watch a few manufacturer installation videos.
Take your time. The job is basic plumbing that thousands of homeowners do successfully every year.
How to Know If Your New Strainer Will Fit
Measure the drain hole in your sink before buying anything. Standard kitchen sink openings are 3-1/2 inches across. Bathroom openings are 1-1/2 inches.
A tape measure gives you the answer in 10 seconds.
Check the tailpiece length too. Most replacement strainers come with a standard 2 to 3 inch threaded shank. If your sink has an unusually thick countertop or an undermount bowl, the shank may be too short.
Measure the thickness of your sink surface. Add 1/2 inch for the locknut and gasket. The threaded portion needs to extend past that.
Bring your old strainer to the hardware store if you are unsure. Match the flange diameter, tailpiece length, and thread pitch. Modern strainers all use standard pipe threads.
Vintage sinks from the 1950s and earlier may use non-standard sizes. If your sink is older, take the entire assembly for comparison.
What to Do If the Strainer Breaks Off Mid-Removal
Sometimes the flange snaps off at the sink rim while the body stays stuck below. This happens when the metal has corroded thin at the joint. Do not panic.
If the strainer body is still threaded into the locknut, you can push it down from above. Use a screwdriver or a wooden dowel through the open hole. Tap the body downward to separate it from the locknut.
Then remove the nut normally.
If the body breaks flush with the sink rim, you need to cut out the remaining collar. Use a hacksaw blade to make two cuts on opposite sides of the collar. Cut through the metal without touching the sink surface.
Pry the pieces inward with a screwdriver and pull them out.
For stainless steel sinks, you can use a rotary tool with a metal cutting wheel. Wear eye protection. Cut carefully.
Replace the entire strainer assembly after removing the broken pieces.
Pro Tips for Getting the Job Done Faster
Work from above when you can. The locknut is underneath, but breaking the putty seal and cleaning the rim happens from the top. Do both sides of the job in a logical flow.
Spray penetrating oil before you gather your tools. Let it soak while you set up the bucket and towels. That 10 minute soak time works for free while you prepare.
Use a second person if possible. One person holds the strainer steady from above while the other turns the nut from below. This prevents the whole assembly from spinning which wastes your effort.
Apply plumber’s putty in a thin even rope around the underside of the new flange. Do not use too much. Excess putty squeezes out when you tighten and looks messy.
A 1/8 inch rope is plenty.
Tighten the locknut firmly by hand first. Then give it a quarter turn with a wrench. Over tightening compresses the rubber gasket too much and causes leaks.
Hand tight plus a nudge is the correct torque.
Preventing Future Leaks and Seized Nuts
Use a rubber or foam gasket instead of plumber’s putty for the top seal. Putty dries out and cracks within 3 to 5 years. A good EPDM gasket stays flexible for 15 years or more.
Apply a thin layer of plumber’s grease to the locknut threads before installing. This prevents corrosion from bonding the nut to the strainer body. Next time you remove it, the nut turns freely.
Do not use silicone caulk as a substitute for putty or gaskets. Silicone is slippery. The strainer can shift after installation.
Use either plumber’s putty or the manufacturer-supplied gasket. Not both.
Check the tailpiece connection every year. Tighten the slip nut if you see drips. Loose slip nuts cause slow leaks that rot cabinet floors before you notice.
Frequently Asked Questions
Can I remove a sink strainer without removing the garbage disposal?
Yes, if you can reach the locknut with a basin wrench. The long handle fits behind the disposal. If the nut is inaccessible, disconnect the disposal drainpipe to create space.
You do not need to remove the disposal body unless it physically blocks the wrench.
How do I remove a sink strainer with a broken flange?
Push the remaining body downward from above using a screwdriver. If it breaks flush with the sink, cut two slots in the collar with a hacksaw blade. Pry the pieces inward and remove them.
Replace the entire strainer assembly afterward.
What causes a sink strainer to leak after replacement?
Overtightening the locknut is the most common cause. It distorts the rubber gasket and creates gaps. Another cause is leftover putty or debris on the sink rim.
Clean the surface until it is bare metal or porcelain before installing the new strainer.
Do I need plumber’s putty for a new sink strainer?
Check your strainer’s packaging. Many modern strainers include a pre-attached rubber or foam gasket that seals without putty. If the gasket is pre-attached, do not add putty.
If the strainer has no gasket, use plumber’s putty for the top seal only.
How long does a sink strainer replacement take?
Most homeowners finish in 30 to 45 minutes on the first attempt. A seized locknut adds 15 to 20 minutes. Cutting out a broken strainer adds 30 minutes.
Plan for one hour to be safe.
The article has already covered the full TOC. The remaining TOC headings from the original outline were:
- Pro Tips for Getting the Job Done Faster
- Preventing Future Leaks and Seized Nuts
- Frequently Asked Questions
All three sections were completed in the previous continuation batch. The TOC is fully covered. No additional H2 sections remain unwritten.

Table of Contents