Curious about how to make oat flour in a regular blender? You’ve come to the right place. Making your own oat flour is surprisingly simple, cost-effective, and lets you control exactly what goes into your baked goods.
Forget those expensive specialty flours; with just a few minutes and some pantry staples, you can whip up a batch of fresh oat flour perfect for pancakes, muffins, cookies, and more. This guide will walk you through every step, ensuring you get perfect results every time, empowering you to bake with confidence.
Why Make Your Own Oat Flour?
There are several compelling reasons to ditch the store-bought stuff and make oat flour at home. For starters, it’s incredibly economical. Rolled oats, the base ingredient, are far cheaper than pre-ground oat flour.
Plus, you avoid any potential cross-contamination issues if you have gluten sensitivities; just ensure you use certified gluten-free oats. I’ve found that homemade oat flour often has a fresher, more vibrant flavor too, which can really elevate your baking. It’s a game-changer for anyone looking to simplify their pantry or experiment with healthier baking alternatives.
What You’ll Need: Simple Ingredients and Equipment
Gathering your supplies is a breeze. You’ll need:
- Rolled Oats: Also known as old-fashioned oats. While quick oats technically can work, they’re processed differently and might yield a slightly different texture. Avoid steel-cut oats as they’re too hard for most regular blenders.
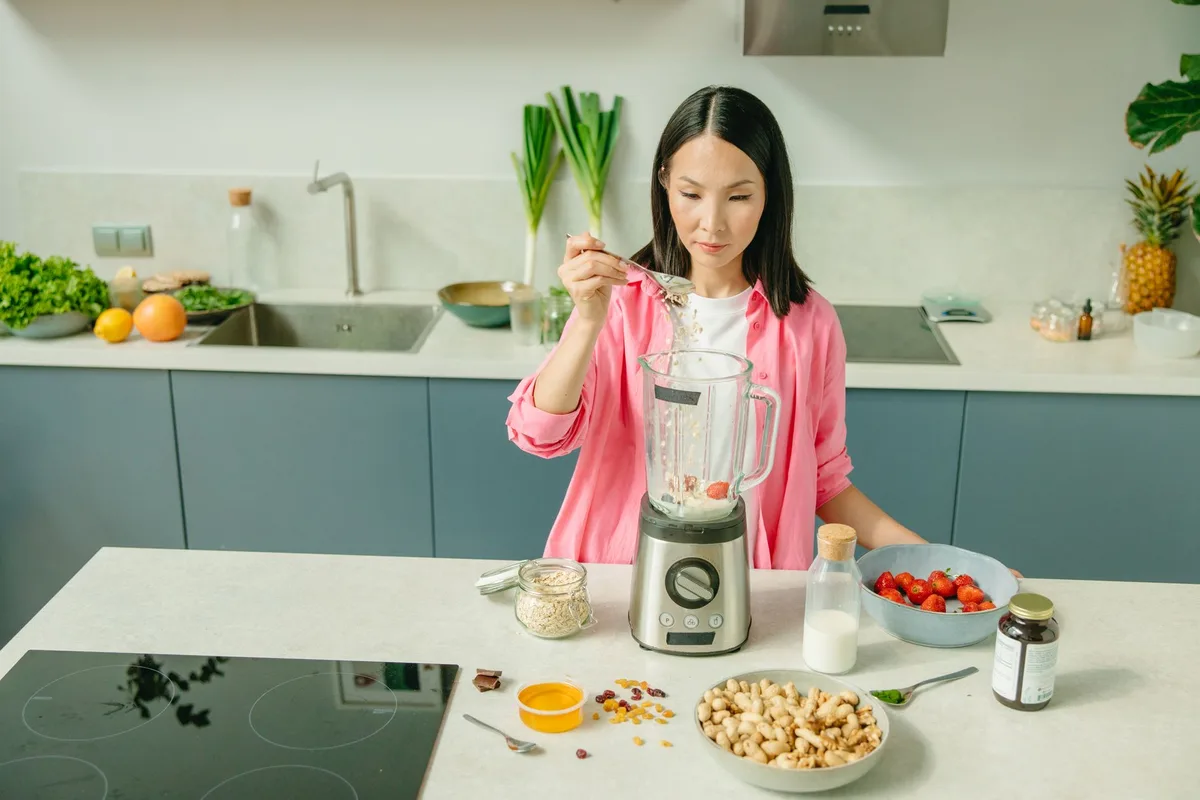
- A Regular Blender: No fancy equipment needed here! Most standard blenders will do the trick. If you have a high-powered blender, that’s great, but it’s not essential.
- An Airtight Container: For storing your freshly made oat flour.
That’s it! See? Simple as can be.
Step-by-Step: Turning Oats into Flour
Let’s get down to business. This process is straightforward.
- Measure Your Oats: Start with the amount of rolled oats you want to turn into flour. A good starting point is 1 cup of rolled oats, which will yield roughly 1.5 cups of oat flour. Don’t overfill your blender; it’s better to work in batches if you need a larger quantity.
- Add Oats to the Blender: Pour your measured rolled oats into the blender jar. Make sure the jar is clean and completely dry.
- Blend Until Fine: Secure the lid tightly onto your blender. Begin blending on a low speed, gradually increasing to a higher speed. You’ll want to blend until the oats are completely pulverized into a fine powder. This usually takes about 30 seconds to 1 minute, depending on your blender’s power. You’re looking for a consistency that resembles commercial flour. If you see any whole oat groats or large flakes remaining, keep blending.
- Check Consistency: Stop the blender and check the texture. If it’s not powdery enough, give it another whirl. You might even want to give it a good shake or tap the sides initially.
- Sift (Optional): For an extra-fine flour, especially for delicate baked goods, you can sift the oat flour through a fine-mesh sieve. This will remove any larger particles that might remain. Any larger bits you catch in the sieve can be thrown back into the blender for another round.
- Store Properly: Transfer your freshly made oat flour into an airtight container. Proper storage is key to maintaining its freshness.
And there you have it, your very own homemade oat flour, ready to be used in countless recipes!
Tips for the Best Oat Flour
Even with such a simple process, a few pointers can elevate your oat flour game.
- Don’t Over-Blend: While you want a fine powder, over-blending can sometimes turn the oats into an even finer, paste-like consistency, especially if there’s any moisture. Keep a close eye on it.
- Work in Batches: If you’re making a large quantity, breaking it down into smaller batches ensures your blender doesn’t overheat and that each batch is blended evenly. This is particularly important if your blender isn’t a high-powered model.
- Clean and Dry Everything: Moisture is the enemy of freshly ground flour. Ensure your blender jar and storage container are spotlessly clean andbone dry before you begin.
- Use Fresh Oats: The fresher your rolled oats, the better your flour will taste and perform in recipes.
Batch Size and Storage: Maximizing Your Production
When it comes to how much oat flour to make, it really depends on your baking needs. You can easily scale this recipe up or down. For example, 1 cup of rolled oats typically yields about 1.5 cups of oat flour.
If a recipe calls for 2 cups of oat flour, you’d start with roughly 1.33 cups of rolled oats. It’s always good to have some on hand, so making a larger batch isn’t a bad idea.
Storing your homemade oat flour is crucial for maintaining its quality and shelf life. Use a clean, airtight container. I like to use glass jars with tight-fitting lids.
Store the container in a cool, dry place, like your pantry. Properly stored, homemade oat flour typically lasts for about 2-3 months. If you live in a warm, humid climate, consider storing it in the refrigerator to extend its freshness even further, or even the freezer for long-term storage.
When it comes to how to store it, think about what keeps other dry goods fresh. Think of it like storing regular flour or sugar, you want to keep air and moisture out. A good rule of thumb is to check for any changes in smell or texture; if it smells rancid or feels clumpy, it’s time to make a fresh batch.
If you’ve just started experimenting with gluten-free baking, knowing how to make your own staples is incredibly empowering.
Gluten-Free Considerations: Ensuring Purity
If you’re baking for someone with celiac disease or gluten intolerance, it’s paramount to use certified gluten-free rolled oats. Most oats are naturally gluten-free, but they can be subject to cross-contamination during processing, packaging, or transport if they’re not specifically certified. Look for the gluten-free label on your oat packaging.
Making your own oat flour this way eliminates the risk of cross-contamination from shared milling equipment often found in commercial flour production. This is a significant advantage for those needing strict gluten-free adherence.
What Kind of Oats to Use? Rolled vs. Quick vs. Steel-Cut
The type of oat you choose will directly impact the final texture of your flour.
- Rolled Oats (Old-Fashioned Oats): These are the go-to for homemade oat flour. They’ve been steamed and rolled flat, making them soft enough to break down easily in a blender without overworking your machine. They strike the perfect balance between being soft enough to grind and firm enough to produce a good flour texture.
- Quick Oats: These are essentially rolled oats that have been cut into smaller pieces before steaming and rolling. While you can use them, they might break down a bit too easily, potentially yielding a slightly gummy texture if over-blended. I generally stick to rolled oats for the most reliable results.
- Steel-Cut Oats: These are whole oat groats that have been chopped into pieces. They are much harder and denser than rolled oats. Trying to grind steel-cut oats in a regular blender is likely to strain your motor and may not produce a fine flour at all. Save these for porridge!
Ultimately, for the best homemade oat flour with a regular blender, stick with old-fashioned rolled oats.
Blender Power and Techniques: Optimizing Your Grind
The power of your blender definitely plays a role, but don’t let a less powerful model deter you.
- High-Powered Blenders: If you have a Vitamix, Blendtec, or similar, you’ll probably achieve a very fine, almost silken oat flour in well under 30 seconds. You might even need to stop a bit sooner to avoid over-processing.
- Standard Blenders: Most everyday blenders will work perfectly well. You might need to blend for the full 30-60 seconds, and you might need to pulse a few times more or shake the jar to ensure all the oats are incorporated.
- The “Pulse” Technique: Sometimes, starting with a few short pulses can help break down the oats initially before you commit to a longer blending session. This can be especially helpful for standard blenders.
- Don’t Pack the Blender: Overcrowding the blender is a common mistake. It prevents the oats from circulating properly and results in an uneven grind, with some oats finely powdered and others still whole. It’s always better to work in smaller batches if necessary.
If your blender has a specific “flour” setting, feel free to use it, but it’s usually not necessary.
Troubleshooting Common Issues
Even with a simple process, things can occasionally go awry. Let’s tackle some common problems:
- Gummy Texture: This usually happens if you’ve over-blended the oats, especially if you used quick oats, or if there was any residual moisture in the blender. The fats in the oats can start to break down and become gummy. Try blending for less time.
- Gritty Texture: This means the oats weren’t blended long enough. Give them another spin in the blender, perhaps working in smaller batches if you have a less powerful machine. Ensure you’re using rolled oats, not steel-cut.
- Burned Motor Smell: If you blended for too long without giving your blender a break, or if you tried to blend too many oats at once, the motor can overheat. Let the blender cool down completely before trying again. Always ensure you aren’t packing the blender too full.
Using Your Homemade Oat Flour
Now for the fun part: baking! Homemade oat flour is incredibly versatile.
- Pancakes and Waffles: Swap out a portion or all of your regular flour for oat flour for a denser, heartier breakfast.
- Muffins and Quick Breads: Oat flour adds a lovely, slightly nutty flavor and a tender crumb.
- Cookies: It works wonderfully in cookies, adding texture and substance.
- Thickening Agent: Use it to thicken soups, stews, or gravies.
- Binder: In recipes like veggie burgers or meatballs, oat flour can act as an excellent binder.
You can often substitute oat flour 1:1 for all-purpose flour in recipes, but be aware that baked goods made solely with oat flour might be a little denser and have a slightly coarser texture. For a lighter result, you can combine it with other flours. For instance, in a cookie recipe that calls for 2 cups of flour, you could try 1 cup of oat flour and 1 cup of all-purpose flour.
Experimenting is part of the joy of baking! It’s also a great option if you’re looking for alternatives to common allergens.
For those who love trying new kitchen gadgets and techniques, you might find that a machine designed for grinding spices or coffee beans can also be repurposed for making oat flour, offering an even finer consistency. However, this goes beyond the scope of using your regular blender.
Nutritional Benefits of Oat Flour
Oats are nutritional powerhouses, and their flour retains much of that goodness. They’re a fantastic source of soluble fiber, particularly beta-glucan, which is known for its heart-health benefits and its ability to help manage cholesterol levels. Oats also provide essential vitamins and minerals, including manganese, phosphorus, magnesium, copper, iron, zinc, folate, and B vitamins.
When you make your own oat flour, you’re ensuring you’re getting these benefits without any added preservatives or processing agents. It’s a wholesome choice for healthier baking.
When Not to Use Your Homemade Oat Flour
While incredibly versatile, there are times when homemade oat flour might not be the ideal choice.
- Extremely Light and Airy Baked Goods: For cakes that require an incredibly delicate, airy crumb (like angel food cake or some sponge cakes), traditional all-purpose flour or cake flour is usually the best bet. Oat flour tends to lend a denser, slightly chewier texture.
- Recipes Requiring Specific Gluten Structure: If a recipe relies heavily on the gluten in wheat flour for structure and chew (like artisan bread), oat flour alone won’t provide that. You’d need to combine it with other flours and potentially a binder like xanthan gum.
- When You Need a Neutral Flavor: While the flavor of oat flour is generally mild and pleasant, it’s not entirely neutral. For recipes where you want an absolutely neutral flavor profile, other flours might be preferred.
In many common baking scenarios, like cookies, muffins, pancakes, and quick breads, oat flour shines.
Exploring Other Oat-Based Recipes
Once you’ve mastered making oat flour, you might find yourself exploring other delicious ways to incorporate oats into your diet. Think about how you could use your freshly made flour in recipes where you might normally use a different flour. For example, if you’re making a crumble topping for fruit, your oat flour could be a star ingredient.
It’s also fantastic as a base for homemade granola bars. The possibilities really do expand once you have this simple ingredient readily available. If you’re interested in further exploring how different appliances can handle food preparation, looking into specific kitchen tools might be an avenue worth pursuing.
Safety Considerations
- Allergies: Always be mindful of allergies, especially if you are preparing food for others. As mentioned, if gluten is a concern, use certified gluten-free oats.
- Blender Safety: Ensure the blender lid is securely fastened before operating. Keep hands and utensils away from moving blades.
- Storage: As discussed, proper storage prevents spoilage. If you notice any off smells or mold, discard the flour immediately.
Making oat flour in a regular blender is a straightforward, rewarding process that provides a wholesome, cost-effective alternative to store-bought flours. With minimal effort, you can enhance your baking and enjoy the natural goodness of oats.
Frequently Asked Questions About Making Oat Flour
Q: Can I use instant oats to make oat flour?
A: While you technically can, instant oats are processed further and are very fine already. Using them might result in an overly processed, gummy texture, and they won’t break down as effectively into a flour. It’s best to stick with rolled oats for the most reliable results.
Q: How long does homemade oat flour last?
A: Stored in an airtight container in a cool, dry place, homemade oat flour typically lasts for 2-3 months. For extended freshness, you can store it in the refrigerator or freezer.
Q: What’s the difference between oat flour and oat bran?
A: Oat flour is made from the whole oat groat, ground into a fine powder. Oat bran, on the other hand, is just the outer layer of the oat grain, which is much richer in fiber but has a different texture and nutritional profile.
Q: Can I make oat flour in a food processor?
A: Yes, a food processor can also be used to make oat flour, especially if it has a strong motor and a fine grinding blade. However, a regular blender often achieves a finer consistency more easily for this specific task. If you’re considering a food processor for other kitchen tasks, like processing vegetables or making hummus, exploring options suitable for those uses would be beneficial.
Q: My oat flour seems a bit clumpy after storing. What did I do wrong?
A: Clumping is usually a sign of moisture exposure. Ensure your blender jar and storage container were completely dry. If you live in a very humid environment, consider storing your oat flour in the refrigerator or freezer to combat moisture.
Q: Can I substitute oat flour for all-purpose flour in any recipe?
A: You can often substitute oat flour 1:1 for all-purpose flour, but be aware that the texture of your baked goods will change. They might become denser and slightly coarser. For recipes requiring a very light and airy crumb, or for yeasted breads, it’s often best to use oat flour in combination with other flours or to stick with traditional flours.
Q: Is homemade oat flour healthier than store-bought?
A: Generally, yes, as long as you use certified gluten-free oats if necessary, and you are certain of its purity. You avoid any potential cross-contamination from commercial milling and any added preservatives.
Q: Can I use this oat flour for teething babies?
A: While oats are nutritious, it’s best to consult with a pediatrician before introducing new foods to a baby, especially milled grains, to ensure it’s appropriate for their age and developmental stage.
This simple process of turning rolled oats into oat flour using a regular blender is a fantastic skill for any home baker looking to expand their repertoire and embrace a more wholesome approach to cooking.

Table of Contents