Nothing’s more frustrating than a stand mixer that won’t mix properly. You scrape the sides. You lift the bowl.
You wonder why your buttercream has unmixed patches of butter.
Here’s the thing: your mixer probably just needs a simple adjustment.
I’ve tuned up dozens of stand mixers over the years, and I’ve learned that most performance issues boil down to one thing, clearance between the beater and the bowl. Get that right, and everything changes. Batters mix evenly.
Whipped cream doubles in volume. You stop scraping down the bowl every thirty seconds.
Let’s fix yours.
Why Your Stand Mixer Needs Adjustment in the First Place
Stand mixers are precision tools, but they’re also mechanical devices. Over time, parts shift. Hinges loosen.
The bowl-support bracket gets slightly bent from that time you levered out a stiff cookie dough.
Even brand-new mixers sometimes ship with the clearance set incorrectly. I’ve unboxed units that barely grazed the bowl surface on one side and left a quarter-inch gap on the other.
The problem isn’t your mixer being broken. It’s your mixer being out of specification.
The most common symptom is visible, you can see unincorporated flour or butter stuck to the bottom or sides after mixing. But there’s a sneakier symptom too: your mixer strains on tasks that should be easy. When the beater rides too high, the motor works harder because the ingredients aren’t getting circulated properly.
Most manufacturers include an adjustment mechanism, but they bury it in the manual alongside the warranty card. You’re not supposed to need it. Except you do, eventually.
The Two Main Stand Mixer Designs
Before you turn any screws, you need to know what you’re working with. Stand mixers come in two basic configurations, and the adjustment process is completely different for each.
Tilt-head mixers are the ones where the top hinges back, exposing the bowl underneath. These are the most common home models. The adjustment screw lives at the base of the hinge, usually hidden behind a small plastic cover or just sitting there exposed.
Bowl-lift mixers have a stationary head. The bowl sits on a platform that raises up using a lever mechanism. These are typically larger, more powerful machines.
The adjustment happens at the bowl support bracket.
If you’re not sure which you have, watch how the bowl attaches. Does the head tilt back? Tilt-head.
Does the bowl lift up on a metal post? Bowl-lift.
Neither design is better. Both need the same end result, the beater should just barely kiss the bottom of the bowl when the bowl is locked in place.
Tools You’ll Need
You probably already own everything required. This isn’t a complicated job.
- A flathead screwdriver (small to medium size)
- A Phillips-head screwdriver (for some models)
- A clean dime or thin coin (for the dime test, I’ll explain)
- A ruler or feeler gauge (optional but helpful)
- A flashlight
- Your mixer’s manual (the adjustment location varies by brand)
That’s it. No specialty tools. No disassembly.
You’re looking at a ten-minute job, tops.
How to Adjust a Tilt-Head Stand Mixer
This is the most common adjustment, so pay attention. The process is straightforward once you understand what you’re actually moving.
Step 1: Locate the Adjustment Screw
On a tilt-head mixer, the adjustment screw is almost always at the back of the hinge mechanism, right where the head pivots. On KitchenAid models (the most popular brand), it’s a flathead screw facing upward or rearward. You’ll see it when you tilt the head all the way back.
Some models have a small plastic cap covering the screw. Pop it off gently with your fingernail or a flathead screwdriver. Don’t pry too hard, it’s just a snap-fit cover.
Step 2: Prepare the Mixer
Lock the bowl into place. Install the flat beater (not the wire whip, not the dough hook, the flat paddle). Make sure everything is seated properly.
Here’s a common mistake: people try to adjust the clearance with an empty bowl. That’s fine for a rough check, but the weight of ingredients changes the clearance slightly. If you want to be precise, put about a pound of something in the bowl, flour, sugar, whatever you have handy.
Step 3: The Dime Test
This is the trick that every repair tech uses. Take a dime and place it on the bottom of the bowl, right in the center. Now lower the beater into the bowl.
Turn the mixer on low speed for about ten seconds.
Stop the mixer. Lift the beater. Look at the dime.
What you want is the dime to be pushed slightly outward or to have a visible impression on its surface. If the dime hasn’t moved at all, the beater is too high. If the dime is flattened or badly scratched, the beater is too low.
You can also use a feeler gauge if you have one. The ideal gap between the beater and the bowl bottom is about the thickness of a credit card, roughly 1/32 of an inch. You want contact, but barely.
Step 4: Make the Adjustment
Turn the adjustment screw. On most tilt-head mixers, turning clockwise lowers the beater closer to the bowl. Counterclockwise raises it higher.
Do quarter-turn increments. Don’t go wild, a half turn changes the clearance noticeably.
After each adjustment, run the dime test again. It usually takes two or three tries to get it perfect.
Step 5: Test with a Real Mixture
Once the dime test looks right, actually mix something. I use a simple butter-and-sugar creaming test. One stick of softened butter, half a cup of sugar.
Cream on medium speed for two minutes. Then stop and inspect.
You want to see even incorporation with no butter clinging to the bottom of the bowl. If you see streaks or patches, you’re not there yet. Adjust slightly and try again.
How to Adjust a Bowl-Lift Stand Mixer
Bowl-lift mixers use a different mechanism, but the principle is the same. You’re adjusting how high the bowl rises relative to the beater.
Step 1: Locate the Adjustment
On a bowl-lift mixer, the adjustment is usually at the base of the bowl support arm. You’ll find a flathead screw or a hex bolt right where the bowl platform meets the main body of the mixer. On KitchenAid bowl-lift models, it’s a screw on the rear of the bowl support bracket.
Some newer models use a locknut and bolt configuration. You’ll need a wrench for those.
Step 2: Check Current Clearance
Lock the bowl into position. Install the flat beater. Manually rotate the beater by hand and watch the gap between the beater and the bowl bottom.
Shine a flashlight in there if you need to see better.
If the beater hits the bowl, you’re too tight. If you can see daylight between the beater and the bowl bottom, you’re too loose.
Step 3: Adjust the Bowl Height
Turn the adjustment screw. Clockwise usually raises the bowl (bringing the beater closer to the bottom). Counterclockwise lowers it.
But I’ve seen some models where this is reversed, so pay attention to what actually happens when you turn.
The goal is the same credit-card-thickness gap. You want contact, but not pressure.
Step 4: Test with the Dime
Same test as the tilt-head. Place a dime in the center of the bowl. Lower the bowl into position.
Run on low for a few seconds. Check the result.
Adjust in small increments until the dime shows just a hint of contact.
How to Test Stand Mixer Beater to Bowl Clearance
You need a reliable way to confirm your adjustment is correct before you declare victory. Here’s the complete testing protocol.
The Paper Test
Take a strip of printer paper about an inch wide and six inches long. Place it between the beater and the bowl bottom. Manually rotate the beater through its full arc.
The paper should be pulled tight but not tear.
If the paper tears, you’re too tight. If the paper slides freely without resistance, you’re too loose.
This is a fast, repeatable test. I use it every time.
The Rotary Test
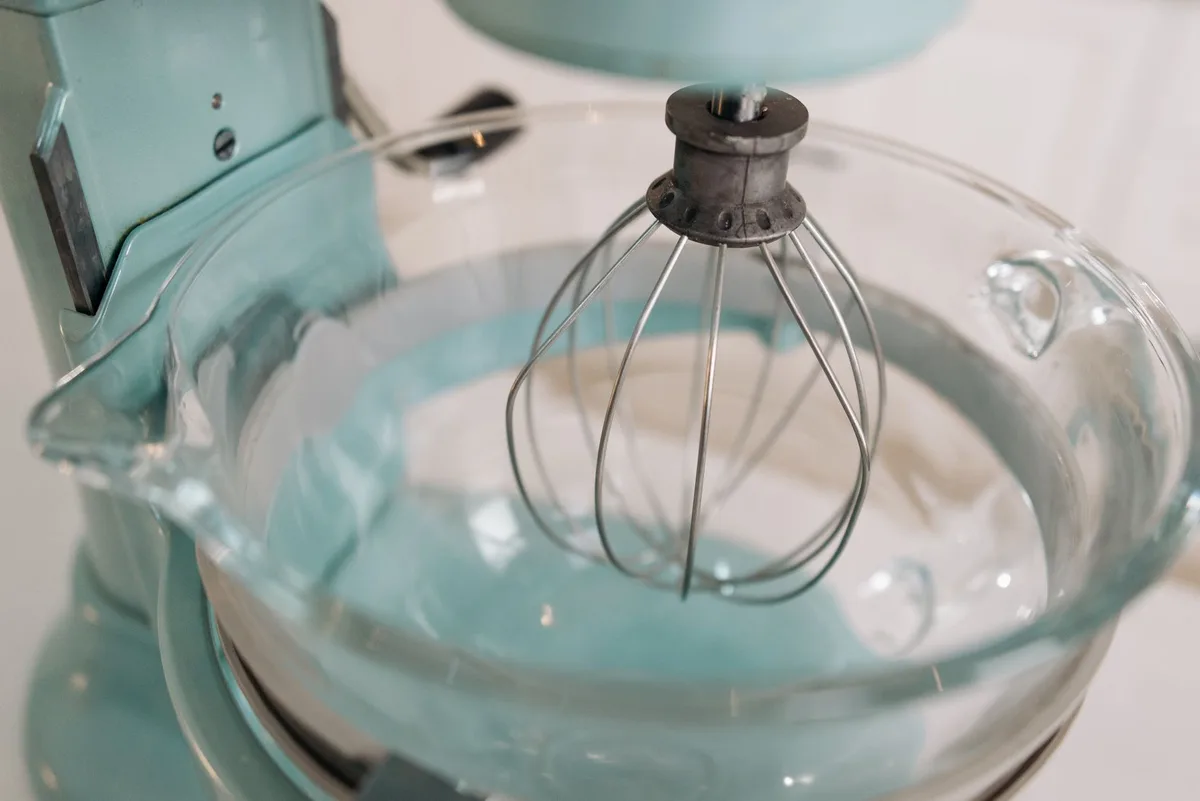
Install the flat beater. Fill the bowl with about four cups of water. Run the mixer on speed 2 and watch the vortex.
You want the water to be drawn down into the beater evenly. If the water just sloshes around without forming a consistent vortex, your beater-to-bowl clearance is off somewhere.
This test is especially good for catching clearance problems that only show up at certain spots in the beater’s rotation.
The Real-World Bake Test
Theory is great. But you don’t bake with a dime. You bake with butter and sugar and eggs.
Make a batch of something simple, I recommend sugar cookies because the dough is forgiving and the results are obvious. Cream the butter and sugar for exactly three minutes on medium speed. Scrape down the bowl.
Look at what stuck to the bottom.
A properly adjusted mixer leaves almost nothing behind. An improperly adjusted mixer leaves a ring of unmixed butter at the very bottom of the bowl.
Common Mistakes People Make When Adjusting a Stand Mixer
I’ve seen a lot of people try to fix their mixers. I’ve also seen a lot of people make the same errors. Avoid these.
Overtightening the screw. You’re not trying to crush the beater into the bowl. You’re trying to create a barely-there gap. Too much adjustment and the beater will scrape the bowl coating.
On painted steel bowls, this ruins the finish. On stainless steel bowls, it creates metal-on-metal noise that drives you nuts.
Adjusting with the wrong beater installed. The flat beater, the wire whip, and the dough hook all have different profiles. Always adjust using the flat beater. The other attachments are secondary.
Ignoring the bowl itself. If your bowl is dented, warped, or has a bent rim, no amount of head adjustment will fix the clearance. Check your bowl on a flat surface first. If it rocks, replace the bowl, not the adjustment.
Forgetting that the adjustment screw can loosen over time. After you get the clearance right, mark the screw position with a paint pen or nail polish. That way you’ll know if it drifts later.
When Adjustment Alone Won’t Fix the Problem
Sometimes the issue isn’t the adjustment. Don’t chase a solution that doesn’t exist.
If your mixer makes grinding noises even after correct adjustment, the problem is mechanical, worn gears, damaged bearings, or stripped bushings. Those require professional service or replacement parts.
If the beater wobbles instead of spinning true, the shaft is bent or the beater attachment hub is damaged. No amount of bowl adjustment can compensate for a bent shaft.
If the bowl rocks in its locked position, the locking mechanism is loose or the bowl tabs are worn. Replace the bowl or the locking assembly.
These are repair issues, not adjustment issues. Know the difference so you don’t waste time.
Adjusting for Different Attachments
Here’s something most guides don’t mention: your mixer needs different clearance for different tasks.
The dough hook is the most demanding. It’s taller than the flat beater, and it needs more clearance to avoid hitting the bottom of the bowl when kneading stiff dough. If you’ve adjusted your mixer perfectly for the flat beater and then the dough hook starts scraping, that’s normal.
You can’t optimize for both at the same time.
What I recommend: adjust for the flat beater, since that’s what you use 90% of the time. When you use the dough hook, just watch it during the first minute of kneading. If it scrapes, stop and adjust slightly, then readjust back when you’re done.
It sounds annoying, but in practice you rarely need to. Most dough hooks have a slightly different shape that clears the bowl even with a tight beater adjustment.
The wire whip needs the most clearance. It’s flexible by design, but if it hits the bowl, it’ll shed wires. Always give the whip extra room.
If your whip is scraping, back off the adjustment before you ruin the attachment.
Maintenance After Adjustment
Once you’ve got the clearance dialed in, you want it to stay that way. A little preventive care goes a long way.
Clean the hinge mechanism every few months. Crumbs and flour dust accumulate in the hinge area and can make the adjustment screw stiff or inaccurate. A quick blast of compressed air or a wipe with a damp cloth keeps things moving freely.
Check the adjustment screw for tightness after heavy use. I’ve had mixers that stayed perfect for years and others that drifted after a single batch of bagel dough. Vibration works screws loose.
It’s physics.
Lubricate the bowl support pins if your model has them. A drop of food-grade mineral oil on the pins keeps the bowl sliding smoothly and reduces wear that can throw off clearance.
The One Adjustment Most People Miss
There’s a secondary adjustment on some stand mixers that controls how far the head tilts back. If your tilt-head mixer feels loose or floppy when you tilt it back, there’s a tension screw that needs tightening.
This doesn’t affect mixing performance directly, but it affects safety. A loose head can fall forward while you’re trying to change attachments. Look for a screw at the hinge pivot point.
Tighten it just enough to create resistance, you want the head to stay where you put it.
This is separate from the beater clearance adjustment. Don’t confuse the two.
Final Thoughts (But Actually Final)
Your stand mixer is a workhorse. It deserves to work correctly. That simple adjustment, the one you’ve been putting off because it seemed too technical, is probably the only thing standing between you and perfectly mixed batters.
Do the dime test. Turn the screw. Test again.
It takes ten minutes and costs nothing.
Once you’ve done it, you’ll notice the difference immediately. Your mixer will feel more powerful because it’s not fighting against bad geometry. Your batters will come together faster.
And you’ll stop scraping down the bowl every thirty seconds like some kind of kitchen penitent.
That’s the goal. A mixer that works with you, not against you.
Go adjust yours.

Table of Contents