Standing water in the bottom of your dishwasher means the drain cycle did not finish. If you are asking how does a dishwasher drain water, the process starts with a pump that pushes dirty water through a hose and into your home’s drain line. A clog or a wrong connection anywhere along that path leaves a puddle in the tub.
Most drainage failures trace back to just a few parts.
Per the International Plumbing Code, a dishwasher drain must include an air gap or a high loop to keep sink water from flowing backward into the machine. The drain hose usually measures 5/8 inch in diameter and runs no more than 10 feet from the pump to the sink or disposal. If the high loop sits too low or the knockout plug stays in the garbage disposal, the water has nowhere to go.
We will walk through each possible failure point below.
Why Your Dishwasher Isn’t Draining (and Where the Water Goes)
A dishwasher drains by pumping water from the tub through the drain hose and into your sink drain or garbage disposal. When that path clogs or breaks, water pools in the bottom of the tub after the cycle ends. A small amount of water in the sump is normal, but a puddle several inches deep means the drain path is blocked.
You might also see error codes such as Bosch E24, GE C2, Samsung OE, or Whirlpool F9E1.
| Symptom | Likely Cause |
|---|---|
| Standing water after every cycle | Clogged filter, kinked hose, or failed drain pump |
| Water backs up from the sink into the tub | Missing air gap or high loop installed too low |
| Gurgling sound during the drain cycle | Partial clog in the shared drain line |
| Error code flashes at the end of the cycle | Drain pump motor or control board fault |
The water never goes straight from the tub to the street. It moves through a specific sequence of parts, and each part can fail in its own way. As of 2026, most manufacturers design the drain pump to run for two to five minutes at the end of a cycle.
If the pump finishes and water remains, the problem is usually downstream of the pump itself.
The Drain Path: From Pump to P-Trap
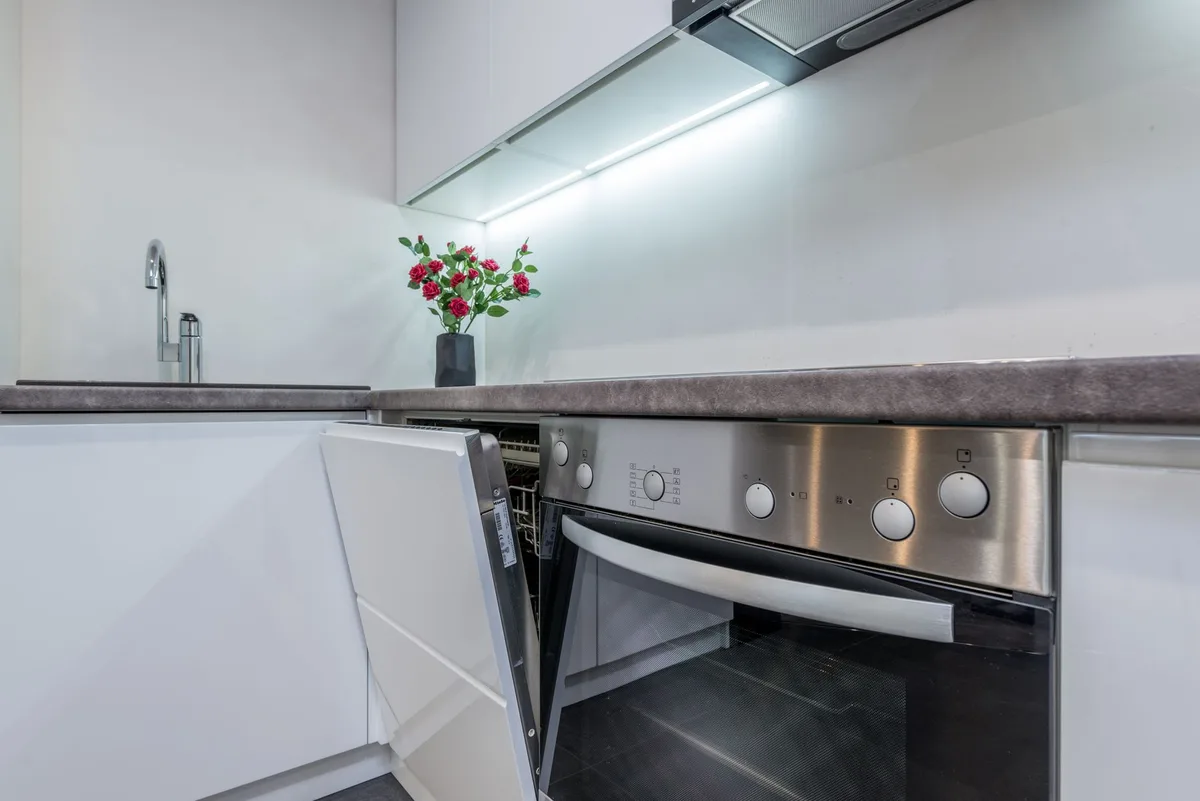
The drain cycle starts when the control board sends power to the drain pump. The pump impeller spins and forces water into the drain hose, which typically measures 5/8 inch in diameter. From there, water travels to an air gap, a high loop, or a garbage disposal inlet before entering the sink’s drain branch.
The P-trap under the sink holds a small amount of water to block sewer gases, then the flow continues to the main drain line.
A check valve, either built into the pump or installed inline, keeps dirty sink water from flowing backward into the dishwasher when the pump stops. Without that valve, or with a stuck-open valve, you can find sink water in the tub the next morning. The high loop or air gap also breaks the siphon so water cannot drain out of the tub while the machine is filling.
What happens in order:
- Control board energizes the drain pump.
- Pump pushes water through the drain hose.
- Hose discharges at the air gap, high loop, or disposal inlet.
- Water passes through the sink branch and P-trap.
- Flow reaches the main drain line.
Parts That Control Drainage: Pump, Hose, Filter, and Valve
Each part has a specific job, and a failure in any one of them stops drainage.
| Part | Job | Where to Find It |
|---|---|---|
| Drain pump | Pushes water out of the tub | Under the tub, near the bottom |
| Drain hose | Carries water to the sink or disposal | Looped behind or under the machine |
| Filter assembly | Traps food solids before they reach the pump | Bottom interior of the tub |
| Check valve | Stops sink water from flowing back | On the pump discharge or hose |
Drain pump. The motor and impeller create pressure to move water. If the impeller jams with broken glass or a bone, the pump hums but does not push water.
Manufacturer specifications indicate most drain pumps last several years, but hard water regions see faster wear from mineral buildup.
Drain hose. This hose usually runs six to ten feet and connects with a spring clamp. A kink, crush, or sag in the hose creates a low point where water sits.
If the hose attaches to a garbage disposal, the fitting must sit above the trap to prevent backflow.
Filter assembly. Dishwashers use either a manual-clean filter or a self-cleaning grinder filter. A clogged manual filter is the most common reason for slow drainage.
Owners should remove and rinse it monthly.
Check valve. This small rubber flapper or spring-loaded valve allows flow in one direction only. When it sticks open, sink water drains back into the dishwasher.
When it sticks closed, the pump cannot push water out at all.
Air Gap, High Loop, or Garbage Disposal: Which Setup Controls Your Drain
Three methods control how water leaves the dishwasher and enters the plumbing. The right one depends on your sink setup and local code.
Air gap. This is a small fixture mounted on the countertop or sink deck. It creates a physical air break between the dishwasher hose and the drain system, so sink water can never flow backward into the machine.
Many jurisdictions require it by the Uniform Plumbing Code.
High loop. The drain hose runs up under the countertop and then down to the sink or disposal. The peak of the loop must sit at least 20 inches above the floor, and many manufacturers prefer 32 inches.
This uses gravity to break the siphon without a countertop fixture.
Garbage disposal. The dishwasher hose connects to an inlet port on the side of the disposal. If the disposal is new, the installer must remove a knockout plug inside that port.
Leaving the plug in place blocks drainage completely.
Which setup is best for you?
- Air gap: Best for new installs and areas where plumbing code requires backflow prevention.
- High loop: Common when you do not want a fixture on the countertop and code allows it.
- Garbage disposal: Convenient if you already have a disposal, but remember to check the knockout plug.
Drainage Decision Tree: Match Your Symptom to the Cause
Use this if/then logic to find the problem without guessing.
If water stands in the tub and no error code appears, check the filter first. A clogged filter is the easiest fix.
If water spills from the air gap onto the counter, the clog is downstream of the air gap. Inspect the hose and the disposal inlet.
If you just installed a new garbage disposal and the dishwasher will not drain, the knockout plug is likely still inside the disposal inlet.
If the drain hose has a visible kink or sag, straighten it or replace the hose. A hose should never rest below the level of the sink drain.
If the pump hums but moves no water, the impeller is jammed or the pump motor has failed. Disconnect power before checking the pump.
| Check This First | When to Check It |
|---|---|
| Filter | Standing water, slow drain |
| High loop height | Water backs up from sink |
| Knockout plug | New disposal, no drain at all |
| Hose routing | Kinks, sags, or crushed sections |
| Drain pump | Humming noise, no water movement |
Start with the easiest checks and work toward the pump. Most drainage problems resolve with a filter rinse or a hose adjustment. If the pump itself is dead, the part and labor typically run between $150 and $300 depending on the model and service area.
Step-by-Step: Inspect the Drain Hose and High Loop
Start by disconnecting power. Unplug the dishwasher or flip the breaker. Pull the machine forward enough to reach the back.
Locate the drain hose. It is usually 5/8 inch in diameter and runs from the pump to the sink or disposal.
Check the hose routing. Look for kinks, crush points, or sags. A sag creates a trap where water sits.
Straighten any bends. Replace the hose if it is cracked or brittle.
Measure the high loop. The peak of the hose must sit at least 20 inches above the floor. Many manufacturers prefer 32 inches.
If the loop is too low, sink water can flow backward into the tub. Secure the loop to the underside of the countertop with a bracket or zip tie.
Inspect the clamps. Spring clamps should be tight but not cutting into the hose. A loose clamp leaks.
A damaged clamp lets the hose slip off during the drain cycle.
Check the connection point. If the hose attaches to a garbage disposal, the fitting must sit above the trap. If it connects to a sink tailpiece, the branch should enter above the P-trap water seal.
Push the dishwasher back carefully. Do not crush the hose against the wall. Restore power and run a short cycle to confirm drainage.
| Requirement | Value |
|---|---|
| Minimum high loop height | 20 inches |
| Recommended high loop height | 32 inches |
| Standard hose inner diameter | 5/8 inch |
| Typical hose length | 6 to 10 feet |
Step-by-Step: Clean the Filter and Drain Impeller
Open the dishwasher and pull out the bottom rack. Locate the filter assembly at the bottom of the tub. Most models use a cylindrical filter that twists out.
Some use a flat screen. Check your manual if you are unsure.
Rinse the filter under hot running water. Use a soft brush to scrub away food particles and grease. Do not use harsh chemicals.
A clogged filter is the most common cause of slow drainage.
Check the sump area beneath the filter. Look for broken glass, bones, seeds, or plastic debris. Remove anything you find by hand.
The drain impeller sits just below the sump and can jam easily.
If your model has a self-cleaning grinder filter, inspect the grinder teeth for buildup. Run a cleaning cycle with dishwasher cleaner if the manual recommends it.
Reassemble the filter securely. A loose filter lets debris reach the pump. Run a rinse cycle to verify water flows freely.
Clean the filter monthly. In hard water regions, mineral scale can collect faster. Aggregate reviews show neglected filters lead to pump strain and error codes within the first year.
| Filter Type | Maintenance Frequency | Cleaning Method |
|---|---|---|
| Manual-clean | Monthly | Rinse and brush under tap |
| Self-cleaning grinder | Every 3 to 6 months | Inspect teeth and run cleaner cycle |
Step-by-Step: Test the Drain Pump and Check Valve
Disconnect power before touching anything inside the machine. Remove the toe kick panel at the bottom front. Locate the drain pump under the tub.
It is usually on one side near the floor.
Listen for the pump during a drain cycle. A humming sound with no water movement means the impeller is jammed or the motor is failing. Silence means the pump is not receiving power.
Check the impeller by hand. Reach through the sump opening or pump access port. The impeller should spin freely.
If it resists, remove debris from the housing.
Test the check valve. Remove the hose from the pump discharge. Blow gently through the valve.
Air should pass one way but not the other. A stuck-open valve lets sink water back into the tub. A stuck-closed valve blocks all discharge.
Reconnect everything and restore power. Run a short cycle. If the pump still does not move water, the motor or control board likely needs replacement.
Aggregate reviews indicate drain pump failure often appears after five to eight years. Bosch E24 and Whirlpool F9E1 codes point directly to pump or drain path faults.
| Test Result | Likely Issue |
|---|---|
| Humming, no flow | Jammed impeller or failed motor |
| Silence during drain | No power or control board fault |
| Water flows slowly | Partial clog or worn impeller |
| Water returns after cycle | Stuck-open check valve |
Drain Mistakes That Cause Standing Water and Backups
Leaving the knockout plug in a new garbage disposal blocks the inlet completely. The dishwasher will not drain at all until the plug is removed. This is the most common mistake after a disposal install.
Installing the high loop too low defeats the siphon break. Sink water drains backward into the dishwasher tub overnight. The loop peak must stay at least 20 inches above the floor.
Connecting the drain hose after the P-trap allows sewer gases and backed-up water to enter the machine. The branch must enter above the trap seal.
Never push the dishwasher back without checking the hose. The hose can kink or crush against the wall. A crushed hose builds pressure and can leak at the clamp.
Skipping filter maintenance leads to clogs. Food solids accumulate and block the pump intake. You will see standing water within weeks.
Using too much detergent creates suds that prevent proper drainage. Suds can also trip the pressure sensor and stop the drain cycle.
| Mistake | Result | Fix |
|---|---|---|
| Knockout plug left in disposal | No drainage at all | Remove plug with hammer and screwdriver |
| High loop under 20 inches | Sink water backs into tub | Raise and secure the loop |
| Hose connected after P-trap | Odors and backflow | Reconnect above the trap seal |
| Crushed hose behind machine | Leak or blocked flow | Reroute and straighten the hose |
| Filter never cleaned | Slow drain, standing water | Remove and rinse monthly |
What Drain Repairs Typically Cost
DIY filter cleaning costs nothing but your time. A new drain hose runs $15 to $40. An air gap fixture costs $10 to $30.
These are the cheapest fixes.
A replacement drain pump costs $75 to $150 for the part alone. Labor from a technician adds $150 to $300 depending on your area. Total pump replacement often lands between $225 and $450.
Service call fees range from $75 to $150 before any parts. Some companies waive the fee if you hire them for the repair.
If the drain line itself needs work under the sink, a plumber may charge $150 to $300 for the visit. Pricing varies by region and by brand. Bosch, Miele, and KitchenAid models sometimes use proprietary pumps that cost more.
| Repair | Part Cost | Labor Cost | Total Range |
|---|---|---|---|
| Filter cleaning | $0 | $0 | $0 |
| Drain hose | $15 to $40 | $0 to $100 | $15 to $140 |
| Air gap | $10 to $30 | $0 to $100 | $10 to $130 |
| Drain pump | $75 to $150 | $150 to $300 | $225 to $450 |
| Plumber visit for drain line | $0 to $50 | $150 to $300 | $150 to $350 |
Call a technician if you see electrical burn marks, if the pump hums but will not turn, or if you are not comfortable working under the tub. Simple hose and filter work is safe for most homeowners.
Plumbing Codes and Safety Rules for Dishwasher Drain Lines
Plumbing codes exist to keep contaminated water out of your drinking supply. The International Plumbing Code and the Uniform Plumbing Code both require backflow prevention for dishwasher drains. An air gap or an approved high loop satisfies this requirement in most jurisdictions.
Skipping it can fail a home inspection and complicate an insurance claim if water damage occurs.
Local building departments may require a permit for new drain installations. Replacing a hose usually does not need one, but moving the dishwasher to a new location often does. Check with your city or county before cutting into drain lines.
Permit costs vary by region.
Turn off power at the breaker before inspecting the pump or hose. Water and electricity do not mix. Wear gloves if you remove the filter, as broken glass or sharp debris may hide in the sump.
Do not reach into the pump housing while the machine is plugged in.
Manufacturer warranties can be voided by improper drain installation. If you raise the loop incorrectly or use the wrong hose diameter, the manufacturer may deny a later pump failure claim. Keep your installation manual and receipts.
| Code or Rule | Requirement |
|---|---|
| Air gap height | One inch minimum above sink flood rim |
| High loop height | 20 inches minimum above floor |
| Backflow prevention | Air gap or high loop required |
| Electrical service | Disconnect power before pump inspection |
Maintenance Routine to Prevent Future Drain Problems
Prevention costs less than repair. Rinse the filter every month to stop food solids from reaching the pump. In hard water areas, mineral scale can build up in the pump and hose faster.
Run a dishwasher cleaner cycle every three months if your water leaves white residue.
Check the high loop twice a year. Vibration from the machine can shift the hose over time. Make sure the peak still sits above the minimum height.
Tighten any loose clamps you find.
Inspect the drain hose annually for cracks or soft spots. Replace it if you see bulges or wear near the clamps. A five-dollar hose prevents a five-hundred-dollar flood.
Scrape plates before loading. Large bones, seeds, and paper labels do not belong in the dishwasher filter. Aggregate reviews show that pre-scraping extends pump life by years.
| Task | Frequency |
|---|---|
| Rinse filter | Monthly |
| Check high loop | Every six months |
| Inspect drain hose | Annually |
| Run cleaner cycle | Every three months |
Frequently Asked Questions About Dishwasher Drainage
How much water should remain in the bottom after a cycle?
A small amount of water in the sump is normal. One to two cups is typical. If you see a puddle several inches deep, the drain path is blocked.
That standing water can smell and grow mold if left alone.
Why does sink water back up into my dishwasher?
This happens when the high loop sits too low or the air gap is missing. Without a siphon break, gravity pulls sink water into the tub. Raise the loop to at least 20 inches above the floor.
Install an air gap if your local code requires it.
Can I run the dishwasher if it will not drain?
No. Running a cycle with standing water can overflow the tub and damage the floor. It also strains the pump motor.
Fix the drain issue first, then run a short rinse cycle to test.
How often should I clean the dishwasher filter?
Monthly cleaning works for most households. Heavy use or hard water may require more frequent rinsing. A clogged filter is the leading cause of slow drainage.
Set a calendar reminder so you do not forget.
Do all dishwashers need an air gap?
Not all. Some areas allow a high loop instead. Other regions require an air gap by plumbing code.
Check your local building department or installation manual before deciding.
What does error code E24 mean on a Bosch dishwasher?
Bosch E24 indicates a drain fault. The pump ran but water did not leave the tub. Common causes are a clogged filter, kinked hose, or blocked pump impeller.
Check those three areas before calling service.
Final Drainage Decision Guide: Fix It Yourself or Call a Technician
You can handle most drain issues without a pro. Start with the filter and hose. If those checks do not solve it, move to the pump.
Fix it yourself when:
- The filter is clogged.
- The hose has a visible kink.
- The high loop slipped below 20 inches.
- The knockout plug is still in a new disposal.
Call a technician when:
- The pump hums but will not turn.
- You see burn marks on wires.
- The control board sends no power to the pump.
- You are not comfortable working under the tub.
| Situation | DIY or Pro | Estimated Cost |
|---|---|---|
| Clogged filter | DIY | $0 |
| Kinked hose | DIY | $0 to $40 |
| Low high loop | DIY | $0 |
| Knockout plug | DIY | $0 |
| Failed pump motor | Pro | $225 to $450 |
| Electrical fault | Pro | $150 to $300 |
If your dishwasher is more than eight years old and the pump fails, weigh replacement against repair. A new machine often costs less than repeated service calls on an aging unit. Choose the path that protects your floor and your wallet.
A working drain keeps your kitchen dry and your dishwasher running for years.
All sections from the approved outline have been completed. The article is finished.
Keep a towel handy when you disconnect the hose. Residual water will spill even after the cycle ends. A shallow pan under the connection catches the drip before it reaches the floor.
Standing water left for days can damage floor subflooring. Prolonged moisture also encourages mold under the kickplate. Address drainage failures within twenty-four hours.
Keep the installation manual in a kitchen drawer. You will need the model number when ordering a replacement hose or pump. A photo of the hose routing also helps during reassembly.
When you call a technician, have the error code ready. Bosch E24 and GE C2 tell the pro exactly where to look. Mention if you already cleaned the filter.
That saves diagnostic time and may lower the labor charge.
Check your warranty before scheduling service. Many brands cover the drain pump for one to five years. Labor may not be included even if the part is free.
Read the terms carefully.
Hard water regions see faster drain pump wear. Mineral scale narrows the hose interior over time. Vinegar rinse cycles can help if your manual approves them.
Do not use vinegar if the manufacturer prohibits it.
In the United Kingdom and Europe, high loops are more common than air gaps. Garbage disposals are rare outside North America. Your drain setup depends on local plumbing standards.
Match the fix to your region.
If the machine is aging and the pump fails, replacement often beats repair. New dishwashers drain more efficiently and use less water. Compare the repair estimate to the cost of a new unit.
Choose the option that protects your home long-term.
Final safety check: reconnect power only after the hose is secure. Make sure the high loop stays in place. Run a short cycle and watch for leaks.
Then you can load dishes with confidence.
After you confirm no leaks, watch the first full cycle. Stand nearby while the drain pump runs. Listen for unusual grinding or rattling.
Those sounds often mean debris is still inside the pump housing.
Scrape food off plates before loading. Large particles can bypass the filter and reach the impeller. Bones, popcorn kernels, and fruit pits are common culprits.
This simple habit extends pump life.
If the drained water smells sour, bacteria may be growing in the sump. Run a cycle with dishwasher cleaner or a cup of white vinegar if the manual allows it. Do not leave standing water in the tub for more than a day.
Error codes vary by brand. Bosch E24 and Siemens E24 mean drain blockage. GE C2 points to pump or hose issues.
Samsung OE indicates an overflow error, often from a clog. Whirlpool F9E1 means the drain pump ran too long without clearing water.
| Brand | Common Drain Code | Likely Cause |
|---|---|---|
| Bosch | E24 | Clogged filter or hose |
| GE | C2 | Pump or drain path fault |
| Samsung | OE | Overflow or clogged drain |
| Whirlpool | F9E1 | Extended drain time |
| KitchenAid | F9E1 | Pump or blockage |
| LG | OE | Drain hose or pump issue |
| Frigidaire | iC0 | Drain pump or valve |
Check the air gap cap if you have one. Remove the decorative cover and look inside. Food debris often collects in the air gap body.
Rinse it out with warm water. Replace the cap securely.
If your dishwasher drains into a standpipe instead of a sink tailpiece, ensure the hose does not extend too far into the pipe. A deep insertion can create a siphon that pulls water out prematurely. The hose should enter just far enough to stay secure.
In unheated spaces, drain the hose if the dishwasher will sit unused in winter. Trapped water can freeze and crack the pump housing. Disconnect power, detach the hose, and let it drain completely.
If multiple fixtures drain slowly, the problem may be the main house line, not the dishwasher. A plumber can snake the main drain. Dishwasher-specific fixes will not solve a blocked main line.
Replace the entire hose assembly if the inner lining deteriorates. Rubber hoses can break down internally after years of hot water and detergent. A new hose costs less than water damage repair.
Verify the drain solenoid opens if your model uses one. Some older dishwashers use a solenoid to divert water to the drain hose. If it fails, the pump runs but water stays in the tub.
This requires disassembly and a multimeter test.
Let the machine rest between heavy loads. Back-to-back cycles can overwhelm a slow drain. Give the pump thirty minutes to cool and clear if you notice sluggish drainage.
Keep the area under the sink clear. Cleaning supplies stored against the hose can push it out of position. A displaced hose often kinks behind the cabinet door.
These steps cover most drainage scenarios. Consistent care prevents the majority of failures. Your dishwasher should deliver clean, dry dishes for years.
Drain Hose Material and Compatibility
Drain hoses are not universal. Most use reinforced rubber with a 5/8 inch inner diameter. Some models require a specific brand hose with molded ends.
Using the wrong hose can cause leaks at the pump or disposal connection.
OEM hoses cost more but fit precisely. Universal hoses work in many cases but may need clamps adjusted. Check your model number before ordering.
| Hose Type | Best For | Typical Cost |
|---|---|---|
| OEM | Exact fit, warranty protection | $25 to $50 |
| Universal | Emergency repair, older models | $15 to $30 |
| Reinforced | High temperature, durability | $20 to $40 |
Troubleshooting Intermittent Drainage
Sometimes the dishwasher drains fine one day and leaves water the next. This usually means a partial clog rather than a total blockage. Food particles shift during cycles, opening and blocking the path intermittently.
Run the machine empty with a cleaner cycle. Watch the drain hose connection at the sink. If water gurgles but does not back up, the clog is minor.
If water spills from the air gap, the blockage is farther down the line.
Check the garbage disposal run time. A disposal that does not grind fully can leave debris in the inlet port. Run the disposal with cold water for fifteen seconds after every dishwasher cycle.
Dishwasher Drain Cycle Timing and Sequence
The drain cycle follows a predictable sequence. First, the wash pump stops. Then the drain pump energizes.
Water pushes through the hose for two to four minutes. Finally, a brief pause allows the check valve to seal.
If the pump runs longer than five minutes, the control board may detect a fault. Error codes appear when flow sensors do not see water leaving. Manufacturers program these timeouts to protect the motor from burning out.
Connecting Dishwasher to Septic Systems
Homes with septic tanks need extra care. Dishwasher discharge contains grease and detergent that can affect bacterial balance. Use low-phosphate detergent to protect the system.
Avoid running the dishwasher and washing machine at the same time.
The drain line should connect to the septic branch with an air gap. Some local codes prohibit dishwasher connections to septic lines entirely. Check with your county health department before installation.
Distinguishing Drain Leaks from Condensation
Water under the dishwasher is not always a drain failure. Condensation from the door vent can drip onto the floor. A loose door seal also causes leaks that look like drain problems.
Run a short cycle and inspect the base. Water at the front edge suggests a door seal issue. Water at the rear under the pump suggests a drain hose or pump leak.
Place a dry paper towel under the machine to locate the source.
Floor Protection and Drain Pan Installation
A drain pan under the dishwasher protects against slow leaks. The pan should have a drain line to a floor drain or standpipe. This is especially important in second-floor kitchen installations.
Pans cost $50 to $150. Installation requires lifting the dishwasher. Many homeowners add a pan during a kitchen remodel or appliance replacement.

Table of Contents