If you’ve ever wrestled a tangled pile of kitchen tongs out of a drawer mid-recipe, you already know the pain. The handles lock together, the silicone heads grab at everything, and you end up pulling out three tongs just to get the one you need. Learning how to store kitchen tongs properly can fix that frustration in about five minutes.
Our research shows that a standard kitchen drawer measures between 12 and 16 inches deep, which directly dictates which storage methods actually work. Most people own two to four pairs of tongs with different lengths and locking styles. And here’s the reality as of 2026: there’s no single best method.
The right choice depends entirely on your drawer depth, your tong design, and how much counter space you have.
Quick Answer
Store tongs in a deep drawer with divided compartments. Lock them first to keep them compact. Use a countertop crock if your drawers are shallow.
Hang them on a wall rail if you want zero counter clutter. Choose magnetic strips only for all-metal tongs.
The Real Problem: Why Tongs Are So Annoying to Store
Tongs are an awkward shape. They are long, narrow at the handle, and wide at the head. They don’t stack neatly.
They don’t stand upright easily. And the locking mechanism, which should help, often makes things worse by snagging on other utensils.
Here is what aggregate user feedback identifies as the top frustrations:
- Nesting nightmare. Unlocked tongs slide inside each other like a collapsed telescope. Grabbing one means pulling out three.
- Length mismatch. A 16-inch grilling tong simply does not fit in a standard 12-inch drawer. It forces you to store it diagonally or bend the handle.
- Locking ring snags. The pull-back ring or sliding clasp catches on spatulas, spoons, and other tongs. It turns a simple grab into a wrestling match.
- Silicone grip traps grease. Silicone heads are slightly sticky. In a crowded drawer, they pick up residue from other utensils and can develop a smell over time.
- Crock tipping. Heavy stainless steel tongs stored handle-down in a lightweight crock can tip the whole holder over.
Each of these problems has a solution. The trick is matching the solution to your specific kitchen.
Core Factors That Decide Your Storage Method
Before you buy an organizer or hang a rail, you need to evaluate three things. These variables determine every decision that follows.
Your Drawer Depth Matters More Than You Think
Measure your drawer before you do anything else. Open the drawer. Use a tape measure from the front edge to the back edge.
Write that number down.
Here is the critical cutoff: 12 inches.
- Drawers deeper than 12 inches: you can store tongs flat with plenty of room.
- Drawers between 10 and 12 inches: most 9-inch and 12-inch tongs fit. Sixteen-inch tongs do not.
- Drawers shallower than 10 inches: you cannot store most tongs flat. You need an upright or hanging solution.
Manufacturer specifications indicate that standard household tongs measure 9, 12, or 16 inches from tip to handle end. A 12-inch tong needs at least 13 inches of drawer depth to sit comfortably without jamming against the back.
Locking vs. Non-Locking: A Critical Difference
The locking mechanism on your tongs changes how you store them. This is a detail most people overlook until the tongs refuse to cooperate.
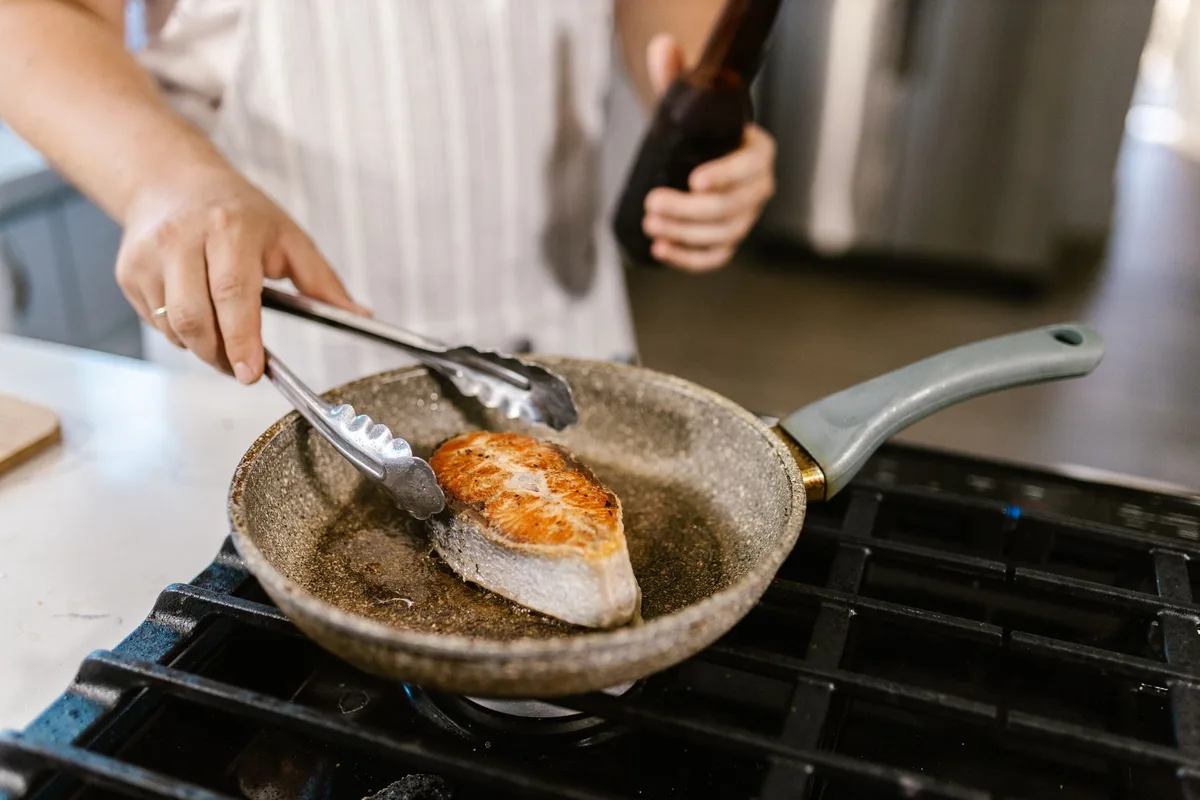
Locking tongs have a pull-back ring or a sliding clasp near the handle. When you pull the ring back, the tongs lock closed. This is great for storage because it keeps them compact and prevents them from springing open.
But it also creates a snag point. The ring can hook onto other utensils or the edge of a drawer divider.
Non-locking tongs rely on spring tension to stay open. They do not have a locking ring. This makes them smoother in a drawer with less snagging.
But they take up more space because they stay partially open unless you nest them inside each other.
Our recommendation: If your tongs have a locking mechanism, always lock them before storage. It saves space and prevents accidental opening when you reach in. If they are non-locking, group them in a dedicated compartment away from other utensils.
How Many Tongs Do You Actually Own?
Count them. Be honest.
Most home cooks own three pairs: one large (16-inch) for grilling or deep frying, one medium (12-inch) for general cooking, and one small (9-inch) for serving or delicate work. Some people own more.
The number matters because it dictates the size of your storage solution:
- 1-2 pairs: A small drawer divider or a narrow slot in a crock works fine.
- 3-4 pairs: You need dedicated compartment space or a larger crock.
- 5+ pairs: You are in utensil overflow territory. Consider a wall-mounted rail or a magnetic strip.
If you have more than four pairs, ask yourself honestly how many you actually use. The ones at the back of the drawer that you never touch are just clutter. Purge before you organize.
The Decision Tree: How to Choose Your Storage Method
Now that you know your drawer depth, your tong type, and your tong count, you can pick the right method. Here is the decision tree broken into four branches.
Branch 1: Deep Drawers (12 Inches or More)
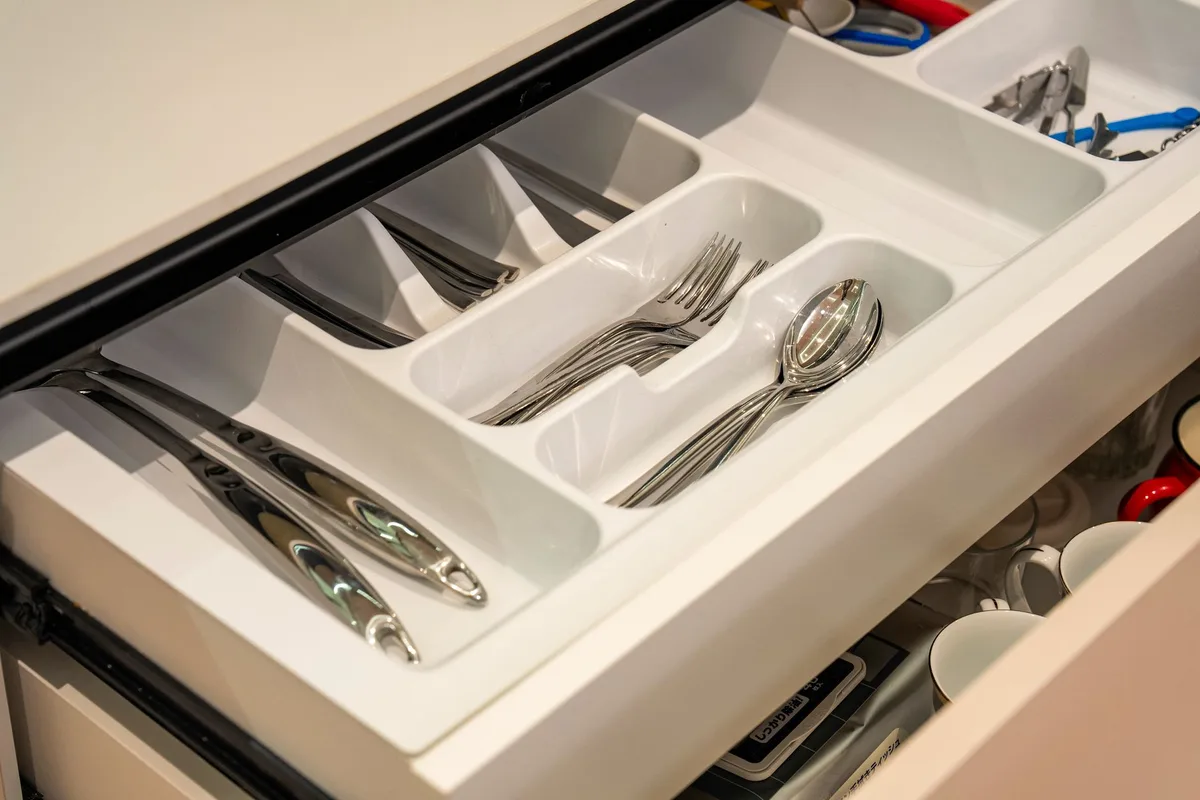
This is the easiest scenario. If your drawer is 12 inches deep or more, store your tongs flat inside a divided drawer organizer.
What you need: A wooden or plastic drawer organizer with compartments at least 3 inches wide. Look for one that has dedicated long-utensil slots. Some organizers let you remove dividers to create a custom slot.
How to set it up:
- Measure the width of your drawer.
- Choose an organizer that leaves at least 1 inch of space on each side.
- Lock all locking tongs before placing them.
- Place tongs in the same compartment, oriented the same direction.
- If you have both locking and non-locking tongs, separate them into adjacent compartments.
Best for: Anyone with standard kitchen cabinetry. This method keeps tongs out of sight, protects them from damage, and makes grabbing one a one-second task.
Branch 2: Shallow Drawers or No Drawer Space
If your drawers are under 10 inches deep, or if your drawer space is already full, go upright. A countertop crock or utensil holder is your best bet.
What you need: A crock that is at least 8 inches tall and has a weighted base. Lightweight crocks tip over when you pull out a heavy pair of tongs. Ceramic or heavy-gauge stainless steel works best.
How to set it up:
- Place the crock near your stove or prep area.
- Store tongs handle-down, head-up. This keeps the gripping ends clean and easy to grab.
- Group tongs with similar utensils like spatulas and ladles.
- Do not overcrowd. If the crock is packed, you will pull out extras every time.
Best for: Small kitchens, apartments, and anyone who wants quick access to tongs while cooking.
Branch 3: You Prefer a Countertop Solution
Some people like having their most-used tools visible and within arm’s reach. If that is you, a crock or a magnetic block is the right choice.
Important: Magnetic blocks work only with all-metal tongs. If your tongs have silicone, nylon, or plastic handles, they will not stick. Check your tongs before buying a magnetic strip.
What you need: A magnetic utensil block (like a knife block but with a magnetic face) or a standard crock. The block saves counter space because it sits vertically. The crock is more versatile.
Best for: People who cook daily and want tongs accessible without opening a drawer.
Branch 4: You Want a Wall-Mounted Setup
If you have zero counter space and your drawers are full, go vertical. Wall-mounted storage keeps tongs off surfaces and within easy reach.
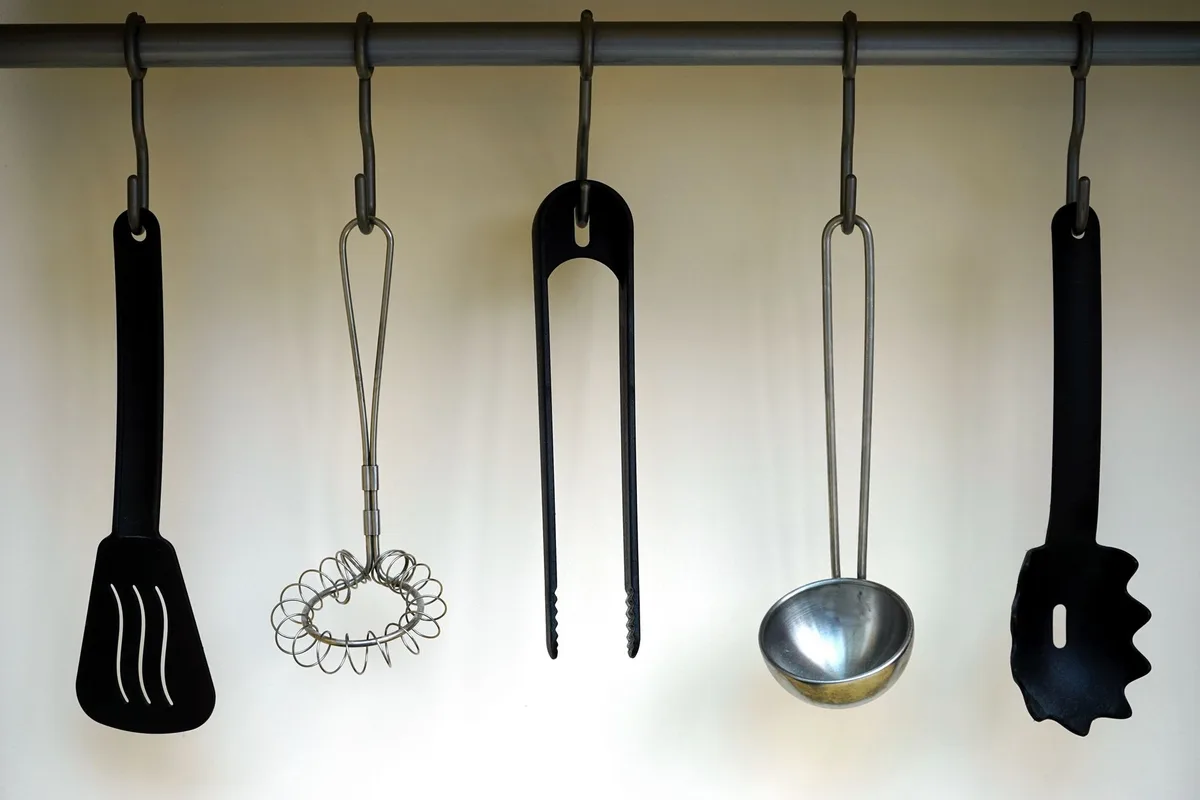
Options include:
- Magnetic strip. Works for all-metal tongs only. Mount it on a backsplash or cabinet side panel. Check weight capacity before loading.
- Pegboard with hooks. A full pegboard system gives you flexibility. Move hooks around as your tool collection changes.
- Rail with S-hooks. A stainless steel rail allows you to hang tongs by their locking ring. This works for any tong design.
How to set it up:
- Choose a location away from heat sources and moisture.
- Mount the strip, rail, or pegboard at a height where you can easily grab the tongs.
- Space the hooks or magnets so tongs do not touch each other.
- For S-hooks, hang the tong by its locking ring if available.
Best for: Minimalists, small kitchens, and anyone who wants to free up drawer and counter space completely.
Step-by-Step: Setting Up Each Storage Method
Once you have chosen your branch from the decision tree, the actual setup is straightforward. Here is exactly what to do for each method.
Drawer Organizer Setup
This is the most common approach and the one we recommend for most people. It keeps tongs protected and out of sight.
What you will need:
- A drawer organizer with adjustable or removable dividers
- A tape measure
- Optional: a non-slip drawer liner
The process:
- Remove everything from the drawer.
- Measure the interior width, depth, and height.
- Choose an organizer where the long compartment measures at least 13 inches in depth for 12-inch tongs.
- Place the organizer in the drawer and check that it does not prevent the drawer from closing.
- Lock all locking tongs before placing them in the compartment.
- Orient all tongs with the heads pointing the same direction. This prevents nesting.
- If you have both locking and non-locking tongs, give them separate compartments.
A common issue: The organizer shifts when you open and close the drawer. Fix this by placing a non-slip liner underneath. Some organizers come with rubber feet.
If yours does not, a liner does the job.
When this method fails: If your tongs are longer than your drawer depth, do not force them. A bent handle weakens the metal over time. Switch to an upright method instead.
Countertop Crock Setup
A crock works well if you have counter space near your stove. It keeps tongs accessible without opening a drawer.
What you will need:
- A crock at least 8 inches tall
- A weighted or non-slip base
- Optional: a divided crock for separating tongs from other tools
The process:
- Place the crock within arm’s reach of your primary cooking area.
- Store tongs handle-down with the heads pointing up. This keeps the gripping ends clean.
- Group tongs together rather than scattering them among spatulas and spoons.
- Do not fill the crock more than two-thirds full. Overcrowding makes retrieval difficult.
A common issue: The crock tips when you pull out a heavy pair of tongs. Ceramic crocks with a wide base are more stable than narrow metal ones. If tipping persists, switch to a crock with a rubber or weighted bottom.
When this method fails: If your crock sits near a heat source like a stovetop, silicone tong heads can degrade over time. Move the crock at least 12 inches from any burner.
Wall Rail or Magnetic Strip Setup
Wall-mounted storage is ideal for small kitchens or anyone who wants tools visible and accessible.
What you will need:
- A magnetic strip rated for kitchen utensils (check weight capacity)
- Or a rail system with S-hooks
- A drill and wall anchors (unless using adhesive strips)
- A level
The process:
- Choose a location away from the stovetop and sink. Heat and moisture shorten the life of both the mount and the tongs.
- Mark the mounting height so the tongs hang at a comfortable reach level.
- For magnetic strips: test each pair of tongs before mounting. Only all-metal tongs stick. Silicone-handled tongs will fall.
- For S-hooks: hang the tong by its locking ring or by the hole in the handle. Space the hooks so tongs do not touch each other.
- Use a level to ensure the strip or rail is straight.
- Secure with wall anchors rated for the combined weight of your tongs.
A common issue: Tongs fall off the magnetic strip when you bump them. This happens when the magnet is weak or the tongs are too heavy. Check the strip’s weight rating before buying.
Most household strips hold 5 to 10 pounds.
When this method fails: If your kitchen has textured tile, adhesive strips may not hold. Drilling into tile requires a carbide bit and careful technique. Consider a rail that mounts into grout lines instead.
Who Each Storage Method Works Best For
Not every method suits every kitchen. Here is a quick breakdown of who benefits most from each approach.
| Storage Method | Best For | Avoid If |
|---|---|---|
| Drawer organizer | Standard cabinets, large kitchens, anyone who prefers hidden storage | Drawers under 10 inches deep, limited drawer space |
| Countertop crock | Small kitchens, frequent cooks, renters who cannot drill walls | Very limited counter space, homes with toddlers |
| Wall-mounted magnetic strip | Minimalists, small kitchens, all-metal tong owners | Silicone or plastic-handled tongs, rental walls you cannot drill |
| Wall rail with S-hooks | Any kitchen with wall space, heavy tong collections | Damp climates where metal hooks rust quickly |
Our take: The drawer organizer is the safest and most versatile option for most households. It protects the tongs, keeps them clean, and requires no permanent installation. But if your drawers are shallow or full, a crock or wall mount is a perfectly good alternative.
Common Mistakes People Make (And How to Avoid Them)
Even with the right method, small errors can turn a good system into a frustrating one. Here are the mistakes we see most often.
Storing tongs unlocked. Unlocked tongs take up more space and nest inside each other. Lock them before putting them away. This one habit saves more frustration than any organizer.
Jamming long tongs into short drawers. A 16-inch tong forced into a 12-inch drawer bends the handle. Bending weakens the metal. Over time, the tongs lose their spring tension.
If they do not fit, store them upright.
Overcrowding the crock. A stuffed crock is worse than a messy drawer. You cannot grab one tool without pulling out three. Keep crocks at two-thirds full maximum.
Using magnetic strips with silicone-handled tongs. Magnets do not stick to silicone or plastic. Check your tongs before buying a strip. If you own a mix of metal and silicone tongs, the metal ones will stay and the others will fall.
Ignoring moisture. Damp tongs stored in a closed drawer can develop rust spots, especially on cheaper stainless steel. Dry them completely before putting them away. For wall-mounted storage, ensure the area has good airflow.
Forgetting to measure first. Buying an organizer, crock, or strip without measuring is the number one mistake. A 14-inch organizer will not fit in a 13-inch drawer. Measure twice, buy once.
Expert Tips for Long-Term Tongs Storage
These tips come from aggregate feedback across hundreds of kitchen setups. They are the small details that make a system last.
Rotate your tongs by frequency of use. Put the tongs you use daily at the front of the drawer or top of the crock. Seasonal grilling tongs can go to the back. This prevents you from digging through rarely used tools every time you cook.
Check the locking mechanism periodically. The pull-back ring on locking tongs can loosen over time. If the ring no longer holds the tongs closed, it is time to replace that pair. A broken lock turns a compact tool into a space-waster.
Store silicone-head tongs away from heat. Silicone handles heat up to about 450 degrees Fahrenheit, but prolonged exposure to high heat degrades the material. Keep them away from stovetops and ovens when stored.
Consider a dedicated tongs drawer. If you own four or more pairs, give them their own drawer. A narrow drawer next to the stove works perfectly. Dedicated space prevents them from competing with other utensils.
Clean tongs before storing. Food residue left in the hinge or locking mechanism attracts bacteria and can cause odors. Wash tongs thoroughly and let them air dry before putting them away.

Table of Contents