You have pulled a perfectly good chicken breast out of the pan, and it is dry again. Learning how to cook chicken breast on cast iron skillet is the fix most home cooks need, because cast iron delivers the kind of heat that builds a crust and locks in moisture. It is not complicated once you understand a few temperature rules and prep steps.
The USDA sets the safe internal temperature for chicken at 165°F. That is the target, but how you get there matters just as much as the number itself. Cast iron’s heat retention changes the game completely.
Let us start with why chicken breast dries out in the first place.
Why Most Chicken Breast Comes Out Dry (And How Cast Iron Fixes It)
Chicken breast is lean. That is its biggest problem. With very little fat to keep the meat moist during cooking, it dries out fast when you overcook it.
Most pans cannot hold enough heat to build a quick sear before the interior dries out. Cast iron changes that.
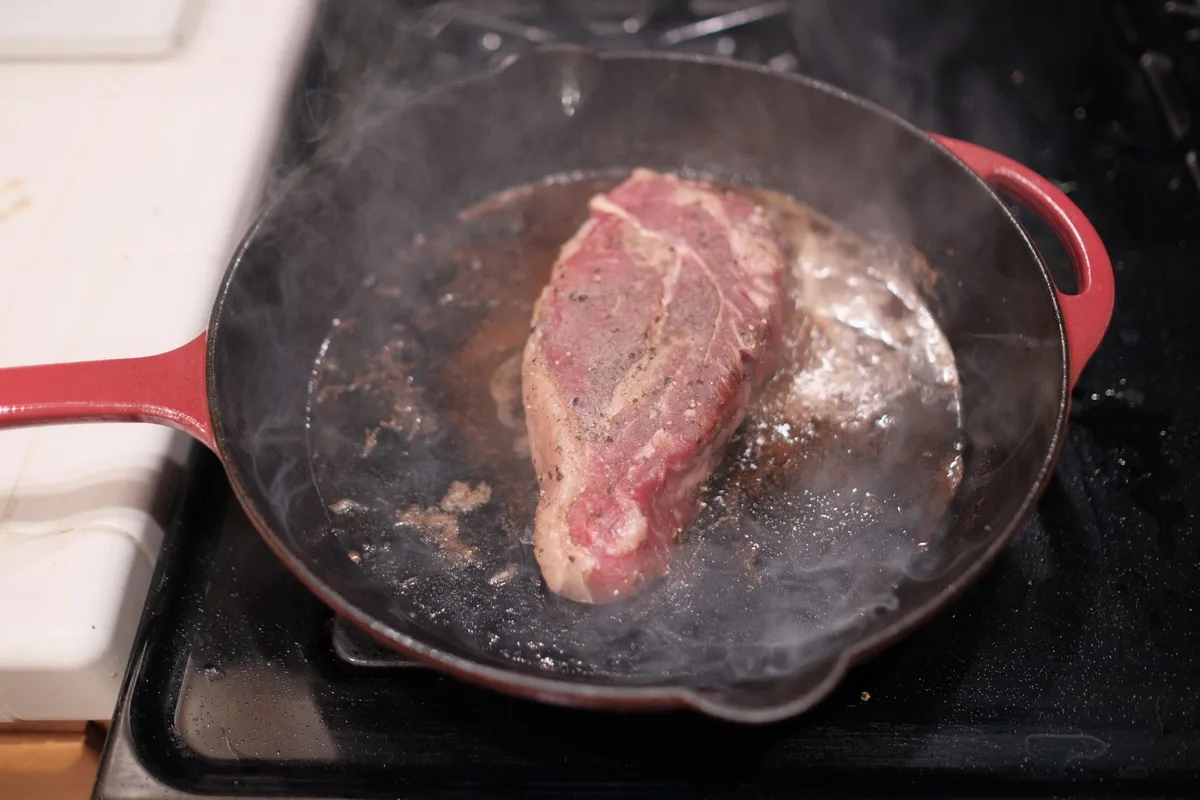
Cast iron skillets are heavy and dense. They hold heat better than any nonstick or stainless steel pan you own. When you drop a cold chicken breast onto a properly preheated cast iron surface, the pan does not lose temperature.
The heat stays high. The meat gets a fast, deep sear. That sear locks in the juices.
Most home cooks also skip the critical step of drying the chicken. Surface moisture turns to steam. Steam keeps the pan temperature low.
You end up boiling the chicken instead of searing it. Cast iron fights this, but only if you help it.
The solution is simple. Dry the chicken. Heat the pan.
Let the pan do the work.
Quick Answer: The Best Method at a Glance
How to cook chicken breast on cast iron skillet comes down to four steps. Preheat the pan for five minutes on medium-high heat. Pat the chicken completely dry with paper towels.
Sear each side for four to six minutes until golden. Rest for five minutes before slicing at 165°F.
The USDA Food Safety and Inspection Service confirms that 165°F is the safe internal temperature for poultry. That number is non-negotiable for safety. But it is also your guide for doneness.
The 3 Variables That Decide Your Cooking Method
Not all chicken breasts are the same. Your cooking method changes based on three factors. Here is how to decide what works for your exact situation.
Chicken Thickness
A thin breast cooks fast. A thick one takes longer. If you cook a thick breast the same way as a thin one, you get burnt edges and a raw center.
The fix is either pounding the breast to even thickness or using the oven to finish it.
For breasts thinner than 1 inch, stovetop only works fine. For breasts thicker than 1.5 inches, you need a two-step method. Sear on the stovetop.
Then finish in the oven.
Bone-In vs. Boneless
Bone-in breasts take longer to cook. The bone acts as an insulator. You need to adjust your timing and often use the oven-finish method.
Boneless breasts cook faster and more evenly.
Skin-On vs. Skinless
Skin-on breasts give you a crispy layer. The skin protects the meat from drying out. You can cook them at higher heat without worrying as much.
Skinless breasts need more care. They dry out faster and need precise temperature control.
Step-by-Step: The Basic Cast Iron Chicken Breast Method
This method works for most boneless, skinless chicken breasts between 1 and 1.5 inches thick. Follow these steps in order for consistent results.
Preheat Your Skillet the Right Way
Place your cast iron skillet on the stove. Turn the heat to medium-high. Wait five minutes.
Do not add oil yet. The pan needs to heat evenly across the entire surface. You can test it by holding your hand a few inches above the pan.
You should feel steady, radiating heat.
Dry and Season the Chicken
Remove the chicken from the fridge. Pat it dry with paper towels. This is the most important step.
Moisture is the enemy of a good sear. Season both sides generously with salt and pepper. Let it sit for 10 minutes at room temperature.
Sear Without Moving
Add oil to the hot pan. Swirl to coat the bottom. Place the chicken breast in the pan.
It should sizzle immediately. Do not move it. Let it cook for four to six minutes.
The crust forms when the meat stays still. Resist the urge to peek or shake the pan.
Flip and Finish
Flip the chicken with tongs. Cook for another four to six minutes. Check the internal temperature with a meat thermometer.
At 160°F, remove it from the pan. It will climb to 165°F during resting. This is called carryover cooking.
Rest Before Slicing
Place the chicken on a cutting board. Cover loosely with foil. Wait five minutes.
Do not skip this step. Slicing too early releases all the juices. A rested chicken breast stays moist and tender.
The Thick Breast Problem: When to Use the Oven-Finish Method
If your chicken breast is over 1.5 inches thick, stovetop alone will not work. The outside will burn before the inside reaches 165°F. The solution is a two-step method that uses the oven to finish the job.
Sear the breast on the stovetop for two to three minutes per side. Get a good crust. Then transfer the skillet to a preheated oven at 400°F.
Finish cooking for five to ten minutes. Check the internal temperature.
This method works because the oven surrounds the meat with even heat. The cast iron skillet holds its temperature when you put it in the oven. This is one of the biggest advantages of cast iron over other pans.
As of 2026, this remains the standard technique used by professional kitchens for thick cuts of poultry.
The Thin Breast Problem: How to Avoid Overcooking
Thin chicken breasts are a different challenge. Anything under half an inch cooks in under three minutes total. The window between done and dry is tiny.
The best approach is to keep the heat high and cook fast. Preheat your skillet fully. Add the chicken.
Cook for two minutes per side. Check the temperature immediately. At 160°F, pull it off the heat.
Do not use the oven-finish method for thin breasts. They will overcook before the oven heat even reaches them. Stovetop only is the right call here.
Pounding chicken breasts to even thickness solves both problems. It makes thick breasts thinner and thin breasts more uniform. Place the breast between two sheets of plastic wrap.
Use a rolling pin or heavy pan. Aim for half an inch thickness across the whole piece.
Butter Basting: When and Why to Do It
Butter basting adds flavor and moisture to lean chicken breast. It is a restaurant technique that works well with cast iron.
Here is how it works. Sear the chicken on one side. Flip it.
Add a tablespoon of butter, a crushed garlic clove, and a sprig of thyme to the pan. Tilt the skillet slightly so the butter pools. Use a spoon to scoop the hot butter over the chicken.
Repeat for about two minutes.
The butter browns as it heats. That creates nutty, rich flavor. The fat also helps keep the breast moist during the final minutes of cooking.
Butter basting is best for skinless breasts. The butter directly contacts the meat. For skin-on breasts, the skin already provides enough fat and protection.
Butter basting is optional there.
One warning. Butter burns at a lower temperature than oil. Keep the heat at medium after you add the butter.
High heat will turn the butter bitter and black.
Mistakes That Ruin Cast Iron Chicken
Avoid these common errors. They are the difference between juicy chicken and a dry disappointment.
Putting Cold Chicken in a Hot Pan
Cold chicken lowers the pan temperature instantly. The sear never forms. You end up steaming the meat instead.
Let the chicken sit at room temperature for 15 minutes before cooking. It should not feel cold to the touch. This step is not about food safety.
It is about heat transfer.
Using the Wrong Oil
Not all oils handle high heat the same way. Oils with low smoke points burn before the pan gets hot enough to sear.
Olive oil and butter burn quickly. Avocado oil, grapeseed oil, and canola oil handle high heat well. Use these for the initial sear.
Save the butter for basting at the end.
Overcrowding the Skillet
Cast iron works best when the pan is not full. Crowding drops the pan temperature. The chicken releases moisture instead of searing.
Cook one or two breasts at a time in a 12-inch skillet. If you need to cook more, do it in batches. Keep the finished pieces in a warm oven while you cook the rest.
Slicing Too Soon
Cutting into a hot chicken breast releases all the juices. The meat turns dry and stringy.
Wait five minutes after cooking. The internal temperature will rise by about five degrees during this rest. The juices redistribute.
The result is a moist, tender breast.
How to Clean Cast Iron After Cooking Chicken (Without Ruining the Seasoning)
Cast iron care is simple. Many people overcomplicate it.
Let the pan cool slightly. Rinse it with hot water. Use a stiff brush to remove any stuck bits.
Do not use soap unless you have to. A little soap is fine, but it strips seasoning.
For stubborn residue, add coarse salt to the wet pan. Scrub with a paper towel or brush. The salt acts as an abrasive without damaging the surface.
Dry the pan completely. Place it on a low heat burner for a minute to evaporate any remaining moisture. Then apply a thin layer of oil.
Wipe off the excess. Store it in a dry place.
Do not soak cast iron. Water causes rust. Do not put it in the dishwasher.
The detergent and high heat destroy the seasoning.
Best Oils and Fats for Searing Chicken Breast
The right oil makes a difference. Here is a quick comparison of the best options.
| Oil / Fat | Smoke Point | Best Use |
|---|---|---|
| Avocado oil | 520°F | High heat searing |
| Grapeseed oil | 420°F | Searing and basting |
| Canola oil | 400°F | All-purpose searing |
| Clarified butter (ghee) | 450°F | Searing with butter flavor |
| Regular butter | 302°F | Basting only, not searing |
| Olive oil | 375°F | Medium heat only |
Avocado oil is the best choice for beginners. It has a high smoke point and a neutral flavor. It does not burn easily.
It lets the seasoning on the chicken do the work.
Canola oil is a solid budget option. It works well and costs less. The flavor is neutral.
Use regular butter only for basting at the end of cooking. It adds flavor but burns fast. Ghee works for both searing and basting because the milk solids are removed.
The 165°F Rule: Temperature Guide for Safety and Juiciness
The USDA sets 165°F as the safe internal temperature for chicken. That number is based on food safety research. At 165°F, harmful bacteria like salmonella and campylobacter are killed instantly.
But here is what many home cooks miss. Chicken breast stays juicy when you pull it off the heat at 160°F. The internal temperature continues to rise during resting.
This is called carryover cooking. It adds another five degrees. You hit 165°F without overcooking the meat.
Use an instant-read thermometer. Insert it into the thickest part of the breast. Avoid touching bone if cooking bone-in.
The reading stabilizes in three to five seconds. Digital thermometers are more reliable than analog ones.
Do not rely on cooking time alone. Every chicken breast is different. Thickness, starting temperature, and pan heat all affect cook time.
The thermometer is your only accurate guide.
How This Compares to Other Cooking Methods
Cast iron is not the only way to cook chicken breast. But it has clear advantages over the alternatives.
Cast Iron vs. Nonstick
Nonstick pans are easy to clean. Food does not stick. But they cannot handle high heat.
Most nonstick coatings degrade above 500°F. You cannot get the same sear.
Cast iron wins for crust formation. It loses for ease of cleaning. If you want a golden brown surface, pick cast iron.
If you want easy cleanup and do not care about sear, nonstick works.
Cast Iron vs. Stainless Steel
Stainless steel heats unevenly. Hot spots form. Chicken sticks more aggressively than on cast iron.
You need more oil and more attention.
Cast iron holds heat better. It sears more evenly. But stainless steel is lighter and easier to handle.
For chicken breast specifically, cast iron is the better choice. The heat retention matters more than the weight.
Cast Iron vs. Oven-Baking
Baking chicken breast in the oven is hands-off. You season it, put it on a sheet pan, and let it cook. No flipping.
No splatter.
But oven-baking does not produce a crust. The meat cooks in its own steam. The surface stays pale and soft.
Cast iron gives you both crust and even cooking. It is the best of both worlds.
Pro Tips for Consistently Juicy Results
These techniques go beyond the basic method. They help you nail the result every time.
Brining or Dry-Brining
Brining adds moisture to the meat. A wet brine is salt and sugar dissolved in water. Soak the chicken for 30 minutes to four hours.
Rinse and pat dry before cooking.
Dry brining is simpler. Sprinkle salt over the chicken. Let it sit uncovered in the fridge for two to 24 hours.
The salt draws moisture out, then pulls it back in. The result is seasoned meat that holds onto its juices during cooking.
Pounding to Even Thickness
Uneven chicken breasts cook unevenly. The thin part dries out while the thick part finishes cooking. Pounding solves this.
Place the breast between two sheets of plastic wrap. Use a rolling pin or heavy pan. Aim for even thickness across the whole piece.
Half an inch is a good target for quick cooking.
Letting the Chicken Come to Room Temperature
Cold chicken shocks the pan. The temperature drops. The sear never forms.
Let the chicken sit on the counter for 15 to 20 minutes before cooking.
This is not a food safety issue. The USDA guidelines allow raw chicken to sit at room temperature for up to two hours. Fifteen minutes is safe and effective.
Frequently Asked Questions
How long does it take to cook chicken breast in a cast iron skillet?
For a boneless, skinless breast about one inch thick, cook four to six minutes per side. Total time is eight to 12 minutes. Thicker breasts need the oven-finish method and add five to 10 minutes.
Do I need oil in a cast iron skillet for chicken?
Yes. Cast iron needs oil to prevent sticking and to build a crust. Use a high smoke point oil like avocado or canola.
Add it after the pan is hot.
Why does my chicken stick to the cast iron skillet?
The pan is not hot enough or the chicken is not dry enough. Preheat the skillet for five minutes on medium-high. Pat the chicken completely dry with paper towels.
Moisture causes sticking.
Can I cook frozen chicken breast in a cast iron skillet?
It is not recommended. Frozen chicken releases too much water. The water drops the pan temperature.
You end up steaming the meat. Thaw chicken in the fridge overnight for best results.
Should I cover the skillet while cooking chicken breast?
No. Covering the pan traps steam. The steam softens the crust.
Cook uncovered for a crispy, golden brown surface. Use a lid only if you need to finish a very thick breast in the oven.
Do I need to season a new cast iron skillet before cooking chicken?
Yes. New cast iron skillets come with a factory seasoning, but it is thin. Add a layer of oil and heat the pan until it smokes.
Repeat this two or three times for a stronger nonstick surface.
Final Verdict: Is Cast Iron the Best Pan for Chicken Breast?
Yes, for most home cooks. Cast iron delivers the high heat and even temperature needed for a good sear. It holds heat better than nonstick or stainless steel.
It works on any stovetop and transfers to the oven easily.
The downsides are real. Cast iron is heavy. It takes longer to heat up.
It needs proper cleaning and drying. But for the specific goal of cooking a juicy chicken breast with a golden crust, no other pan does it better.
Master the preheat. Dry the chicken. Use a thermometer.
Rest the meat. Those four steps are all you need to turn out consistently good chicken breast from a cast iron skillet.

Table of Contents