I’ve been cooking professionally for over fifteen years, and I can tell you this: shredding chicken by hand with two forks is a waste of your time. It’s messy. It’s slow.
And your forearms will ache before you’re halfway through a batch of pulled chicken for tacos or meal prep.
But here’s the trick nobody tells you about.
Your stand mixer, that heavy workhorse sitting on your counter, can shred an entire batch of chicken in under 60 seconds. No fuss. No fork-stabbing your palm.
No shreds flying everywhere.
Let me show you exactly how to do it, what mistakes to avoid, and why this method will change how you prep chicken forever.
Why Use a Stand Mixer for Shredding Chicken?
Shredding chicken in a stand mixer isn’t just faster. It’s better.
You get uniform shreds every single time. Not those uneven chunks where half is shredded and the other half is practically whole. A mixer pulls the meat apart consistently, giving you perfect strands that hold sauce well and cook evenly in soups, casseroles, or sandwiches.
You also save your hands. Anyone who’s shredded a whole rotisserie chicken knows the struggle. The meat gets stuck under your fingernails.
Your fingers get greasy. You end up washing your hands four times during the process. With a mixer, you touch the chicken once, when you put it in the bowl.
And the cleanup? It’s minimal. One bowl, one paddle attachment.
Toss them in the dishwasher and you’re done.
The speed matters too. Hand-shredding a single chicken takes 5, 10 minutes depending on your technique. A stand mixer does it in 15, 30 seconds.
That’s a massive time savings when you’re cooking for a crowd or prepping meals for the week.
Choosing the Right Mixer and Attachment
Before you start, let’s talk equipment. Not all mixers and attachments work the same way for shredding chicken.
The Best Attachment for Shredding
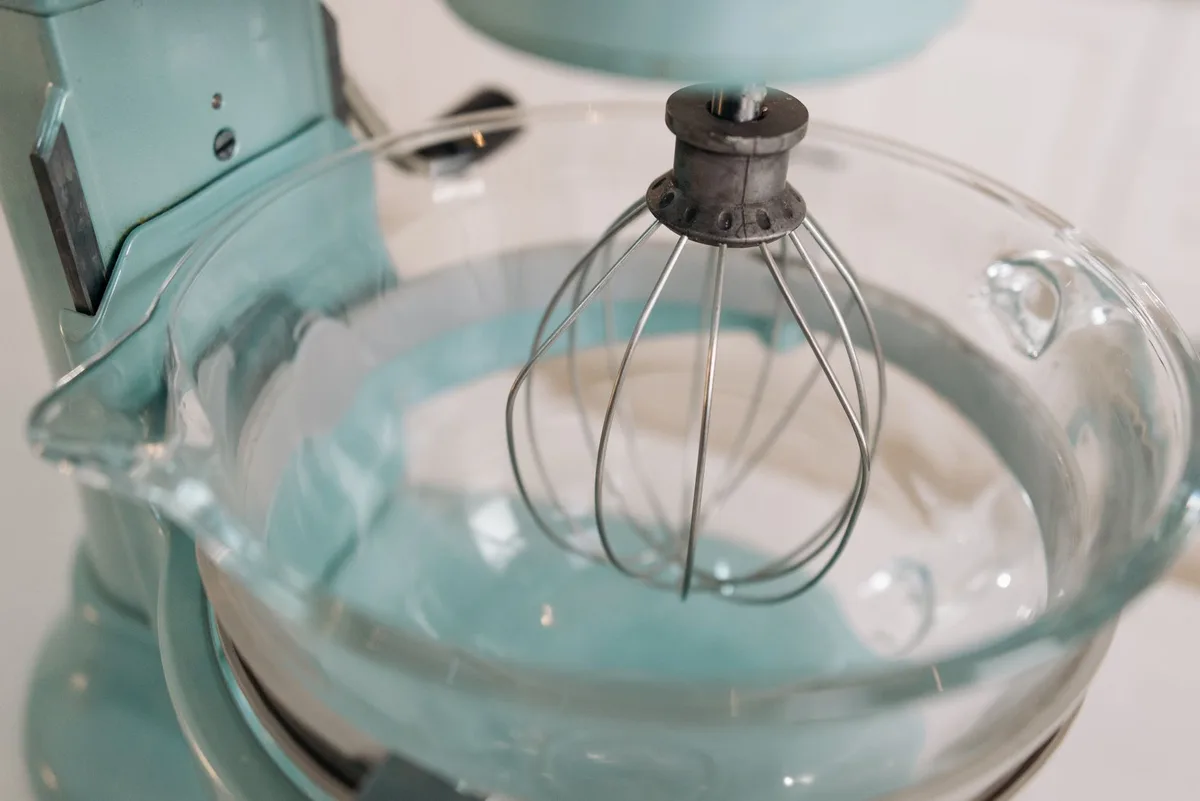
You want the flat beater paddle, that standard paddle-shaped attachment that comes with every stand mixer. Do not use the wire whisk. Do not use the dough hook.
Both will fail miserably.
The whisk will shred the chicken into uneven, stringy mess. Some bits will be pulverized into paste while others remain whole. The dough hook will push the chicken around without actually breaking it apart.
You’ll end up with a warm, spinning lump of meat.
The paddle attachment hits the sweet spot. It’s broad enough to grab the chicken, but it doesn’t cut into it like a blade would. The repeated impact breaks the meat apart along its natural grain lines.
Stand Mixer Size Matters
A 5-quart mixer (standard KitchenAid size) handles one to two whole chickens comfortably. If you try to cram in three chickens, you’ll overcrowd the bowl. The meat won’t shred evenly because it can’t move around properly.
For a 6-quart or larger model, you can push two to three chickens at once. But here’s my advice: don’t push it. Work in batches if you need to.
It takes less than a minute per batch, so you’re not losing time.
Countertop mixers with tilt-head designs work fine. Bowl-lift models work even better because they’re more stable under heavier loads.
What About Hand Mixers?
I get asked this a lot. Yes, you can shred chicken with a hand mixer, the paddle attachments on those work similarly. But you’ll need to hold the bowl steady with one hand while operating the mixer with the other.
It’s doable for small batches. For larger quantities, the stand mixer is far superior.
Step-by-Step: How to Shred Chicken in a Stand Mixer
Let’s walk through the process. I’ve done this hundreds of times, and these steps are foolproof.
Step 1: Cook Your Chicken First
Your chicken needs to be fully cooked before it goes anywhere near the mixer. Raw chicken won’t shred, it’ll just turn into a sticky, unsafe mess.
You can use:
- Rotisserie chicken, The easiest option. Remove the skin and pull the meat off the bones.
- Poached chicken breasts, Simmer boneless, skinless breasts in salted water or broth for 12, 15 minutes until they reach 165°F internally.
- Baked or roasted chicken, Works great, especially dark meat.
- Slow-cooked chicken, Falls apart beautifully after hours in the crockpot.
- Pressure-cooked chicken, Instant Pot or stovetop pressure cooker makes incredibly tender meat.
Let the chicken cool for 5, 10 minutes after cooking. Hot chicken shreds, but it also releases more steam and moisture into the bowl. Slightly warm or room temperature works best.
Step 2: Prepare the Chicken
Remove all skin and bones. This is crucial. Skin gets caught in the paddle and turns into greasy strings.
Bones can damage your mixer or chip the paddle.
Break the chicken into large chunks, roughly 2, 3 inch pieces. You don’t need to be precise. Just make sure no piece is bigger than your fist.
Why break it up first? Large whole chicken breasts or thighs will spin around the bowl without shredding properly. The paddle needs multiple contact points to grab and pull the meat apart.
Step 3: Load the Mixer Bowl
Place the paddle attachment on your mixer. Add the chicken chunks to the bowl.
Don’t fill the bowl more than halfway. The chicken needs room to move and circulate. Overfilling leads to uneven shredding and puts strain on your mixer motor.
Step 4: Start at Low Speed
Turn the mixer to the lowest speed (Stir or Speed 1 on KitchenAid mixers). Let it run for 10, 15 seconds.
Watch what happens. The chicken will start breaking apart almost immediately. You’ll see strands forming.
The meat will look fluffy and separated.
Keep the speed low for two reasons:
- High speed pulverizes the chicken into mush. You don’t want baby food.
- High speed can fling meat bits out of the bowl. Trust me, cleaning shredded chicken off your kitchen wall is not fun.
Step 5: Check and Repeat
Stop the mixer and check the consistency. Are there still large chunks? Run it for another 5, 10 seconds.
Most batches are done in 20, 30 seconds total. Some larger batches take up to 45 seconds. But never go beyond one minute.
After that point, you’re just mashing the meat.
Step 6: Remove and Use
Turn off the mixer. Lift the paddle, most of the chicken will fall off. Use a spatula to scrape off any meat stuck to the paddle.
Transfer the shredded chicken to a bowl or storage container. It’s ready for whatever you’re making.
Common Mistakes and How to Avoid Them
I’ve made every mistake in the book with this technique. Here’s what to watch out for.
Over-Shredding Is the Biggest Problem
The number one mistake people make is letting the mixer run too long. Chicken that’s been shredded for 60+ seconds turns into a pasty, dry mess. It looks like sawdust.
It tastes like disappointment.
Fix: Shred in 10-second bursts. Check after each burst. Stop as soon as the chicken is uniformly pulled apart.
Using Cold Chicken
Chicken straight from the fridge is harder to shred. The cold fat isn’t pliable, so the meat resists breaking apart. You’ll need more time, which increases the risk of over-shredding.
Fix: Let refrigerated chicken sit at room temperature for 15 minutes before shredding. Or microwave it for 30, 45 seconds to take the chill off.
Not Removing All the Bones
I once shredded a batch without realizing I’d missed a small bone. The paddle cracked the bone, and tiny shards ended up throughout the entire batch. I had to throw out 4 pounds of chicken.
Fix: Run your hands through the chicken pieces before loading. Feel for any hidden bones, especially in rotisserie chicken.
Overloading the Bowl
Your mixer’s motor has limits. A heavy load of chicken generates resistance. Overloading can burn out the motor, especially on older or lower-power models.
Fix: Stick to 1, 2 chickens or 2, 3 pounds of chicken meat per batch. If you need more, do multiple batches.
What to Do With All That Shredded Chicken
Once you’ve mastered shredding chicken in your stand mixer, you’ll have plenty of meat to use. Here are my go-to applications.
Chicken Tacos and Burritos
Shredded chicken is the star of taco night. Mix it with salsa verde, lime juice, and cumin. Warm it in a skillet for 2, 3 minutes.
Load it into corn tortillas with fresh cilantro and onion.
Chicken Salad
The uniform shreds make perfect chicken salad. Mix with mayonnaise, diced celery, grapes, and a pinch of curry powder. Serve on croissants or over a bed of greens.
Soups and Stews
Shredded chicken dissolves beautifully into broth. Add it to chicken noodle soup, tortilla soup, or white chicken chili. The shreds soak up flavor without clumping.
Casseroles and Bakes
Use it in chicken tetrazzini, enchilada casserole, or rice bakes. The shreds distribute evenly through the dish. No more getting a giant chunk of chicken in one bite and noodles in the next.
Meal Prep Containers
Portion shredded chicken into 4, 6 ounce servings. Store in the fridge for 3, 4 days or freeze for up to 3 months. It thaws quickly and reheats beautifully.
Storage and Reheating Tips
Shredded chicken has more surface area than whole pieces, so it dries out faster. You need to store it properly.
Refrigerator Storage
Let the chicken cool completely before storing. Place it in an airtight container. Press a piece of parchment paper directly onto the surface before sealing, this reduces air contact and prevents drying.
Shredded chicken stays good for 3, 4 days in the fridge.
Freezer Storage
Divide into meal-sized portions. Place each portion in a freezer bag. Flatten the bag to remove air, then seal.
Flat bags stack easily and thaw faster.
Label each bag with the date and weight. Frozen shredded chicken keeps for 2, 3 months.
Reheating Without Drying
The worst thing you can do is microwave shredded chicken on high power. The edges turn to rubber while the center stays cold.
Instead:
- Stovetop: Warm in a skillet over medium-low heat with a splash of broth or water. Cover and stir occasionally. Takes 3, 4 minutes.
- Microwave: Use 50% power. Heat in 30-second intervals, stirring between each. Add a tablespoon of water or broth per cup of chicken.
- Oven: Spread on a baking sheet. Cover with foil. Bake at 350°F for 10, 12 minutes.
How This Method Compares to Other Shredding Techniques
Let’s be real about the alternatives.
Two forks: The classic method. It works, but it’s labor-intensive. You’ll get uneven shreds and tired hands.
Great for small batches of 1, 2 chicken breasts. Terrible for large quantities.
Hand mixer: Faster than forks. More even shreds. But you’re still holding the mixer and the bowl simultaneously.
For medium batches, it’s a decent compromise.
Stand mixer: The clear winner for anything over 1 pound of chicken. Even shreds, minimal effort, fast cleanup. The only downside is you need to own a stand mixer and clean the bowl afterward.
Food processor: Do not do this. A food processor with a blade will turn chicken into paste before you blink. If your recipe needs finely minced chicken, use a food processor.
For shredded chicken, stick to the mixer.
Why Professional Chefs Love This Technique
I’ve worked in kitchens where we’d hand-shred 20 pounds of chicken for Sunday brunch. It was brutal. Then someone tried the stand mixer technique, and we never went back.
Professional chefs care about consistency. When every plate needs to look identical, hand-shredded chicken doesn’t cut it. The mixer gives you uniform strands that plate beautifully and cook consistently.
They also care about speed. A 10-minute hand-shredding task becomes a 30-second machine task. In a busy kitchen, that’s a massive time saver.
And honestly? It’s easier on the staff. Less repetitive strain, fewer burnt fingers from hot chicken, less mess on the cutting board.
A Note on Safety
Your stand mixer is powerful. Treat it with respect.
Never put your hands or utensils into the bowl while the mixer is running. That paddle can break fingers. Always stop the mixer completely before checking the shred consistency or adding more chicken.
Make sure the bowl is locked into place before starting. A loose bowl can tilt or shift mid-cycle, flinging chicken everywhere.
If your mixer starts making unusual sounds or straining, stop immediately. Reduce the load and try again with smaller batches.
The USDA recommends cooking chicken to an internal temperature of 165°F. If you’re cooking chicken specifically for shredding, use a reliable instant-read thermometer to verify doneness before shredding. The USDA’s food safety guidelines are the gold standard for poultry preparation.
When NOT to Use This Method
Stand mixer shredding isn’t perfect for every situation.
Don’t use it if you need chunky shreds for something like chicken pot pie where you want distinct pieces. The mixer breaks meat into fine strands, not chunky cubes.
Don’t use it for minced or ground chicken. That requires a food processor or knife work.
Don’t use it with extremely dry or overcooked chicken. If the meat has no moisture, it will turn into dusty flakes. Moisten dry chicken with broth before attempting to shred it in the mixer.
Don’t use it with skin-on chicken that hasn’t been stripped. The skin wraps around the paddle and creates a slimy mess.
Final Thoughts on Shredding Chicken in a Stand Mixer
The technique is simple. The equipment is already in your kitchen. The results are consistently excellent.
I’ve taught this method to dozens of home cooks. Every single one has had the same reaction: “Why didn’t I know about this sooner?”
It’s one of those kitchen hacks that seems almost too easy. But it works. Every time.
Boneless, skinless, bone-in, rotisserie, any fully cooked chicken will shred beautifully in your stand mixer.
Stop stabbing at hot chicken with forks. Stop spending 10 minutes doing what your mixer can do in 20 seconds. Load the bowl, set the speed low, and let the machine do the work.
Your hands will thank you. And so will everyone who eats that perfectly shredded chicken in your next taco night, soup batch, or meal prep container.

Table of Contents