For filament bulbs, set to continuity and touch terminals; beep means the bulb works.
If you want to know how to test a light bulb with a multimeter, you are in the right place. I test bulbs in homes and shops every week. This guide is simple, safe, and proven. You will learn how to test a light bulb with a multimeter like a pro, avoid common risks, and read the numbers with confidence.

Safety first and tools you need
Do not rush. A few quick checks keep you safe and protect your meter.
What you need:
- Digital multimeter with continuity, resistance, diode, and AC volts
- Insulated probes and, if you have them, small alligator clips
- Non-contact voltage tester for live checks
- Gloves and eye protection for broken glass risk
- A known-good lamp or socket for swap tests
Safety rules:
- Unplug the lamp or switch off the breaker before you touch the bulb.
- Let hot bulbs cool fully to avoid burns.
- Never use continuity or resistance modes on a live circuit.
- Be careful with LED and CFL bulbs. Their drivers and capacitors can hold charge even after power is off. Wait a few minutes before testing.
If your goal is how to test a light bulb with a multimeter safely, these steps make the job simple and calm.
How bulbs work and what your meter reads
Knowing the basics helps you read your meter without doubt.
Incandescent and halogen bulbs:
- A thin filament acts like a tiny wire.
- If the filament is intact, you have continuity and low resistance.
- If the filament is broken, you get an open circuit and no beep.
LED bulbs:
- An LED bulb has a driver and many small LEDs.
- A simple continuity test may not beep even if the bulb works.
- Diode mode can show a small voltage drop on exposed LED segments, but many bulbs are sealed.
This background makes how to test a light bulb with a multimeter much easier to follow.
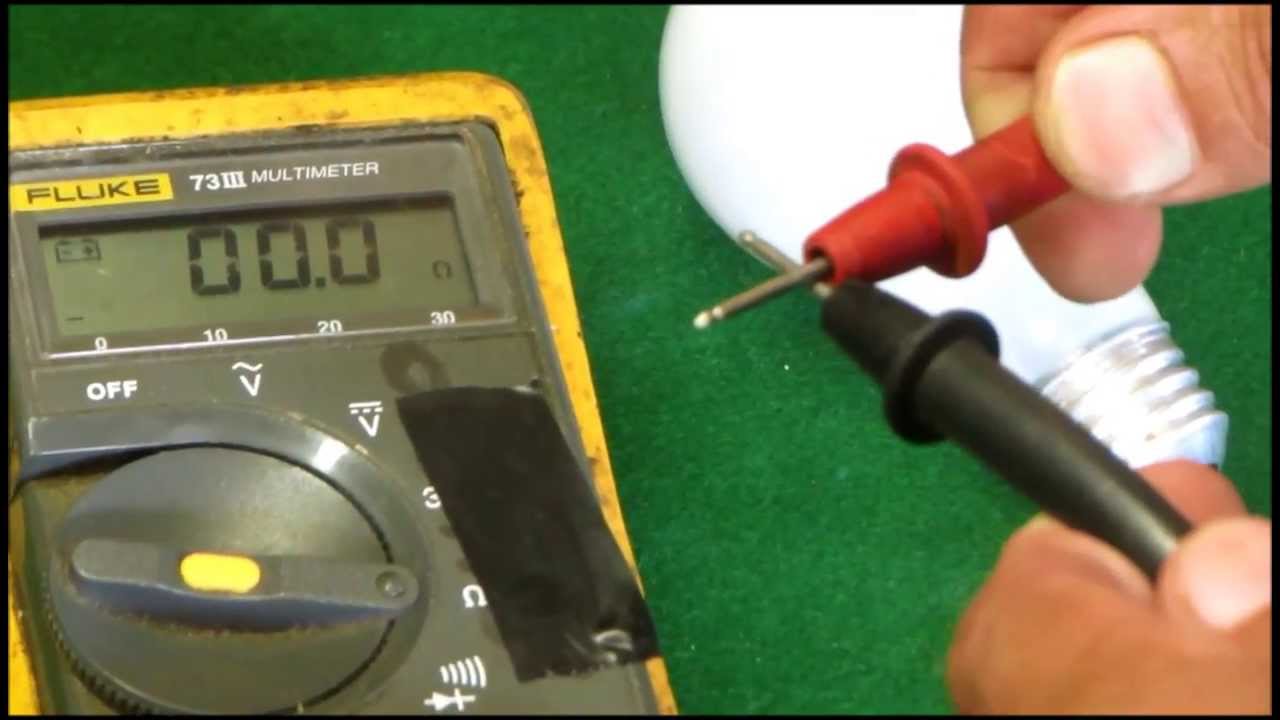
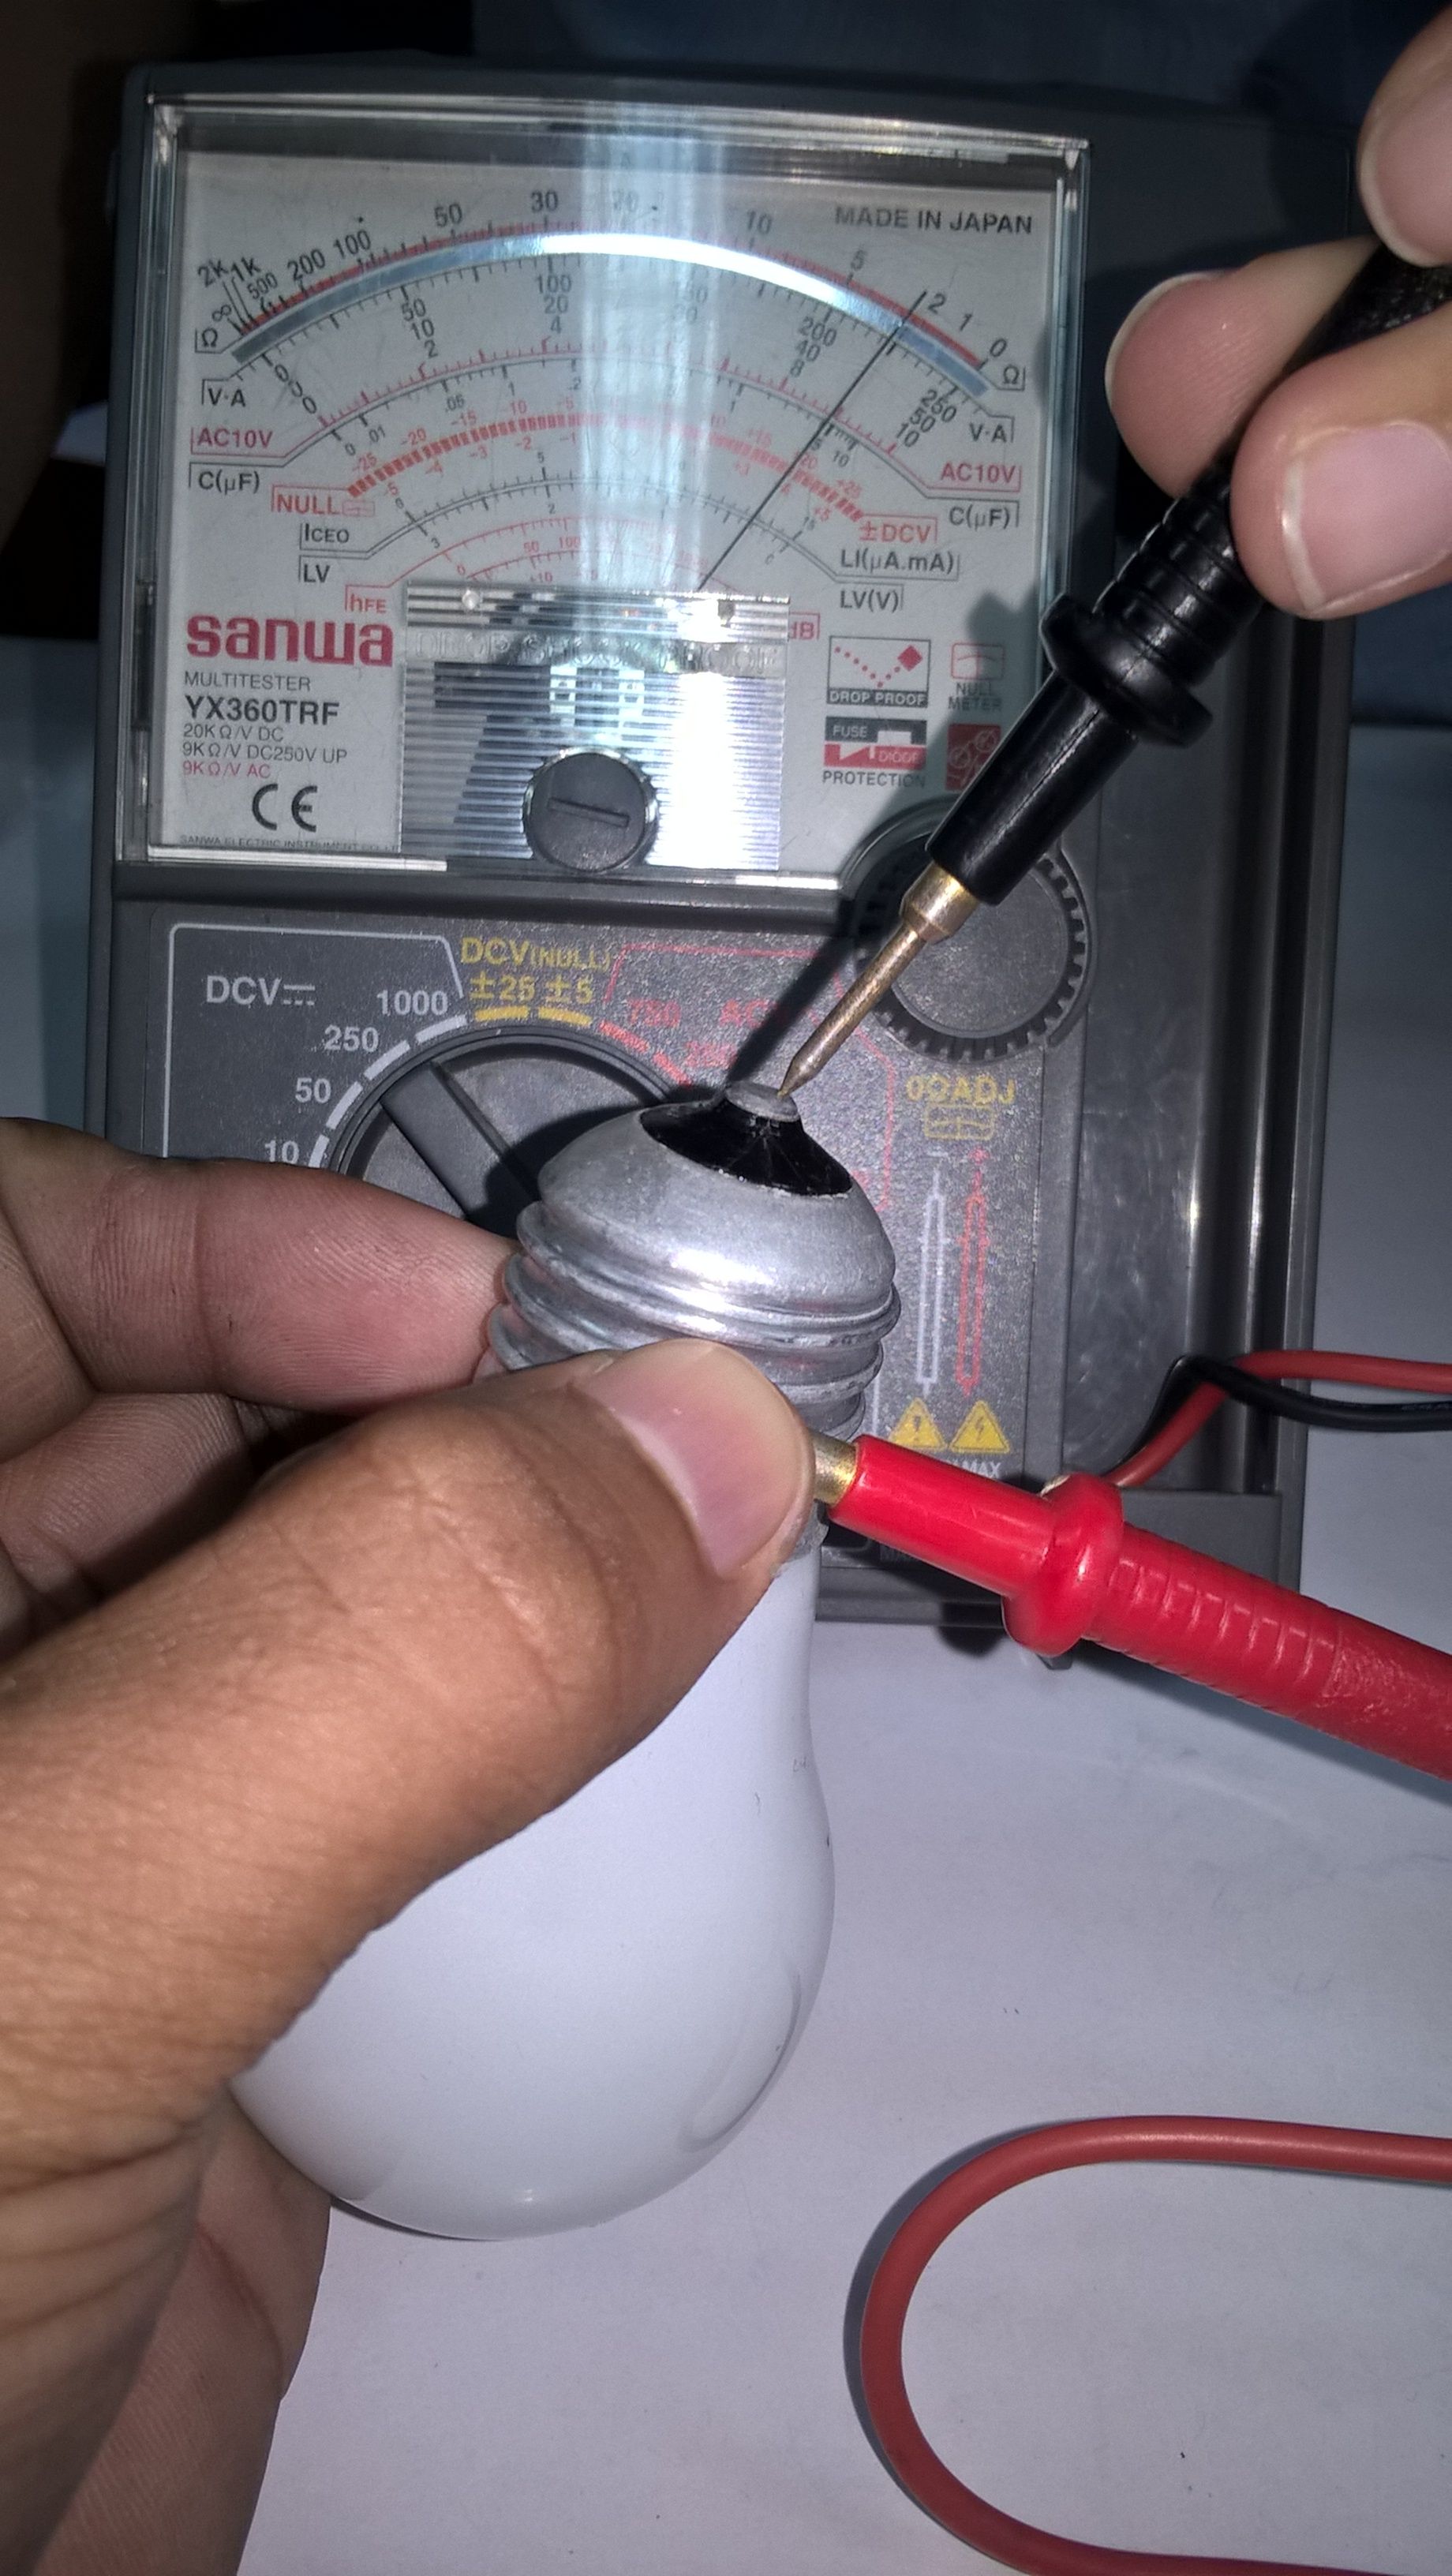
Step-by-step: how to test a light bulb with a multimeter (incandescent and halogen)
This is the fastest, most reliable method for filament bulbs.
- Remove and inspect
- Turn off power and remove the bulb.
- Look for a broken filament, dark spots, or a loose base.
- If the glass is white or cloudy, the bulb may be blown.
- Set and verify your meter
- Set the meter to continuity. Touch probes together. It should beep.
- If you prefer ohms, set to the lowest range.
- Test the bulb
- Edison base (E26/E27): Touch one probe to the center tip and one to the threaded shell.
- Bayonet base (BA15d): Touch one probe to each pin.
- GU10: Touch one probe to each contact.
- Read the result
- Beep or a low ohms value (often 5–80 Ω cold) means the filament is intact.
- OL or no beep means the filament is broken.
- Cross-check with resistance
- A 40 W, 120 V bulb often measures around 20–40 Ω when cold.
- Higher wattage tends to show lower cold resistance.
- Very high resistance or unstable readings suggest a failing filament.
If you want a clear path for how to test a light bulb with a multimeter, start with this continuity test. It gives a yes or no in seconds.
Pro tip from the field: When I test a batch of bulbs on a ladder, I clip one probe to the shell and tap the center tip with the other. It speeds things up and keeps my hands steady.

How to test an LED bulb with a multimeter
LED bulbs need a slightly different approach. Do not expect a beep on the base.
Quick checks:
- Visual check: Burn marks, smell of burnt electronics, or a loose base are red flags.
- Wiggle test: Gently twist the base. A loose base often means a broken internal wire.
Multimeter steps:
- Resistance mode across the base: You may see the reading climb as capacitors charge. That is normal. A rock-solid short (under about 10 Ω) suggests a failed driver.
- Diode mode on exposed LED boards: If you can access the LED board safely (many are sealed), touch probes across an LED or a pair. A small voltage drop one way and OL the other way is normal.
- No access to the board: The best test is a known-good socket. If the socket works with another bulb, but not this one, your LED bulb is likely bad.
Warning:
- Do not apply DC or AC power to internal parts unless you are trained and have an isolation transformer. LED drivers can be dangerous even when unplugged.
This section is key if your search was how to test a light bulb with a multimeter and your bulb is LED. Expect different behavior versus a filament bulb.

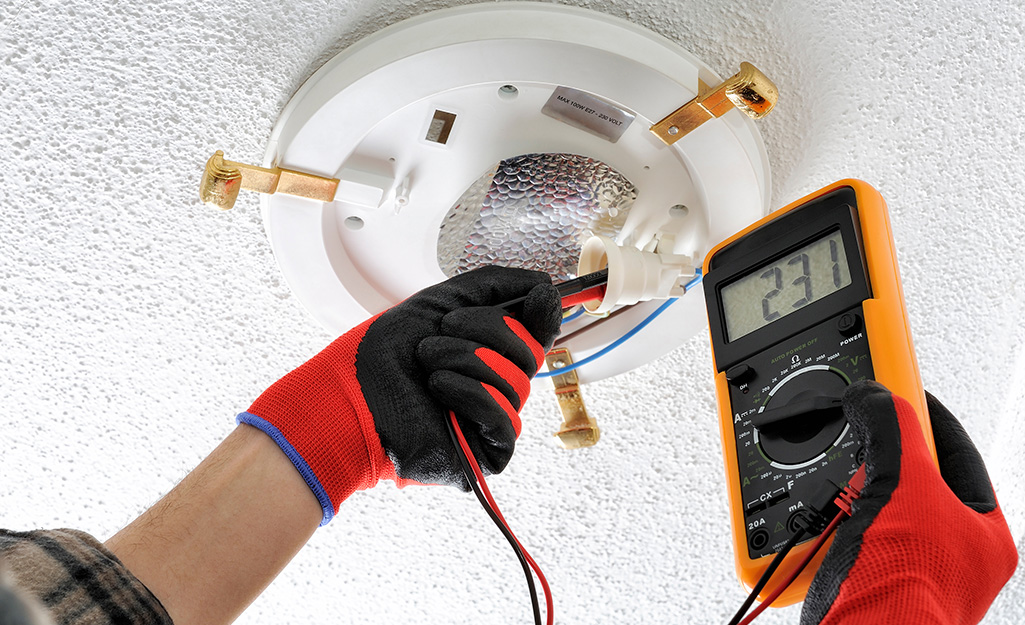
Test the socket and the circuit
Sometimes the bulb is fine. The socket is the real cause. Check it before you toss a good bulb.
Steps:
- Power off and inspect
- Look for a bent center tab in the socket. Gently lift it with a screwdriver if it is flat.
- Check for rust or carbon marks. Clean with contact cleaner when power is off.
- Power on and test AC voltage
- Set your meter to AC volts.
- For E26/E27 sockets, put one probe on the center tab and one on the shell.
- In North America, you should read about 120 V. In many other regions, about 230 V.
- No voltage or a low reading points to a bad switch, loose wire, or tripped breaker.
- Dimmer check
- Many LED and CFL bulbs need dimmer-compatible drivers.
- If the bulb flickers or dies early, the dimmer may be the issue.
If you came to learn how to test a light bulb with a multimeter end-to-end, include this socket test. It often solves the mystery.

Interpret your readings like a pro
Numbers tell a story. Here is how to read them fast.
For filament bulbs:
- 5–80 Ω: Usually good when cold. The exact number depends on wattage.
- OL or no beep: Open filament. Replace the bulb.
- Jumpy readings: Filament about to fail or loose internal connection.
For LED bulbs:
- No beep on continuity at the base: Normal.
- Rising resistance over a few seconds: Normal capacitor charge.
- Very low steady resistance: Possible shorted driver. Replace the bulb.
Extra checks:
- Buzzing or heat discoloration on the base points to a failing socket or driver.
- A bulb that tests good but fails in a fixture often points to the fixture or the switch.
If you focus on how to test a light bulb with a multimeter, these patterns make calls quick and accurate.
Common mistakes and pro tips
Mistakes to avoid:
- Testing in continuity or resistance with the power on. This can damage your meter.
- Touching the glass with bare hands on halogen bulbs. Skin oil shortens bulb life.
- Skipping the center tab check in the socket. It is a common failure point.
- Expecting LED bulbs to beep like filament bulbs.
Pro tips:
- Use alligator clips to free a hand and get stable readings.
- Log the ohms of common bulbs you use. You will spot bad ones at a glance.
- Swap test with a known-good bulb in a known-good socket. It beats guesswork.
- If you help others learn how to test a light bulb with a multimeter, show both continuity and voltage tests. It builds good habits.

Real-life scenarios and quick fixes
From my service calls, these patterns repeat.
Story 1: The “bad” bulb that was fine
- A client had three new LEDs that “kept blowing.” All three tested fine.
- The center tab in the can light was flat. I bent it up, and all bulbs worked.
Story 2: The mystery flicker
- A dimmer rated for incandescents was driving LED bulbs.
- I explained dimmer compatibility, swapped the dimmer, and the flicker was gone.
Story 3: The hidden neutral fault
- A kitchen light was dead but tested at 120 V to ground.
- Neutral was loose in the box. After fixing the splice, the bulb worked.
These quick wins show that how to test a light bulb with a multimeter often leads you to the real cause, not just the bulb.
Frequently Asked Questions of how to test a light bulb with a multimeter
Can I test a light bulb without removing it?
You can measure AC voltage at the socket, but remove the bulb for continuity or resistance tests. Testing out of the fixture is safer and clearer.
Why does my LED bulb not beep on continuity?
LED bulbs have drivers and diodes, not a simple filament. A no-beep result at the base is normal for LEDs.
What resistance should an incandescent bulb show?
Cold resistance is usually between 5 and 80 ohms, depending on wattage. If you see OL, the filament is open.
Is it safe to test a live socket?
Yes, but only in AC volts mode and with care. Never use continuity or resistance on a live socket.
How do I know if the fixture is the problem?
If the bulb tests good and the socket has no power or a bent tab, the fixture is likely at fault. Also check the switch and any dimmer.
Can I test a CFL bulb with a multimeter?
Not well. CFL bulbs have internal ballasts. The best test is a known-good socket or a swap test.
Why does the resistance climb when I test an LED bulb?
The driver capacitors charge as you test, so the reading rises. That is a normal behavior for many LED bulbs.
Conclusion
You now know how to test a light bulb with a multimeter in a safe, clear way. Use continuity for filament bulbs, diode and resistance behavior for LEDs, and always verify the socket and switch. Short steps and simple checks save time and stop guesswork.
Put this guide to work on your next bulb issue. Start with the power off, test the bulb, then the socket. If this helped, share it with a friend, subscribe for more hands-on guides, or ask a question so we can solve it together.

Table of Contents