Shut off water, remove the old top, set, level, and seal the new one.
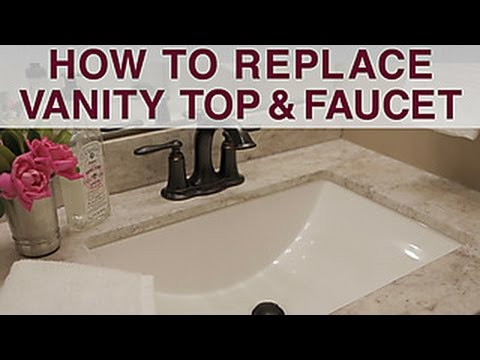
If you want a clean, fast bathroom update, you can do it in a day. In this guide on how to replace vanity top, I will walk you through every step. I have replaced many tops in tight baths, in rentals, and in my own home. I will show you how to avoid leaks, crooked seams, and cracked stone. Follow along and you will have a pro finish without stress.
What to expect from this project
Replacing a vanity top is a beginner‑friendly project with a few gotchas. Plan two to four hours if the plumbing is simple. Add time if you also change the faucet or drain. Most of the work is prep, setup, and clean finish.
You can reuse the vanity base if it is sound and level. You can reuse valves and supply lines if they are in good shape. If your shutoff valves are old or stuck, replace them now. It will save time later.
You will learn how to replace vanity top the right way, from measuring to sealing. We will keep the steps clear and safe. We will also cover fixes for common problems.
Tools and materials you will need
Gather everything before you start. A neat setup makes the job smooth and fast.
- Tape measure, pencil, and notepad
- Utility knife and a flexible putty knife
- Adjustable wrench and basin wrench
- Channel‑lock pliers
- Screwdriver set
- Bucket, rags, and sponge
- Painter’s tape
- Level and shims
- 100% silicone caulk, clear or color‑match
- Construction adhesive or silicone dabs for setting top
- Plumber’s putty or silicone for the drain (as required by the drain finish)
- New faucet, drain assembly, and supply lines if needed
- P‑trap kit if the old one is brittle or corroded
- Acetone or mineral spirits for final wipe (check material care guides)
- Safety glasses and gloves
If your new top is stone or quartz, have a helper. It can be heavy and brittle. The way you set it matters. This is why how to replace vanity top needs a steady hand and a plan.
Measure and plan like a pro
Good measurements prevent returns and stress. Measure the width and depth of the vanity base. Measure wall to wall if the top fits between two walls. Note any out‑of‑square walls. A small gap is normal and will be caulked.
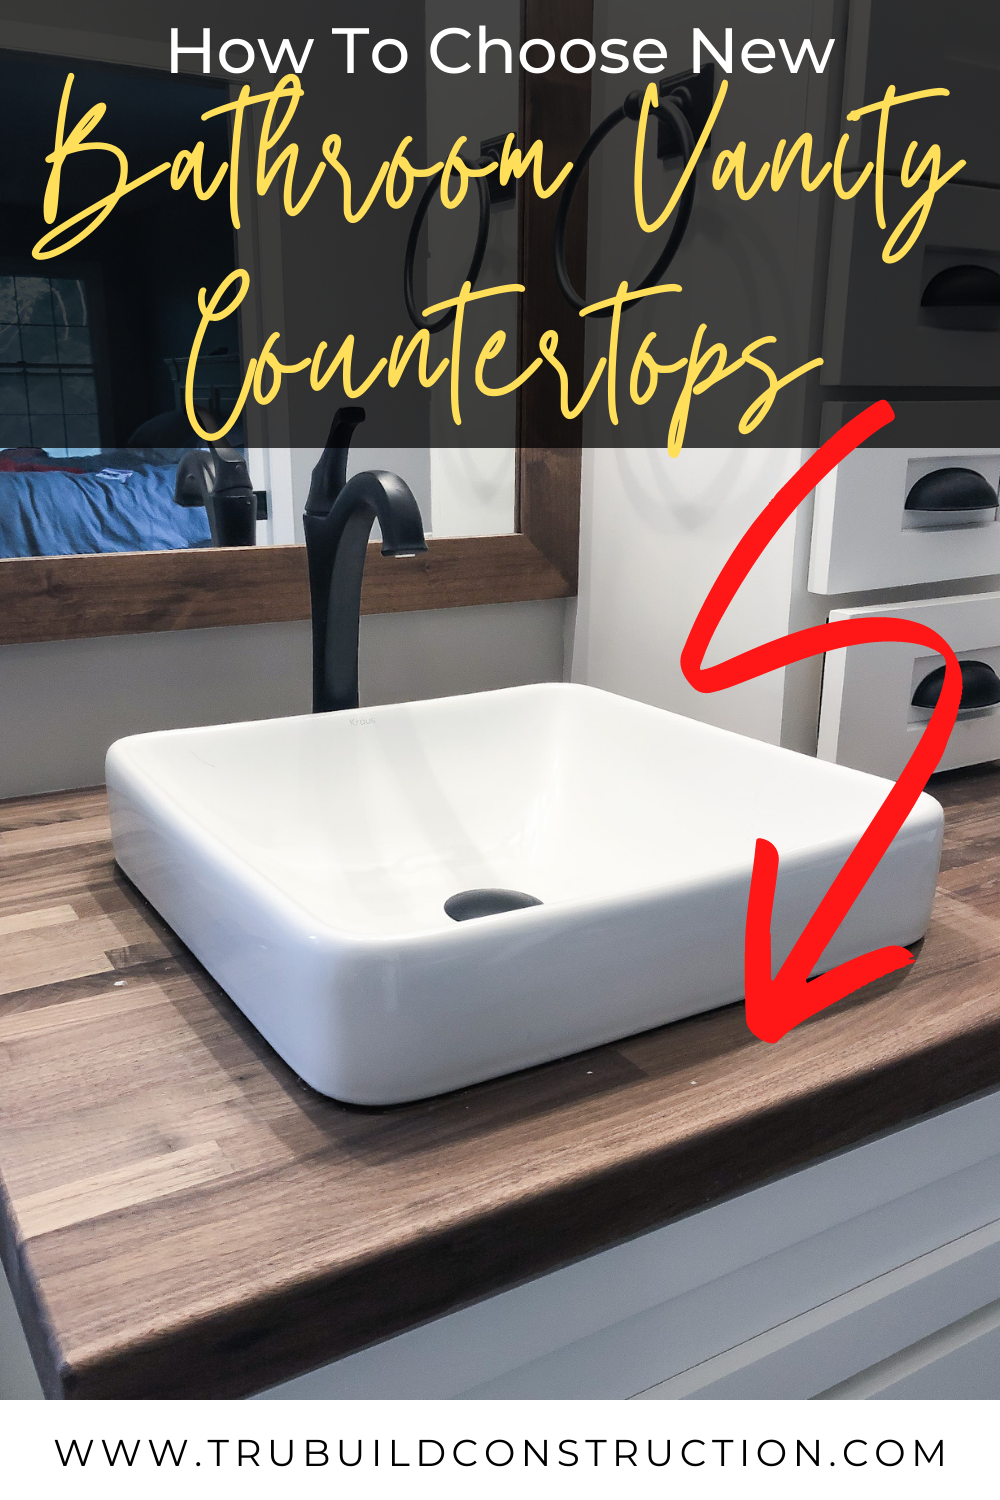
Check faucet hole pattern. Common options are single‑hole, 4‑inch centerset, and 8‑inch widespread. Match the top to your faucet, or buy a faucet to match your top. Check sink type too. Drop‑in, undermount, and integral bowls install in different ways.
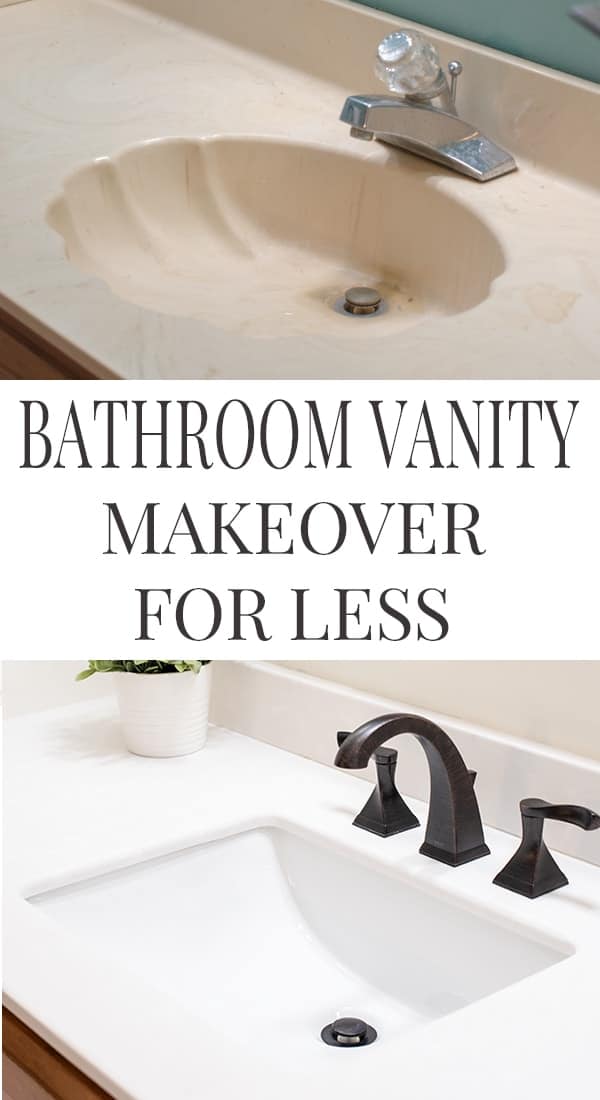
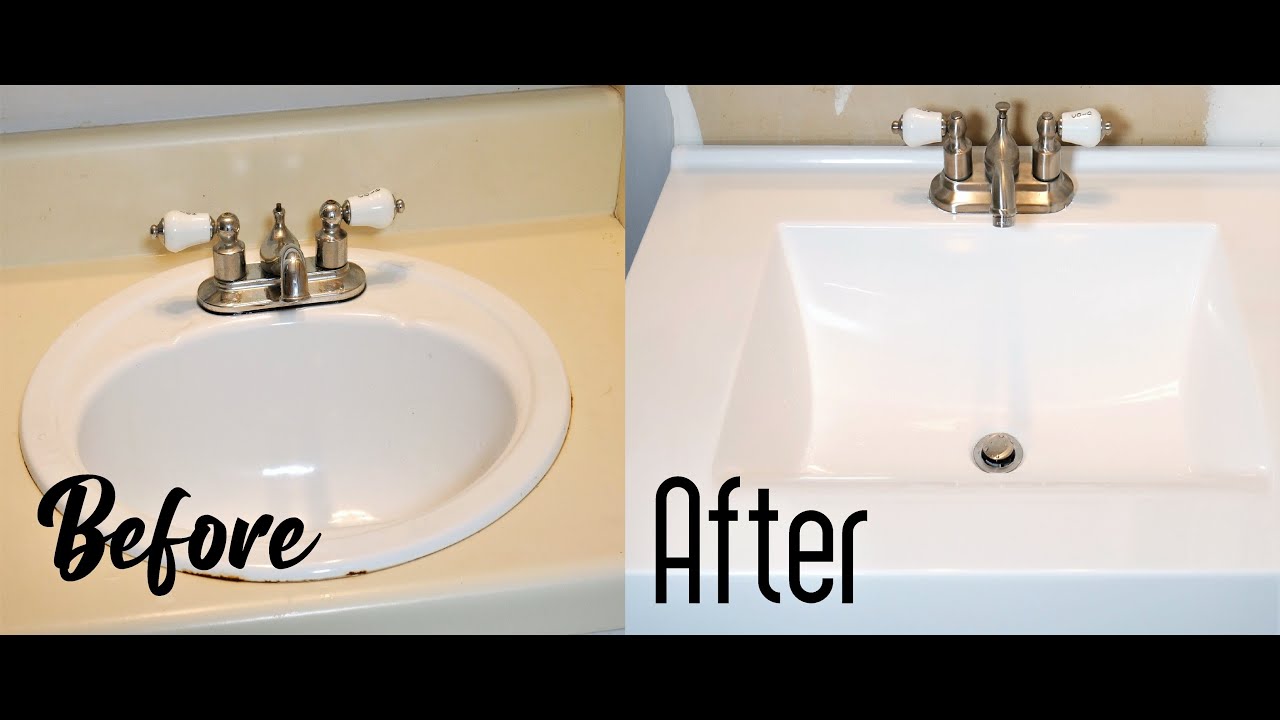
Think about splash pieces. A backsplash and sidesplash can hide wall flaws. They also protect paint. If you move from a thick cultured marble top to a thin quartz top, you may see a paint line. Plan to touch up paint. This is part of how to replace vanity top without surprise.
:max_bytes(150000):strip_icc()/7_remove-vanity-top-56a4a26d3df78cf772835b2d.jpg)
Prep the space and shut off water
Clear the countertop and the vanity base. Put a towel in the sink to catch parts. Turn off both hot and cold water at the shutoff valves. Open the faucet to bleed pressure.
Place a bucket under the P‑trap. Loosen the slip nuts and drop the trap. Cap or cover the drain hole to block odors. Disconnect the supply lines from the faucet. If lines are stubborn, support the valve with pliers as you turn the nut.
Score the caulk line along the backsplash and sides with a utility knife. Cut the bead where the top meets the wall and the cabinet. This reduces wall damage when you lift the top. Clean dust and old caulk bits so the new seal will bond well.

Remove the old vanity top
Follow these steps to lift the top without damage.
- Open the vanity and look up under the top. Remove any brackets, screws, or clips.
- If the sink is drop‑in and separate from the top, remove it first. Cut the caulk and lift it out.
- Slip a putty knife between the top and the cabinet to break any glue spots.
- With a helper, lift the top straight up. Tilt and walk it out. Be careful of the drywall edges.
- Scrape off old caulk from the wall and cabinet. Wipe the surfaces clean.
Check the cabinet for level. Use a level front to back and side to side. Shim the cabinet if needed. A level base is key in how to replace vanity top with a tight, even seam.
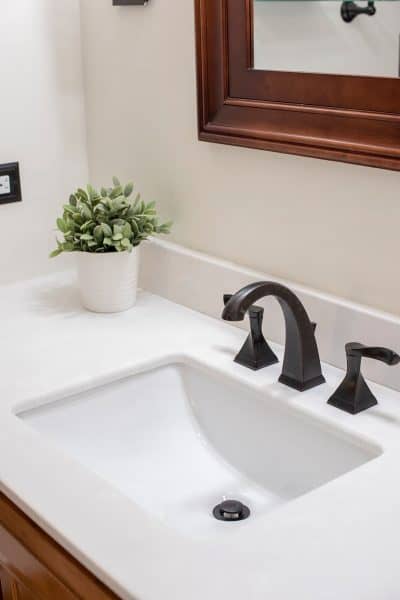
Dry‑fit the new top
Do a dry‑fit before you open any caulk. It will save you from a messy redo.
- Set the top in place without adhesive.
- Check overhangs. Standard is about 1 inch at the front. Side overhangs should match.
- Check gaps at the wall. Small gaps are fine. You can fill them with caulk or a side splash.
- Confirm that faucet holes align with the valves and that the sink is centered.
Mark the final position with painter’s tape. If walls are very out of square, you can scribe and sand a laminate top. Do not try to grind quartz or granite at home. Call a shop if edges need big changes. This is a key safety note in how to replace vanity top at home.

Set and secure the vanity top
Once the dry‑fit looks good, lock it in.
- Place small dabs of silicone or adhesive on the cabinet rails. Use a dab every 6 to 8 inches. Do not smear full coverage. You need space for removal later.
- Lower the top into place. Align with your tape marks. Press down gently.
- Check level. Add shims where needed under the edges. Do not force a heavy top flat if the cabinet is twisted. Fix the cabinet first.
- If your top has a loose backsplash, run a thin bead of silicone along the back edge and set the splash. Tape it in place while it cures.
- Wipe any squeeze‑out at once with a damp rag. Use acetone on stone only if allowed by the maker.
Let the adhesive set per label time. Most silicones skin in minutes and cure in 24 hours. Clean hands and tools as you go. A tidy bead looks like a pro job and is a big part of how to replace vanity top with a clean finish.
Install faucet, drain, and reconnect plumbing
Install the faucet on the bench if possible. It is easier than working under the sink.
- Mount the faucet per the manual. Use the right gaskets. Do not over‑tighten.
- Install the drain. Many metal drains need plumber’s putty under the flange. Some finishes need silicone. Check the instructions to avoid damage.
- Tighten the drain nut while holding the body straight. Align the pop‑up rod if you have one.
- Attach supply lines to the faucet, then to the shutoff valves. Hand‑tighten, then add a quarter turn with a wrench.
- Rebuild the P‑trap. Cut the tailpiece as needed so the trap arm is level and not in a bind.
Open the shutoff valves slowly. Check for leaks with a dry paper towel. A towel shows even a small drip. Run water, then close the stopper to fill the sink. Release and check every joint. This test is vital in how to replace vanity top without leaks.

Seal the edges and finish the look
A neat caulk line makes the job look complete and keeps water out.
- Tape both sides of the seam for a clean line.
- Run a thin bead where the top meets the wall and the cabinet.
- Tool the bead with a damp finger or a caulk tool.
- Pull the tape at once and smooth again if needed.
If your top is natural stone, seal it if the maker calls for it. Quartz often does not need sealer. Follow cure times before use. Good sealing is a final step in how to replace vanity top for long life.
Costs, timing, and value
A basic cultured marble or composite top can cost $100 to $250. Mid‑range quartz or granite runs $250 to $700 for standard sizes. Custom tops and undermount sinks add cost.
Faucets range from $60 to $250 for most homes. New valves, traps, and lines may add $20 to $80. Expect total DIY cost of $200 to $1,000 based on choices. Time is two to six hours, plus cure time. When done well, how to replace vanity top can return big style for less money.
Common mistakes to avoid and pro tips
Learn from jobs that went wrong so yours goes right.
- Skipping the dry‑fit leads to tight corners and chips. Always test fit first.
- Over‑tightening drain parts can crack sinks. Snug is enough, then test.
- Using latex caulk at wet joints fails fast. Use 100% silicone at the splash and edges.
- Not leveling the cabinet leaves gaps. Fix the base before setting the top.
- Reusing crusty supply lines is risky. Replace old lines to prevent leaks.
Pro tips from the field:
- Warm the room. Silicone tools better in a warm space.
- Color‑match caulk to grout or top to hide seams.
- Keep a small mirror and headlamp under the sink. They help you spot slow weeps.
- Take a photo of the plumbing before you remove it. It is a free roadmap.
- If space is tight, remove the doors from the vanity for better access.
These small moves make how to replace vanity top smoother and safer.
Material and style choices that work in real homes
Pick a top that fits your life, not just a photo.
- Quartz is low care and stain resistant. It looks clean and modern.
- Granite is durable and unique. It needs periodic sealing.
- Cultured marble is budget friendly and easy to install. It can scratch.
- Solid surface is warm to the touch and repairable. It is great for family baths.
- Integrated sinks are simple to clean. Undermounts look sleek but need careful install.
Match faucet finish to hardware for a tight look. Check splash height for mirrors and outlets. When you plan style with use in mind, how to replace vanity top pays off every day.
Troubleshooting common issues
Even with care, things can pop up. Here is how to fix them fast.
- Small gap at wall: Use a neat silicone bead or add a sidesplash.
- Drain leak at flange: Re‑seat with the correct sealant. Do not stack gaskets.
- P‑trap misaligned: Adjust the tailpiece length and the trap arm. Do not force angles.
- Top rocks on cabinet: Add thin shims near the corners. Recheck level and re‑caulk.
- Stuck shutoff valve: Replace the valve. Do not torque old stems and risk a break.
Keep calm and work one joint at a time. This mindset is key in how to replace vanity top without stress.
Care and maintenance after install
A few habits will keep your new top fresh.
- Wipe spills fast, especially hair dye and nail polish remover.
- Use mild soap and water for daily clean. Avoid harsh pads.
- Reseal natural stone on schedule if needed.
- Do not sit or stand on the top. Point loads can crack stone.
- Check under the sink every few weeks at first. Catch slow leaks early.
With simple care, your work on how to replace vanity top will last for years.
Frequently Asked Questions of how to replace vanity top
How long does it take to replace a vanity top?
Most swaps take two to four hours for a standard top. Add time for faucet changes or wall touch‑ups.
Do I need to remove the vanity cabinet?
No, not if the cabinet is sound and level. You only remove the top, faucet, and plumbing.
Can I install a quartz top by myself?
You can if it is small and light. For larger tops, use a helper to prevent chips and injury.
What caulk should I use at the backsplash?
Use 100% silicone that is mold resistant. Match the color to the top or wall for a clean look.
Should I use plumber’s putty or silicone on the drain?
Follow the drain maker’s guide. Some finishes need silicone to protect the metal.
How do I match faucet holes if I upgrade the faucet?
Buy a top with the correct hole pattern, or use a deck plate to cover extra holes. Avoid drilling stone at home.
What if my wall is out of square and the gap looks big?
Use a sidesplash or a wider caulk bead with backer rod if needed. Paint touch‑up can also hide thin lines.
Conclusion
You now know how to replace vanity top from start to finish. Measure well, dry‑fit, set the top, and seal with care. Reconnect plumbing with patience, then test every joint with water.
This is a fast, real upgrade you can do this weekend. Gather your tools, pick a top that fits your space, and make the change. Share your results, ask questions, or subscribe for more step‑by‑step DIY guides.

Table of Contents