Clean, sand, prime with a bonding primer, then apply two enamel coats for a durable finish.
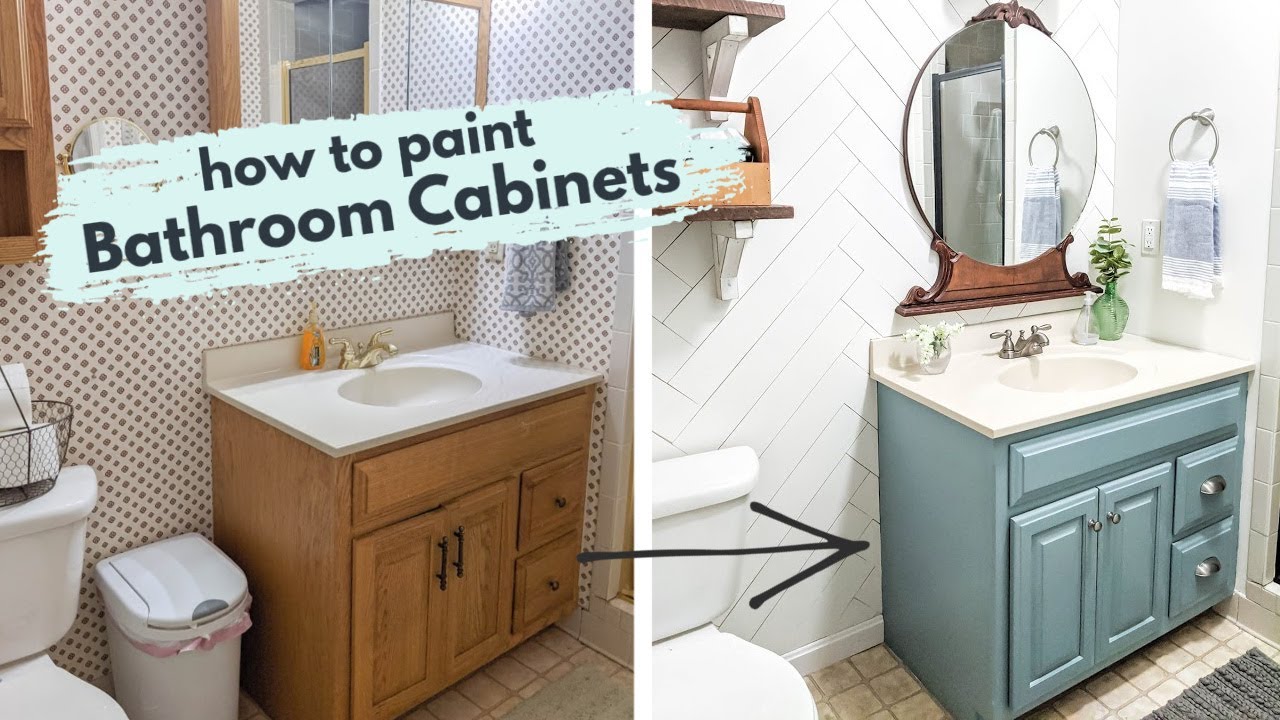
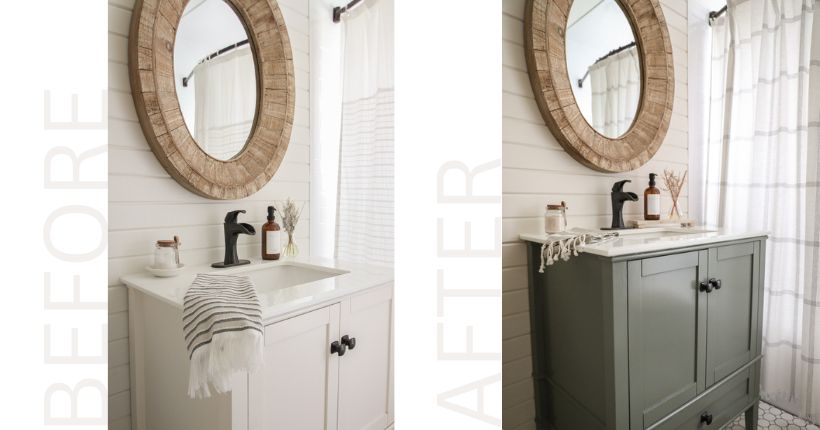
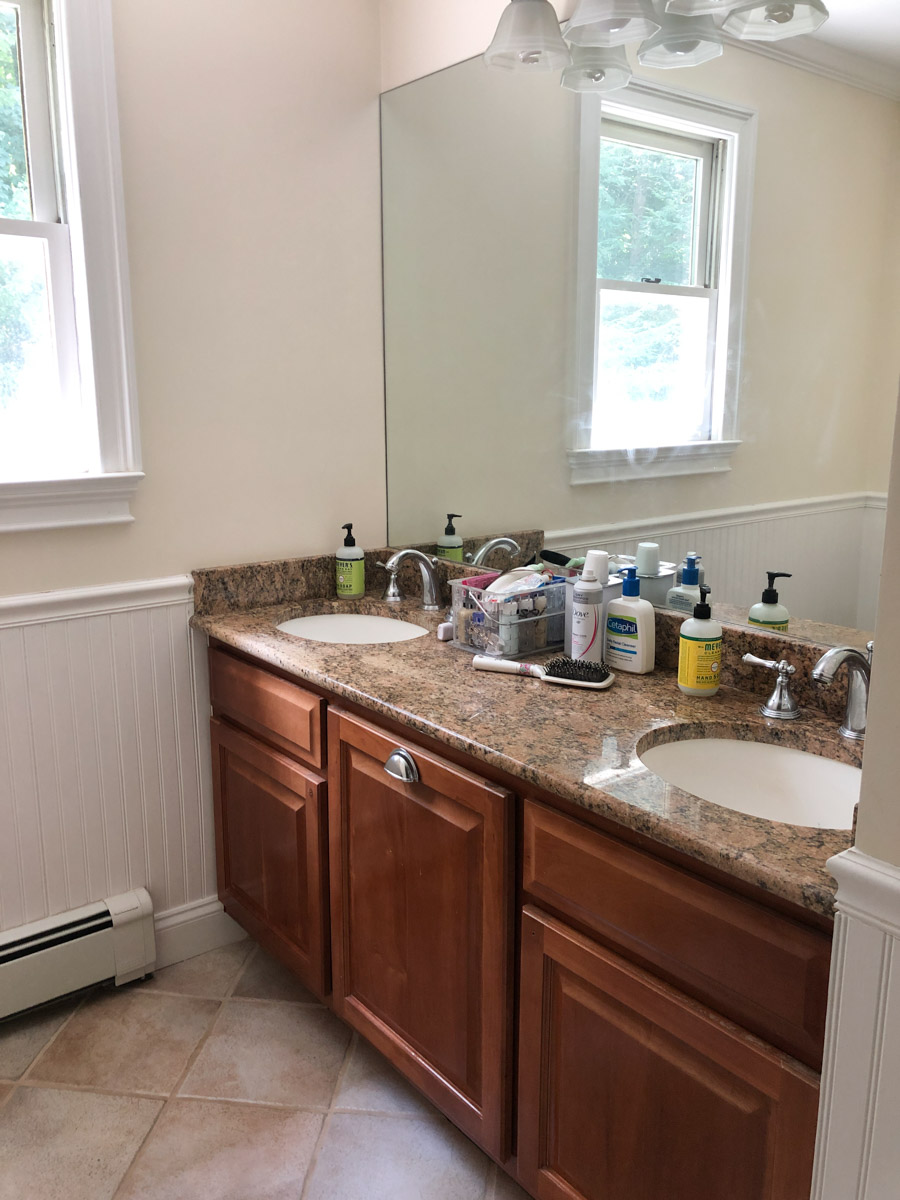
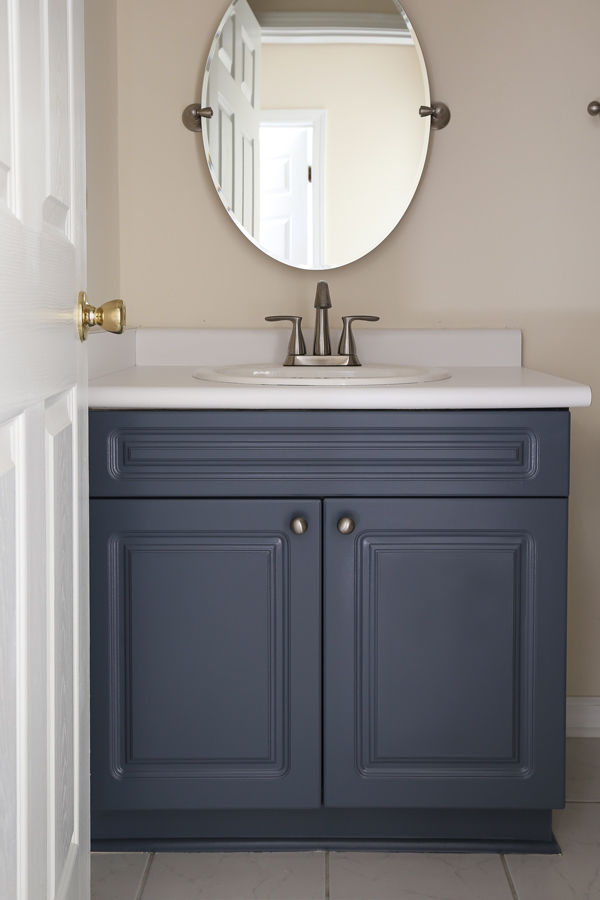
If you want to learn how to paint a bathroom vanity like a pro, you’re in the right place. I’ve painted dozens of vanities in real homes, from builder-grade oak to slick laminate. I’ll walk you through the process, products, and pitfalls so you get a smooth, hard-wearing result. This guide breaks down how to paint a bathroom vanity step by step, with tips you can use today.

Tools and materials you’ll need
Getting the right tools is half the job. It also keeps the process clean and fast.
- Cleaner and degreaser Use a bathroom-safe degreaser or a TSP substitute to remove soap and oil.
- Sandpaper and sanding tools Use 120-grit, 180-grit, and 220-grit sheets. A sanding sponge helps in corners.
- Tack cloths and microfiber cloths These pick up fine dust after sanding.
- Filler and caulk Use wood filler for dings and paintable caulk for seams.
- Primer Use a bonding primer. Choose shellac-based for tough surfaces or waterborne acrylic for low odor.
- Paint Choose a cabinet or trim enamel. Acrylic-alkyd hybrid or urethane-modified acrylic works best.
- Brushes and rollers Use a high-quality angled brush and 4-inch foam roller for smooth coats.
- Painter’s tape and drop cloths Protect floors, walls, and counters.
- Hardware tools Use a screwdriver, labels, and small bags to track parts.
- Safety gear Wear a respirator rated for fumes and dust, plus gloves and eye protection.
Why these products? Bathroom vanities face moisture and daily wear. Bonding primer and enamel paint hold up far better in steam and splashes than wall paint.

Plan and prepare: assess the vanity
Start by checking what your vanity is made of. This is key when deciding how to paint a bathroom vanity.
- Solid wood Takes paint well after sanding and priming.
- Veneer over plywood Needs gentle sanding to avoid burn-through.
- MDF Needs sealed edges; it swells with water.
- Laminate or thermofoil Needs strong adhesion. A shellac or specialty bonding primer helps.
Look for damage. Fill chips and dents. Caulk open seams. If thermofoil is peeling, remove loose film and sand the glue smooth before priming. Peeling foil will cause failure if painted over.
Choose sheen. Satin or semi-gloss are best for wipeability. Flat paint scuffs and stains fast in a bath. Choose a color that hides water spots and matches tile and tops.
Mistakes to avoid
- Skipping degreasing Soap film kills adhesion.
- Using wall paint Cabinet enamel resists moisture and blocking.
- Rushing dry times Enamels need time to cure hard.
Step-by-step: how to paint a bathroom vanity
Follow these steps to master how to paint a bathroom vanity without drama.
Clear and protect
Empty the vanity. Mask tops and walls. Lay drop cloths.Remove doors and hardware
Label each door and hinge. Bag screws so reassembly is easy.Clean and degrease
Wash every surface. Rinse with clean water and let dry. This helps primer grip.Sand for tooth
Sand with 120-grit, then 180-grit for smoothness. Feather edges around chips.Dust control
Vacuum, then wipe with a damp cloth. Finish with a tack cloth.Repair and caulk
Fill dents and holes. Sand smooth. Caulk open seams. Let cure as directed.Optional degloss
On shiny laminate, use a liquid deglosser. Wipe off as the label says.Prime for adhesion
Apply a bonding primer. Use a brush for grooves and a foam roller for flats. Let dry, then sand lightly with 220-grit. Wipe clean.Spot-prime and check
If you sand through, spot-prime. On stained oak, a second primer coat may block tannins.Paint coat one
Use cabinet enamel. Load the roller well and lay off in long, light strokes. Work from inside panels out to rails and stiles.Sand and paint coat two
After dry time, nib sand with 220-grit. Wipe clean. Apply a second, even coat. Check edges for drips.Cure and reassemble
Let parts set per the label. Reinstall doors and hardware. Leave doors slightly open for a few days to avoid sticking.
Pro tips from the field
- Keep a wet edge. Roll small areas and finish with gentle brush strokes.
- Paint doors flat. This reduces runs and gives a flatter finish.
- For MDF edges, seal with shellac or a dedicated edge sealer before primer.
- Sprayer option. An HVLP sprayer gives a showroom finish, but mask very well.
Working this way is the safest bet when learning how to paint a bathroom vanity the first time.

Choosing primer and paint for bathrooms
This is where most projects win or lose. Picking the right system is central to how to paint a bathroom vanity that lasts.
Bonding primer types
- Shellac-based Best for glossy laminate, knots, and stain blocking. Dries fast and sands like glass.
- Waterborne acrylic adhesion Good all-around bonding with low odor. Great on wood, MDF, and many laminates.
- Oil-based Strong blocker, but longer dry time and more odor. Less common today indoors.
Paint types
- Acrylic-alkyd hybrid enamel Levels well, dries hard, and resists blocking. Cleans with water.
- Urethane-modified acrylic enamel Hard, durable, and good for moisture.
- Straight acrylic trim enamel Good, but choose lines made for cabinets.
- Avoid chalk paint It scuffs and needs a clear coat, which can yellow or chip.
Sheen and color
- Satin hides small flaws yet cleans well.
- Semi-gloss is very washable but can show brush marks.
- Whites can vary. Warm whites play well with beige tile. Cool whites suit gray or marble.
Dry time versus cure time
Touch-dry is not cured. Many enamels need 7 to 14 days to reach good hardness, and 30 days for full cure. Plan to handle with care.

Finishes and color choices that resist moisture
Color shapes the mood and maintenance. This matters when planning how to paint a bathroom vanity.
- Light colors Brighten small baths and show less dust. They may show makeup smudges.
- Mid-tones Balanced and forgiving. Great for kids’ baths.
- Dark colors Dramatic but can show lint and water spots. Use a hard enamel in satin or semi-gloss.
Do you need a clear coat?
Most cabinet enamels are made to be a topcoat. A clear coat can add complexity and may amber over time. If you must clear-coat, use a non-yellowing waterborne topcoat rated for cabinets, and test a hidden area.
Hardware and accents
New pulls upgrade the look for little cost. Brushed nickel, matte black, or brass can change the style fast.
Ventilation, safety, and cleanup
Good prep is also about safety. This is often missed in guides on how to paint a bathroom vanity.
- Ventilation Run the bath fan and open a window. Use a box fan to pull air out if needed.
- PPE Wear a respirator for sanding dust and primer fumes. Gloves protect skin from solvents.
- Dust control Vacuum often. Wipe with damp cloths between steps.
- Cleanup Waterborne products clean with water and mild soap. Shellac cleans with alcohol. Follow labels.
- Disposal Never pour solvents down a drain. Let rags dry flat to prevent heat build-up, then dispose per local rules.
Common problems and fixes
You may hit a snag. Here is how to paint a bathroom vanity and recover fast.
- Tannin bleed Yellow stains show through paint. Spot-prime with shellac and repaint.
- Brush marks Too much paint or overworking. Thin slightly per label and use light pressure.
- Orange peel Roller texture is heavy. Switch to a high-density foam roller and roll off excess.
- Fisheyes Oil or silicone on the surface. Degrease, sand, and re-prime.
- Peeling Poor adhesion. Sand to a firm edge, prime with a stronger bonding primer, and repaint.
- Blocking Doors stick together. Give more cure time, use felt bumpers, and reduce humidity.
Maintenance and long-term care
Care keeps that new look. This is the last step in how to paint a bathroom vanity that stands up to real life.
- Be gentle for the first month The finish is still curing. Avoid scrubbing or heavy impact.
- Clean right Use mild soap and water with a soft cloth. Skip harsh pads and bleach.
- Protect edges Add door bumpers and avoid standing water along seams.
- Inspect yearly Touch up chips fast. Re-caulk joints that open with seasonal changes.

Budget and timeline
It helps to plan cost and time before you start how to paint a bathroom vanity.
Typical costs
- Primer 15–30 dollars per quart.
- Enamel paint 25–60 dollars per quart.
- Sundries Brushes, rollers, tape, filler, and sheets can add 30–80 dollars.
- Optional hardware 20–100 dollars depending on style.
Typical timeline
- Day 1 Remove, clean, sand, repair, and prime.
- Day 2 Sand, prime again if needed, and apply coat one.
- Day 3 Light sand and apply coat two. Begin cure.
- Reinstall after the paint is dry to touch and handles gently. Full cure takes longer.
A weekend is enough for many vanities, with cure time after that.
Frequently Asked Questions of how to paint a bathroom vanity
Do I need to sand before priming?
Light sanding improves adhesion and smooths flaws. Even with bonding primer, a quick scuff makes a big difference.
Can I paint a laminate or thermofoil vanity?
Yes, with the right primer. Use a strong bonding primer and make sure any loose thermofoil is removed first.
What kind of paint should I use on a bathroom vanity?
Use a cabinet or trim enamel. Acrylic-alkyd hybrid or urethane-modified acrylic gives a hard, washable finish.
How long should I wait between coats?
Follow the label, usually 4 to 6 hours for waterborne enamel. Cooler or humid rooms may need more time.
Do I need a topcoat over enamel?
Most cabinet enamels are self-sealing. A clear coat is optional and can add risk of yellowing.
Why is my paint peeling near the sink?
Water and soap can get under weak prep. Degrease, sand to a solid edge, prime with a bonding primer, and repaint.
How many coats of primer do I need?
One good coat often works on bare wood. Use two if you see stains, heavy grain, or slick laminate.
Conclusion
Painting a vanity is a small project with a big payoff. Clean, sand, prime with a bonding primer, and use a quality enamel. Give each step time, and your finish will look sharp and wear hard.
Now it’s your turn. Pick a weekend, gather the right gear, and start with one door. If this guide helped, share it with a friend, subscribe for more DIY how-tos, or drop your questions in the comments.

Table of Contents