Shut off power, mount the unit on ductwork, add water line, wire controls, test.
You want clear steps on how to install whole house humidifier without guesswork. I have done this many times in real homes with mixed systems and tight spaces. This guide blends hands-on tips with code-safe practices. If you are ready to learn how to install whole house humidifier like a pro, you are in the right place.

What You Need To Know Before You Begin
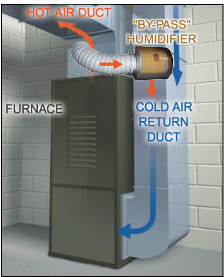
Whole house humidifiers add moisture through your supply or return duct. The system ties into your furnace or air handler. It needs a water source, a drain, and low-voltage control. The job is within reach if you are handy and patient.
Plan the work in small steps. Work with the power off. Take photos of any wiring before you start. This makes the process safe and smooth.
I will show you how to install whole house humidifier units in two common styles. You will also learn how to size, wire, and tune them the right way.
Choose the Right Type of Whole House Humidifier
Pick a type that fits your home and HVAC.
- Bypass humidifier. Uses a duct to move air across a water panel. Low power. Needs a bypass duct and a damper.
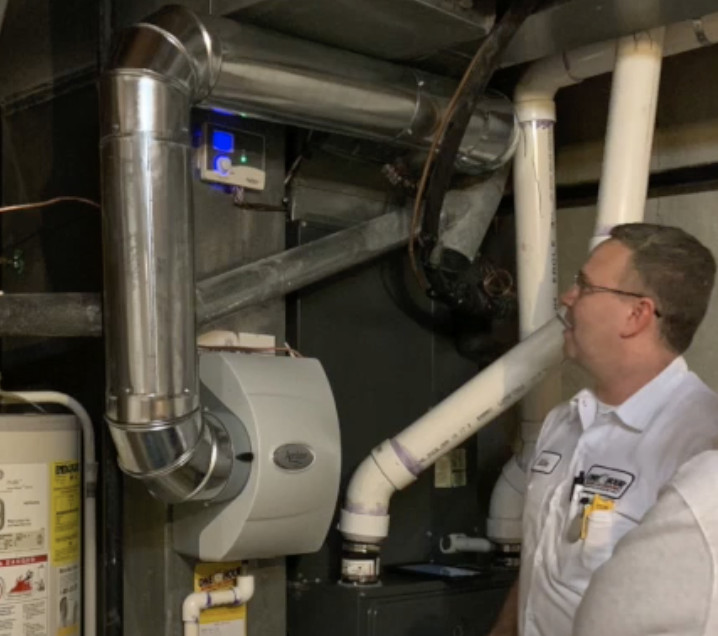
- Fan-powered humidifier. Has a built-in fan. No bypass duct. Good for tight spaces.
- Steam humidifier. Fast and precise. Higher cost. Needs a good drain and power.
Match size to the home. Check the humidifier output in gallons per day. Compare that to your home size and winter temps. In dry climates or large homes, you may need fan-powered or steam.
I often use bypass units for small to mid homes. Fan-powered works well where you cannot run a bypass duct.

Tools and Materials
Have these on hand before you start.
- Drill, hole saw, and bits
- Aviation snips and sheet-metal screws
- Level, marker, tape measure
- Adjustable wrench and screwdriver set
- 24 VAC transformer if not included
- Humidistat or smart thermostat that supports humidifiers
- 1/4 inch copper or PEX line, shutoff valve, tee fitting, and filter
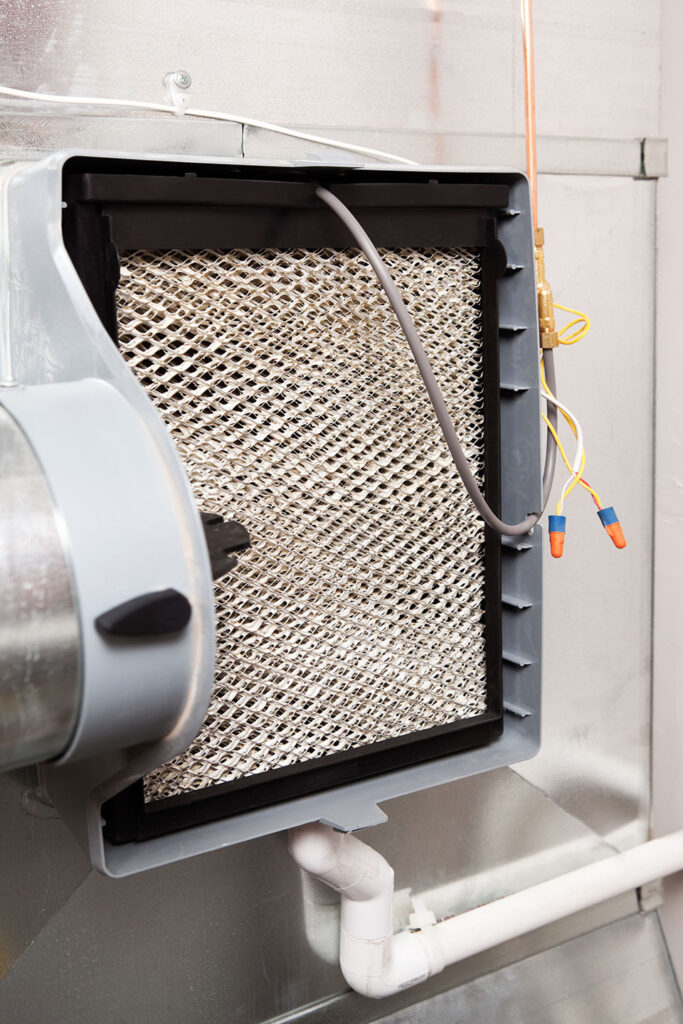
- Humidifier pad, water feed tube, drain tube, clamps
- Foil tape and mastic for air seals
- Safety glasses and gloves
Avoid saddle valves if local code bans them. Use a proper tee and shutoff. This is safer and lasts longer.

Plan the Location and Layout
Good layout makes service easy. Choose flat duct sections near the furnace. Keep space to remove the water panel.
- Mount on the supply duct unless your model says otherwise.
- Place the bypass collar on the return duct for bypass models.
- Keep the drain sloped down to a floor drain or condensate pump.
- Keep wiring runs short and neat.
Sketch the path. Add labels. When I plan how to install whole house humidifier systems, I dry-fit parts first. It saves time and avoids holes in the wrong place.
Step-by-Step: How to Install a Bypass Humidifier
Follow these steps to install a common bypass unit.
- Turn off power. Switch off the furnace and the breaker. Confirm with a non-contact tester.
- Trace the template. Tape the provided template on the supply duct. Mark the cut lines.
- Cut the opening. Drill a starter hole. Cut with snips. Remove sharp edges.
- Mount the cabinet. Apply gasket if included. Set the cabinet. Screw it to the duct. Seal edges with foil tape.
- Install the bypass collar. Mark and cut the opening on the return duct. Attach the collar. Run the flexible duct between the humidifier and the collar. Install the inline damper. Seal joints.
- Add the water line. Install a tee at a cold-water line. Add a shutoff valve and small filter. Run 1/4 inch tubing to the solenoid valve. Keep it clean and kink free.
- Add the drain. Connect the drain tube to the bottom outlet. Slope it to a floor drain or condensate pump. Use a trap if needed per the manual.
- Mount the humidistat. Place it on the return duct or use a wall sensor if allowed. Run low-voltage wires to the humidifier and furnace control.
- Wire low voltage. Connect per the manual. Typical is two wires to the solenoid, two to the humidistat, and two to the furnace HUM or EAC terminal or to a separate transformer.
- Check all seals. Tighten screws. Seal any gaps to stop air leaks.
This is the core of how to install whole house humidifier systems with a bypass duct. Take your time with cuts and seals. Air leaks reduce output and waste heat.
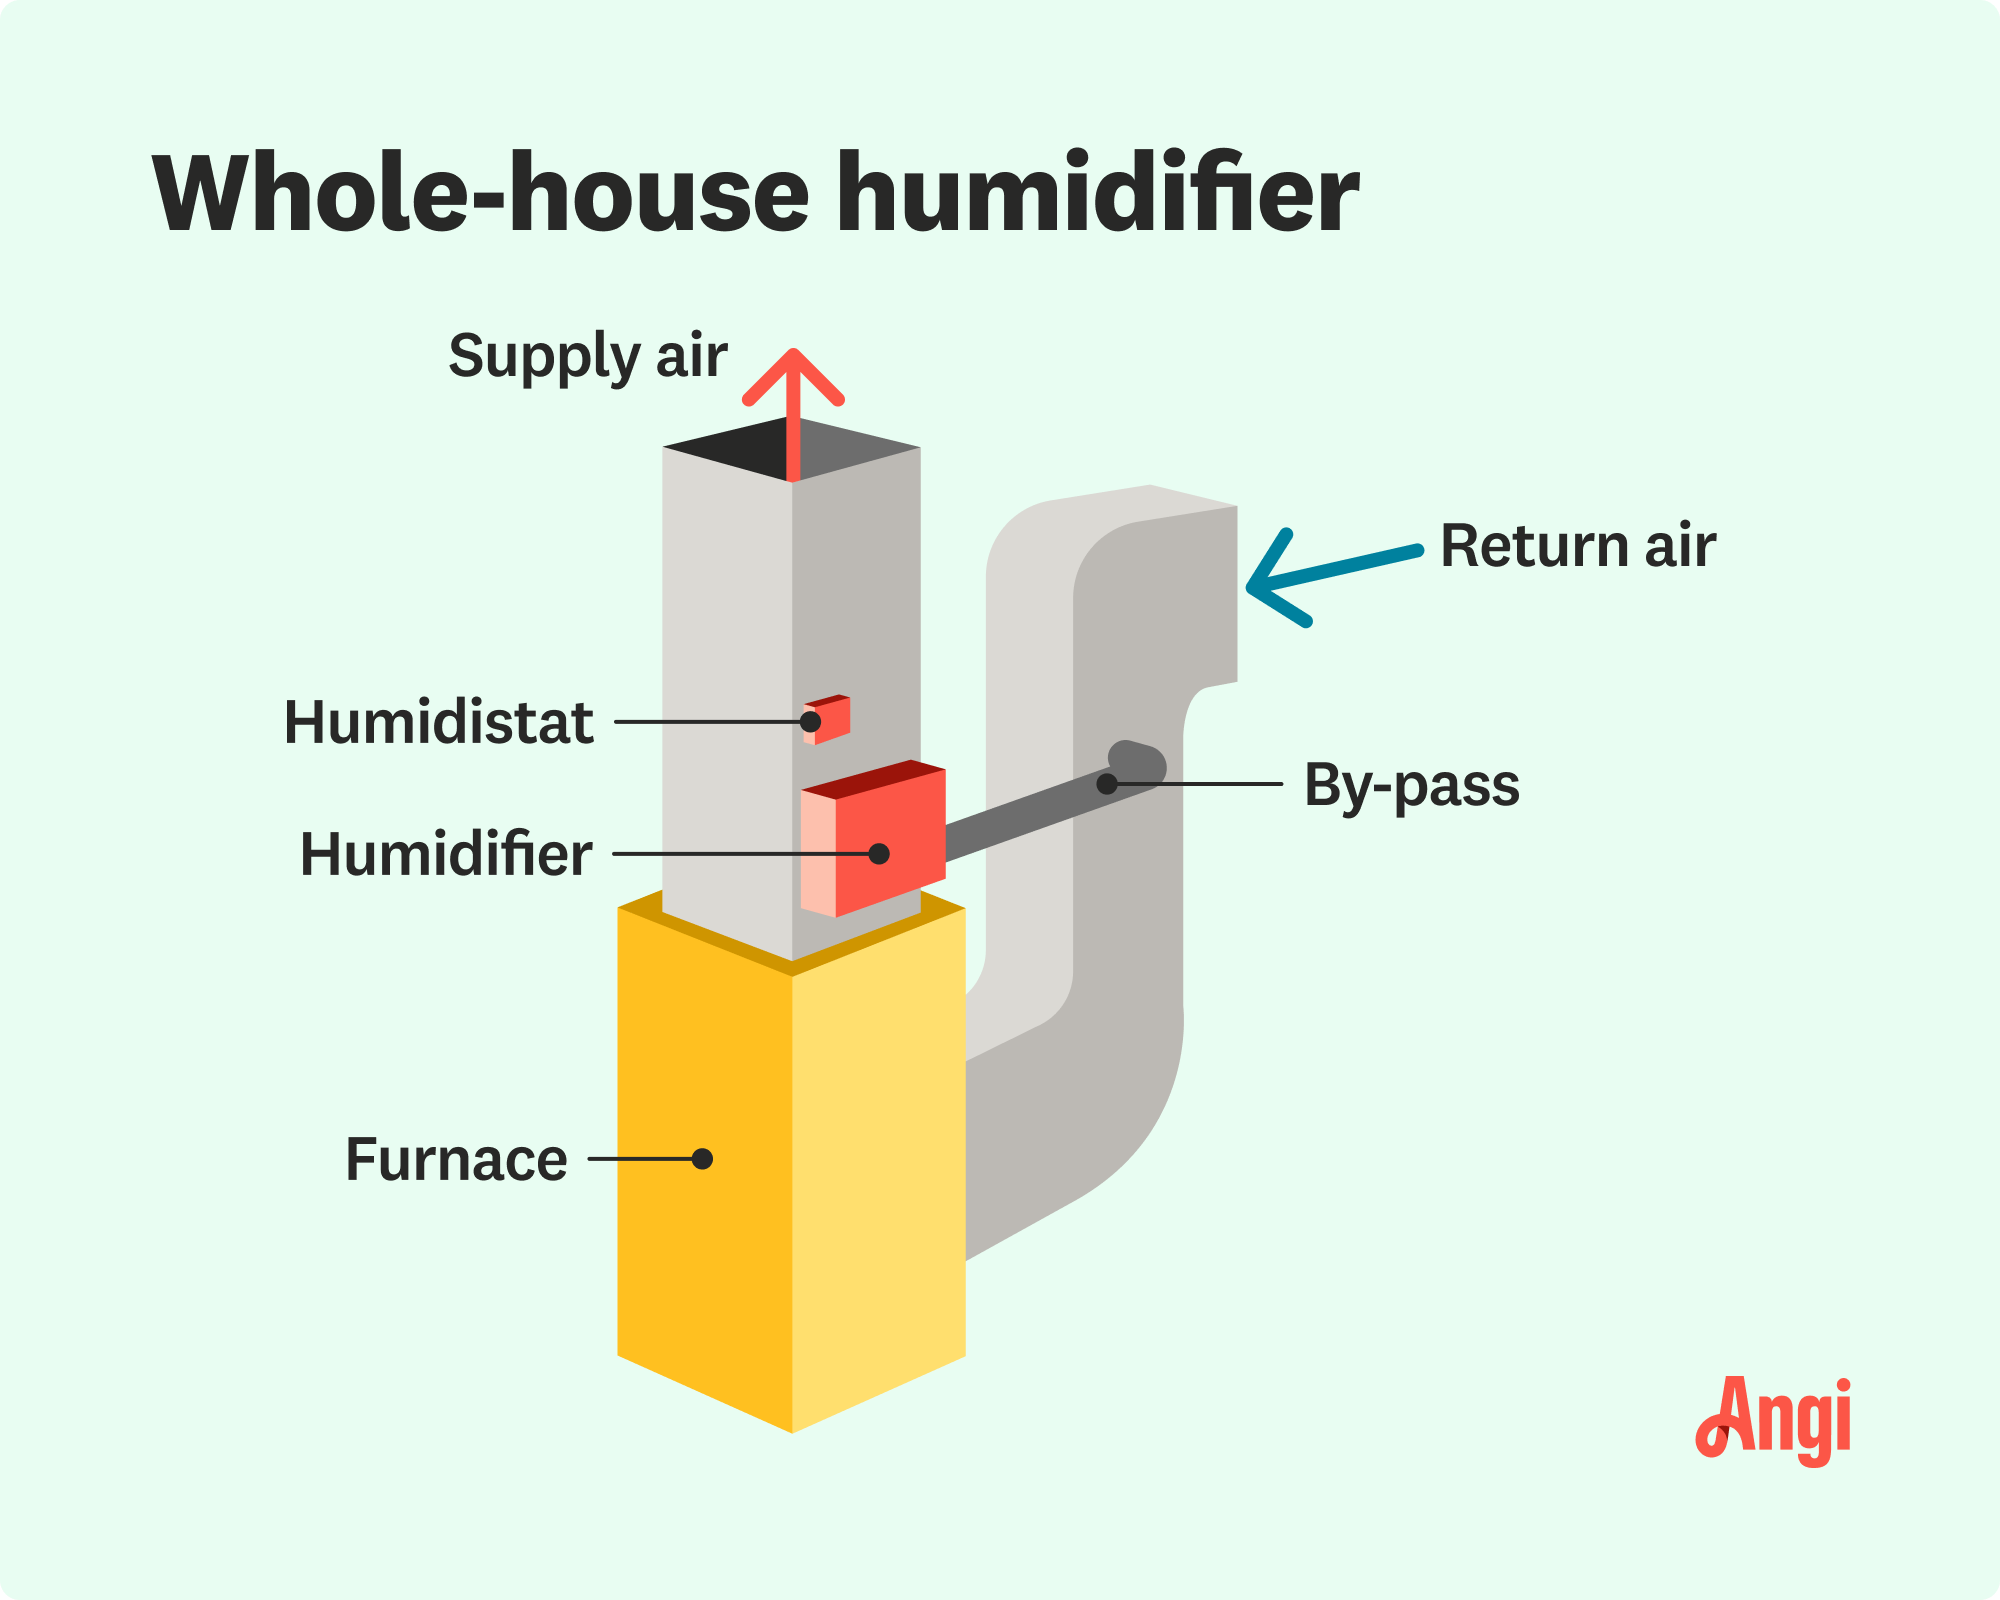
:max_bytes(150000):strip_icc()/anatomy-of-the-home-furnace-humidifier-1824773color-d41575bdba834fd59ac29178949a1e2a.png)
Step-by-Step: How to Install a Fan-Powered Humidifier
The process is similar but simpler.
- Power off and verify.
- Mark and cut the supply duct opening with the template.
- Mount the cabinet with included screws and gasket.
- Skip the bypass duct. The internal fan moves air.
- Connect the water line with a proper tee and shutoff.
- Run the drain line to code with a steady slope.
- Mount the humidistat or connect to a smart thermostat.
- Wire the solenoid and internal fan to 24 VAC control. Use the HUM terminal or a current-sensing relay if needed.
- Seal and tidy all wires and tubes.
In many homes, this is the fastest way for how to install whole house humidifier when space is tight.
Wiring and Controls Made Simple
Low-voltage wiring is simple but must be correct. Always follow the model diagram.
- Power source. Use furnace HUM terminal if it is 120 VAC switched for accessories. If it is 120 VAC, use the included 24 VAC transformer to feed the solenoid. Some furnaces provide 24 VAC HUM. Check the label.
- Control. The humidistat goes in series with the solenoid. When the furnace runs and humidity is low, the solenoid opens.
- Fan interlock. Use a sail switch or current-sensing relay if your model needs the blower to run. Some controls do this inside the furnace board.
- Outdoor sensor. If included, mount it on an exterior wall out of sun and wind. This helps prevent window condensation.
Take a photo of all connections. Label wires. This makes how to install whole house humidifier controls clean and easy to service later.
Start-Up, Setpoints, and Balancing
Open the water valve. Restore power. Call for heat. Set the humidistat to 35 to 40 percent to start. Check for leaks. Listen for the solenoid click and water trickle.
Watch the drain. You want a steady flow with no overflow. Check for air leaks around the cabinet. Seal if needed.
Fine tune. In very cold weather, reduce the setpoint to stop window fog. A smart control can do this for you. This is a key step in how to install whole house humidifier and keep it stable.
Maintenance Tips That Keep It Working
Humidifiers need simple care. Make it a habit.
- Replace the water panel every heating season, or more often with hard water.
- Clean the cabinet and orifice. Mineral scale can block flow.
- Check the drain for clogs. Flush with warm water if slow.
- Inspect the water line and valve for leaks.
- Test the control each fall before the heat season.
These small steps protect your furnace and your air. They also improve the life of the unit.
Common Mistakes and Easy Fixes
Here are issues I see often and how to fix them.
- Using a saddle valve. They clog and may not meet code. Install a tee and a ball valve.
- Wrong duct location. If airflow is weak, move the unit to a straighter section.
- No drain slope. Water backs up. Add a steady downward slope.
- Wiring to constant power. The unit runs with no heat call. Use the HUM or a relay tied to the blower.
- High setpoint in deep cold. Windows sweat. Lower the setpoint or add an outdoor sensor.
When you learn how to install whole house humidifier the right way, most of these never happen.
Cost, Time, and When to Call a Pro
Expect these ranges in most areas.
- Bypass unit. 2 to 4 hours for a first-timer. Parts cost 150 to 300 dollars.
- Fan-powered unit. 2 to 3 hours. Parts cost 250 to 500 dollars.
- Steam unit. 4 to 6 hours. Parts cost 800 to 1,500 dollars or more.
Call a pro if you are not comfortable with wiring or local codes. Hire help if you see asbestos duct wrap, cramped gas lines, or no safe drain. A good tech can also teach you how to install whole house humidifier for your specific furnace brand.
Safety, Codes, and Warranty Notes
Work safe. Wear gloves and eye protection. Sheet metal edges are sharp. Turn off power and water before you start.
Follow local plumbing and mechanical codes. Many places ban saddle valves. Use a proper shutoff. Check if your furnace warranty needs a specific control method. Keep the manual. Record the install date and model.
These steps build trust and help the system last.
Frequently Asked Questions of how to install whole house humidifier
Do I need a permit to install a humidifier?
Some areas require a plumbing permit for new water lines. Check local rules before you start.
Can I use a smart thermostat to control it?
Yes, many smart thermostats support humidifiers. Make sure yours has a dedicated HUM terminal and follow the wiring diagram.
Where should I set the humidity in winter?
Start at 35 to 40 percent. Lower the setpoint in very cold weather to prevent window condensation.
Is a bypass or fan-powered unit better?
Bypass is simple and quiet. Fan-powered is stronger and works when a bypass duct will not fit.
Can I use RO water or softened water?
You can, but most units are designed for tap water. RO can reduce scale but may need a higher flow setting.
How often should I change the water panel?
Change it once per heating season. In hard water areas, replace mid-season as well.
What if my furnace has no HUM terminal?
Use a current-sensing relay or an external transformer controlled by the blower circuit. Follow the included wiring guide.
Conclusion
You now know how to install whole house humidifier gear from start to finish. You picked the right type, planned the layout, made safe cuts, wired it clean, and tuned the setpoint. With simple checks each season, your home will feel better and your wood will thank you.
Take the next step today. Plan your parts list, set a weekend window, and get it done. Want more tips on home comfort and clean air? Subscribe or leave a comment with your setup and goals.

Table of Contents