Turn off water, remove old toilet, replace seal, bolt new unit, reconnect, and test.
If you want a clean, fast, and leak-free upgrade, you’re in the right place. I’ve installed and replaced dozens of RV toilets in tight spaces, in heat and cold, and on both new and aging rigs. This guide shows how to install rv toilet the right way, with clear steps, pro tips, and fixes for common hiccups so you can get back to the fun part of the trip.

What You Need Before You Start
A smooth install starts with the right tools and parts. Set everything out before you touch a bolt.
You will need:
- Nitrile gloves and paper towels for clean work
- Socket or wrench set, usually 1/2-inch for flange nuts
- Flat scraper or putty knife for old seal cleanup
- New RV toilet seal or foam gasket made for your model
- New closet bolts, nuts, and caps
- PEX wrench or adjustable wrench for the water line
- Teflon tape for NPT threads if you have them
- Non-hardening plumber’s grease or silicone-safe lube for the bowl seal
- Disinfectant spray and trash bags
Pick the toilet first. Gravity flush is the most common. Macerator and cassette units need different steps. If your plan is how to install rv toilet in a weekend, check bolt spacing and water inlet side on day one.

Know Your RV Toilet System
Most RVs use a gravity toilet mounted over a black tank. The toilet bolts to a floor flange with two closet bolts. A foam or rubber seal sits between the base and the flange. The water line is often 1/2-inch PEX with a swivel nut at the toilet inlet.
There are also macerator, cassette, composting, and vacuum systems. These vary by plumbing, venting, and power needs. Read your manual before you start. This context makes how to install rv toilet much easier and safer.
Check these points first:
- Bolt spacing and flange height above the floor
- Water inlet type and location on the new toilet
- The tank vent status and any odors at the flange
- Floor level around the flange to prevent rocking
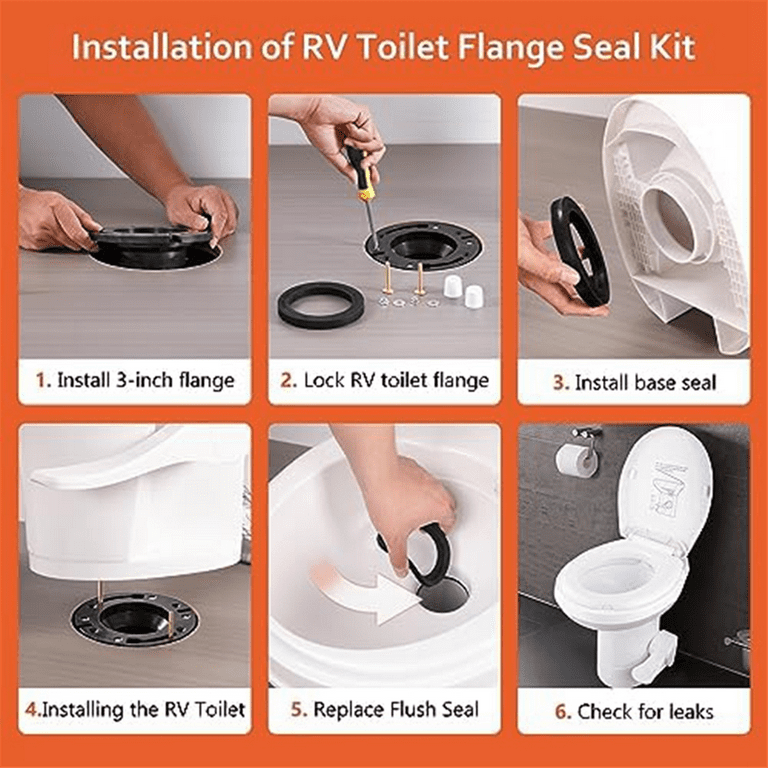
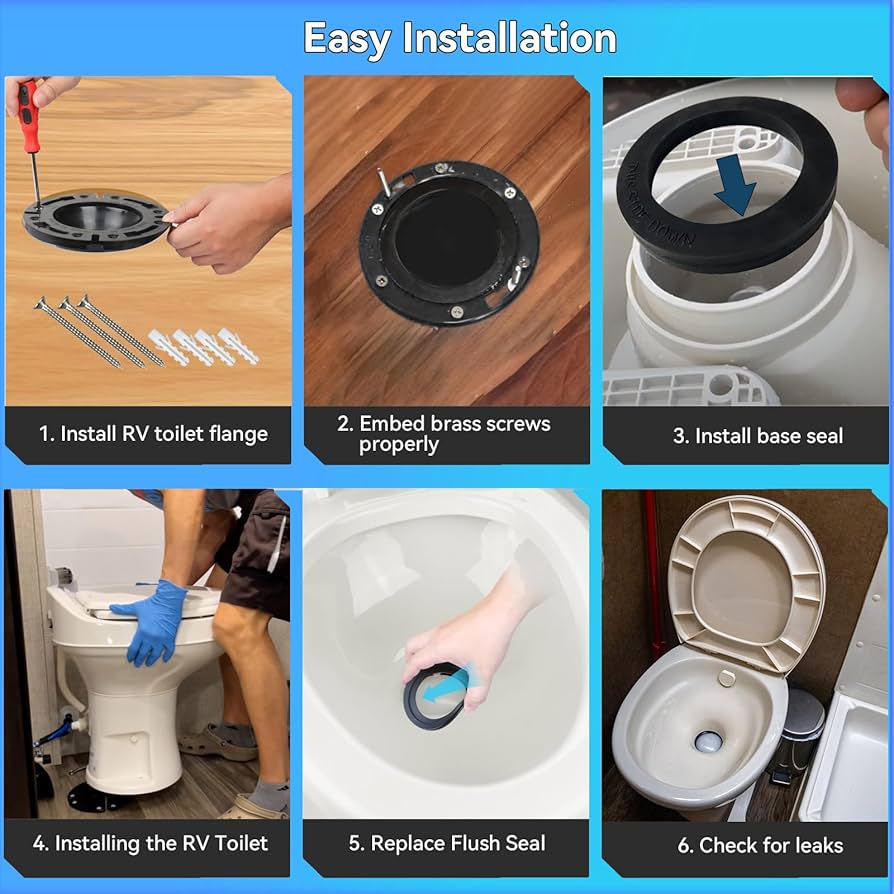
Step-by-Step: How to Install Your RV Toilet
Follow these steps in order. Take your time. Small steps prevent big leaks.
- Shut down water
- Turn off the city water and the pump.
- Open a sink faucet to release pressure.
- Remove the old toilet
- Hold the flush or pedal to drain the bowl.
- Pop the bolt caps. Remove the two nuts.
- Disconnect the water line at the inlet.
- Lift the toilet straight up. Set it on a trash bag.
- Prep the flange
- Scrape off the old seal and residue.
- Clean the flange and floor area.
- Drop in new closet bolts so threads face up.
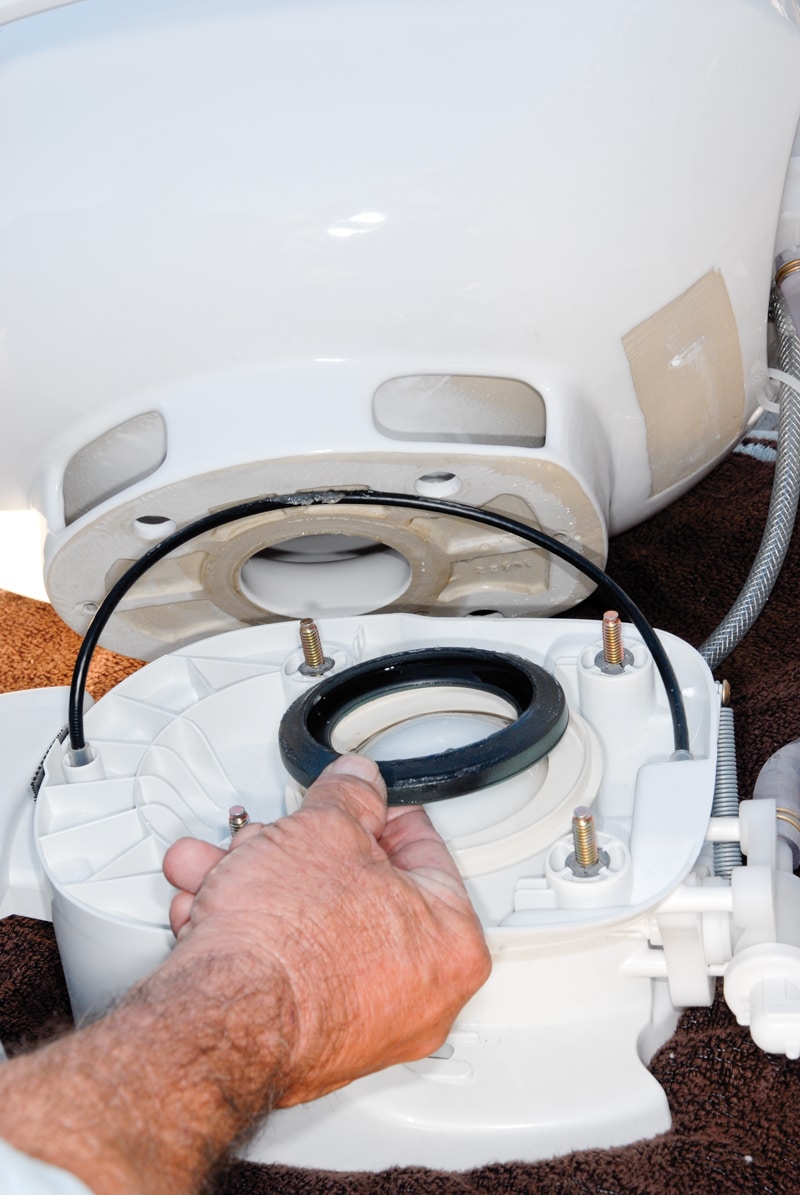
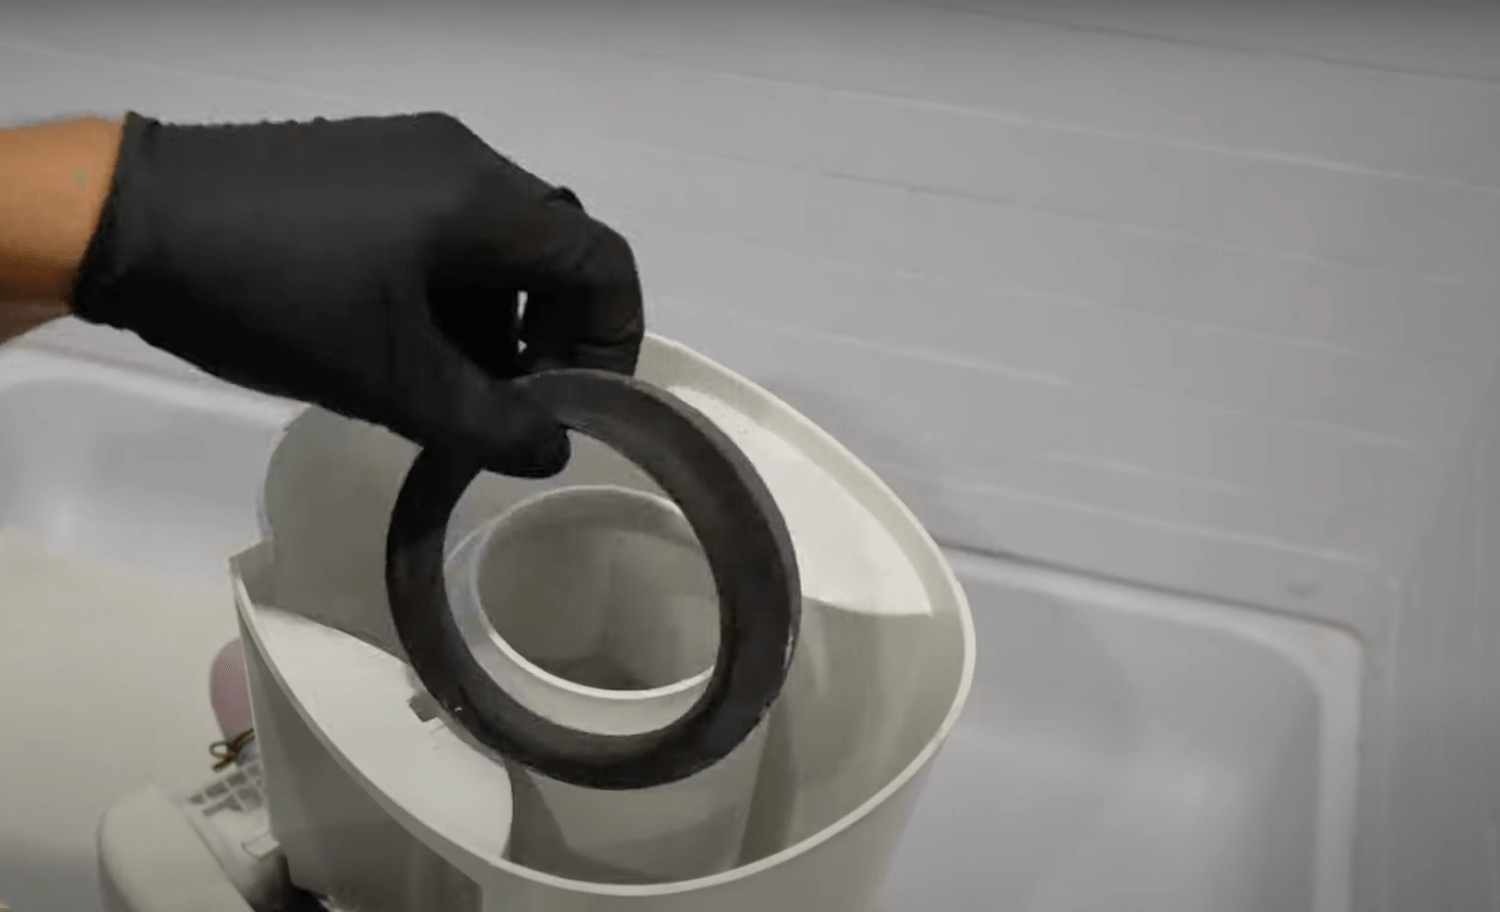
- Set the new seal
- Place the new foam or rubber seal on the flange.
- Make sure the seal sits flat and centered.
- Place the new toilet
- Lift and aim the bowl over the bolts.
- Lower it straight down. Do not slide once it touches the seal.
- Rock gently to seat the seal.
- Tighten the nuts
- Add washers and nuts. Snug them by hand.
- Tighten a few turns per side. Alternate sides.
- Stop when the base is stable. Do not crack the base.
- Reconnect water
- Attach the water line. Use Teflon tape only on male NPT threads. Do not tape compression or flare fittings.
- Hand-tight, then a small wrench turn.
- Test and check
- Turn on the pump or city water.
- Flush several times. Look for drips at the inlet and base.
- If the bowl does not hold water, lube the seal and repeat.
- Finish
- Install bolt caps.
- Add water and a tank treatment to the black tank.
This simple flow is the heart of how to install rv toilet with no leaks and no smells.

Seal and Alignment Tips From the Field
A solid seal is everything. If the base rocks, the seal will fail. It can also let odor in. Do not overtighten to fix rocking. Shim the base if the floor is not level.
Pro tips that save headaches:
- Use a new seal every time. Do not reuse seals.
- Dry-fit the toilet to check bolt alignment before dropping on the seal.
- If the toilet sits high, confirm the flange height. Use the seal the maker recommends.
- If your nuts rusted before, upgrade to stainless hardware.
These small moves are my favorite ways to master how to install rv toilet without call-backs.
Leak Testing, Sanitizing, and Odor Control
Run a wet test before you clean up tools. Place a dry paper towel under the inlet and base. Flush and look for spots. Even a small drip will grow on the road.
Sanitize the area with a disinfectant. Wipe tools and gloves. Add at least a gallon of water to the black tank with a tank treatment. Keep the tank vent clear. Odor still strong? Check the seal seating and the vacuum breaker height on models that use one.
A clean start here closes the loop on how to install rv toilet the right way.

Common Problems After Install and Quick Fixes
Rocking toilet
- Cause: Uneven floor or loose bolts.
- Fix: Add plastic shims at the base. Re-snug the nuts.
Bowl will not hold water
- Cause: Dry or nicked flush seal.
- Fix: Lube with silicone-safe lube. Replace the seal if worn.
Water trickles into bowl
- Cause: Debris in the valve.
- Fix: Cycle the pedal. Flush with clean water. Replace the valve if needed.
Weak flush or clogs
- Cause: Low water or vent issue.
- Fix: Start flush with more water in the bowl. Check vent line for block.
Sewer smell
- Cause: Bad base seal or dry tank.
- Fix: Reseat the toilet. Keep water and treatment in the tank.
Keep this checklist handy if you want a fast answer to how to install rv toilet and keep it working.
Cost, Time, and Skill Check
Most gravity toilets cost about $150 to $400. Macerators can run $600 or more. A seal kit is often under $20. You may also want new bolts and caps.
Plan for 45 to 90 minutes the first time. Two people make lifting easier in small baths. The skill level is beginner to intermediate. If you are not sure how to install rv toilet in your model, call an RV tech and ask about the flange and inlet type.
Safety and Sanitation Best Practices
Wear gloves and eye protection. Black tank fluids can carry germs. Keep pets and kids out of the area. Vent the space if odors are strong.
Do not use wax rings made for houses unless your maker allows it. Most RVs use foam or rubber seals. Tighten bolts in small steps to avoid cracks. If you use a power driver, finish by hand. A calm pace is the safest way to handle how to install rv toilet in tight spaces.
Maintenance Habits To Make Your Install Last
Keep the bowl seal wet. A dry seal leaks air and water. Use a silicone-safe lube a few times a season. Avoid harsh cleaners that can damage rubber parts.
Flush with extra water after solids. Do a tank rinse often. Winterize by pumping RV antifreeze through the toilet and lines per your manual. These habits matter more than any trick you read about how to install rv toilet.
Frequently Asked Questions of how to install rv toilet
What seal should I use for an RV toilet?
Use the seal the maker recommends for your model, usually a foam or rubber ring. House wax rings are not ideal for RV movement and heat cycles.
Can I reuse the old closet bolts and nuts?
You can, but it is not best practice. New stainless or plated hardware prevents future rust and makes the next service easier.
Do I need Teflon tape on the water line?
Use Teflon tape only on male NPT threads. Do not tape compression or flare fittings, as they seal by design.
How tight should I make the flange nuts?
Snug until the toilet is firm and does not rock. Tighten in small, even steps to avoid cracking the base.
Why does my RV still smell after installing a new toilet?
Odor often comes from a bad base seal, a dry black tank, or a blocked vent. Reseat the seal, add water and treatment, and check the vent for blockages.
Conclusion
You now know how to install rv toilet from start to finish. With the right seal, steady tightening, and careful testing, the job is quick, clean, and reliable. Small details like shims and proper lube make a big difference on the road.
Set aside an hour, gather your tools, and go step by step. You will save money, learn your rig, and gain real confidence. Want more guides like this? Subscribe for updates, ask a question in the comments, or share your own install tips.

Table of Contents