Tighten the nut, adjust the chain, or replace the lever assembly.
If your toilet won’t flush or the handle feels loose or stuck, you can fix it fast. In this guide, I’ll show you how to repair toilet handle problems the right way. You’ll learn how the handle works, what to check first, and when to replace parts. I’ve fixed dozens of levers in homes and rentals, and I’ll share the exact steps, tips, and mistakes to avoid so you get a smooth flush every time.

What you’ll need to repair a toilet handle
You don’t need many tools to start. Most jobs take under 20 minutes. Here is my basic kit.
- Adjustable wrench or small socket wrench for the locknut
- Needle-nose pliers for the chain clip
- Screwdriver if your trim has set screws
- Plumber’s grease or silicone grease for the pivot
- White vinegar and a rag for mineral buildup
- Replacement handle kit if the old one is cracked
- Flashlight and a towel to protect the tank lid
A universal handle fits most front-mount tanks. Side-mount and angle-mount need the right bend. Read the package to match your toilet. If you want to know how to repair toilet handle issues for good, choose metal parts that resist corrosion.

How a toilet handle works in plain terms
The handle connects to a lever inside the tank. That lever lifts a chain. The chain lifts the flapper. The flapper lets water rush into the bowl. Then it falls back to seal the tank.
Most failures come from three simple things. The chain is too tight or too loose. The locknut is loose or cross-threaded. The pivot or bushing is corroded or gummy. Knowing this layout makes how to repair toilet handle fixes much easier.

Step-by-step: how to repair toilet handle
- Remove the tank lid and set it on a towel. Look inside. Check the lever, chain, and flapper.
- Test the handle. Does it move freely? Watch the chain as you press the handle.
- Adjust the chain. You want about one or two links of slack. Clip it to a different link if needed.
- Check the locknut on the handle. Many nuts are reverse-threaded. Turn clockwise to loosen, counterclockwise to tighten. If yours is standard, it will loosen counterclockwise. Turn gently.
- Center the handle so it moves cleanly. Tighten the nut by hand, then snug it a quarter turn with the wrench. Do not over-tighten. You can crack the tank.
- Inspect the pivot where the lever passes through the porcelain. Clean any mineral crust with a bit of vinegar. Wipe dry.
- Add a tiny dab of plumber’s grease to the pivot if it feels rough. Do not use oil that can harm rubber.
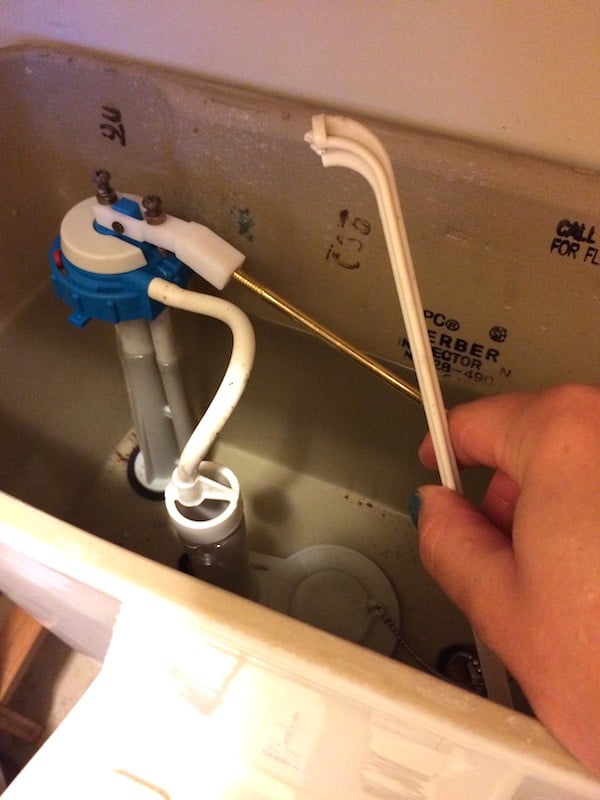
- Make sure the metal rod does not rub the tank wall. Slightly bend the rod so it clears the side and lifts the chain straight up.
- Test flush 5 to 10 times. Make sure the flapper drops fast and seals. Adjust chain slack if the flapper hangs open or closes too fast.
- Replace the handle if it is cracked, wobbly, or corroded. Remove the nut, pull out the old handle, slide in the new one, and attach the chain as before.
- Wipe the area dry and set the lid back on. You’ve done how to repair toilet handle the safe way.
A note from the field. I’ve seen many tanks with the chain pulled so tight the flapper never rests. That wastes water all day. A small bit of slack fixes it in seconds. This is the easiest win in how to repair toilet handle work.

Common problems and fixes
Loose, wobbly handle
- Snug the locknut from inside the tank. Do not over-tighten.
- If the bushing is worn, replace the handle kit.
- Add a touch of silicone grease to the pivot.
Handle sticks down or won’t return
- Chain is too tight or is snagging on the flapper. Add slack and re-route.
- Bend the lever so it clears the tank wall.
- Clean mineral buildup at the pivot with vinegar.
Handle spins but nothing happens
- Chain is off or the clip broke. Reattach the chain to the lever hole.
- If the lever arm snapped, replace the handle assembly.
- This is a classic case for how to repair toilet handle fast.
Hard to press handle
- Water level may be too high, pressing on the flapper. Set the float to the fill mark.
- The lever may be hitting the lid or tank. Reposition or bend the rod slightly.
- Lube the pivot with plumber’s grease.
Ghost flush or flapper won’t seal
- Chain is too tight and holds the flapper up. Add slack.
- Replace an old or warped flapper. A new flapper often ends “phantom flush” issues.
- This step is often part of how to repair toilet handle and fix running water too.
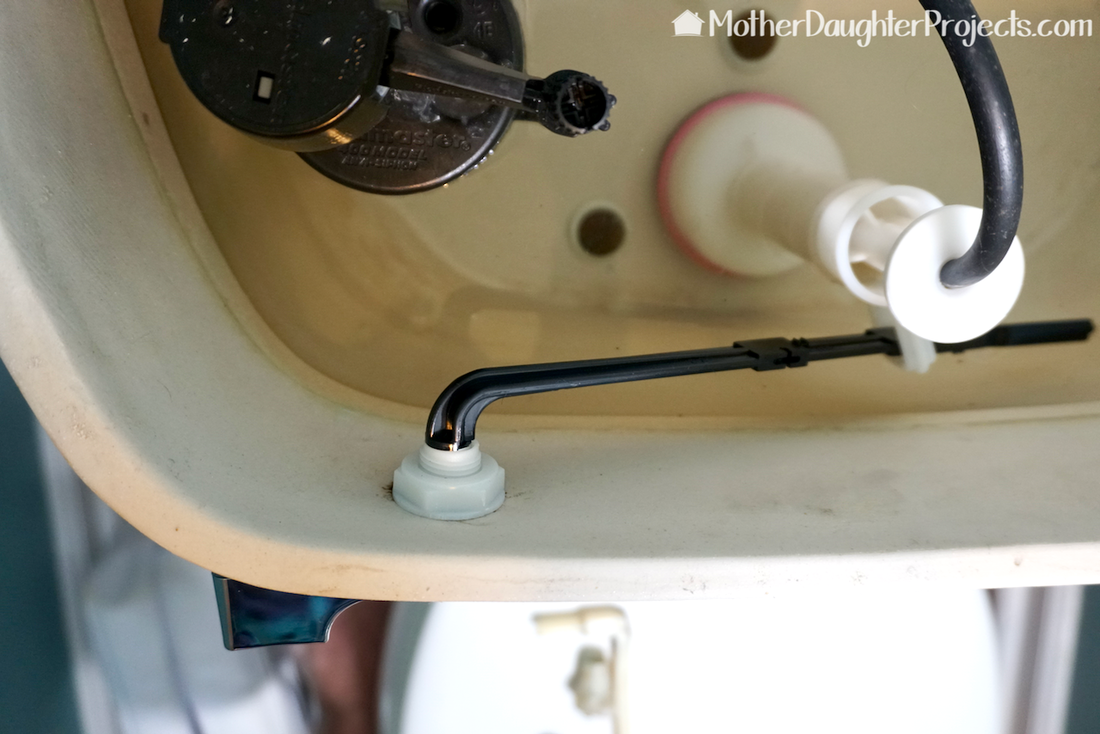
If your toilet has a side-mount lever, the rod needs a different angle. Make sure the rod points toward the flapper without rubbing the side. For dual-flush units, handles work with special parts. Follow the brand’s guide for how to repair toilet handle on dual systems.

Replacement: choosing the right toilet handle
Pick a handle that matches your tank location. Most are front-mount. Check if yours is side or angle-mount. The lever length and bend matter. Universal kits include extra holes for the chain and a bendable rod.
Material choice matters. Metal levers with brass or stainless parts last longer. Plastic looks fine but can flex and break. Choose a finish that matches your faucet and hardware.
A quick thread note. Many locknuts are reverse-threaded to resist loosening during use. That means you loosen clockwise. Some brands use standard threads. Turn gently both ways to test. If you force it, you can crack the tank. For long life and fewer headaches with how to repair toilet handle tasks, buy a quality kit. Expect $8 to $25 for most homes.

Pro tips, mistakes to avoid, and safety
I learned a few rules after many service calls. They save time and parts.
- Never crank down on the locknut. Tanks are porcelain and can crack with little force.
- Do not set the chain so tight the flapper hovers. You will waste water and wear parts.
- Avoid oil sprays that can swell rubber. Use silicone or plumber’s grease.
- Keep the rod clear of the refill tube. Rubbing causes sticky handles.
- Bleach tank tablets can corrode metal parts. They also age rubber fast.
If you manage rentals, keep a small kit on hand. One new handle, a spare flapper, and a clip solve most calls. This small habit turns how to repair toilet handle into a five-minute fix.
Maintenance and longevity
Check the handle action each season. Press and watch the chain. Look for rubbing or slack. Clean the pivot and lever with a quick wipe.
Keep harsh cleaners out of the tank. They attack rubber and metal. Use a cup of vinegar now and then to fight mineral scale. Replace the flapper every few years. This supports smooth handle action and seals.
When you teach family or tenants how to repair toilet handle steps, include chain slack and gentle nut tightening. Small habits prevent big leaks.

Time and cost estimates
Most handle fixes take 10 to 20 minutes. A chain tweak takes two minutes. A full handle swap takes about ten. No special skills needed.
A new handle costs $8 to $25. A pro visit can cost much more. If the tank is cracked or the valve is failing, call a plumber. For normal cases, how to repair toilet handle is ideal for DIY.
Frequently Asked Questions of how to repair toilet handle
How do I know if I should replace or just adjust the handle?
If the lever moves and lifts the chain with control, adjust it. If the handle is cracked, corroded, or the lever arm snapped, replace the assembly.
Why does my handle get stuck after every flush?
The rod likely rubs the tank or the chain is too tight. Bend the rod slightly for clearance and leave one or two links of slack.
Are toilet handle nuts always reverse-threaded?
Many are, but not all. Try gentle turns both ways to test before applying force.
Can I use WD-40 on my toilet handle?
Skip it. Use silicone-based plumber’s grease instead, which is safe for rubber and long-lasting.
What if my toilet handle is on the side, not the front?
Buy a side-mount or angle-mount handle with the right lever bend. The how to repair toilet handle steps are the same, but the rod angle matters more.
Why does my toilet keep running after I fixed the handle?
The flapper may be old or the chain is still too tight. Replace the flapper and leave a little slack so it seals every time.
Will a universal handle fit my brand of toilet?
Usually yes for front-mount tanks. For some side-mount or specialty models, choose a brand-specific kit.
Conclusion
You can fix most handle issues with light tools, gentle turns, and a smart chain setup. Adjust the chain, snug the nut, clean the pivot, and replace a worn lever when needed. With these steps, how to repair toilet handle becomes a quick win that saves water and money.
Give it a try today and see the difference in minutes. If you found this guide useful, share it, subscribe for more simple fixes, or leave a question so I can help with your next repair.

Table of Contents